10 Creative moon photography tips (beyond the classic zoom shot)
Close-up shots of the moon can be breathtaking.
When done well, those crisp crater details feel like holding a telescope through your camera, and they will always have their place.
But the first time I realised moon photography could be more than sharp detail wasn’t even on a photography mission.
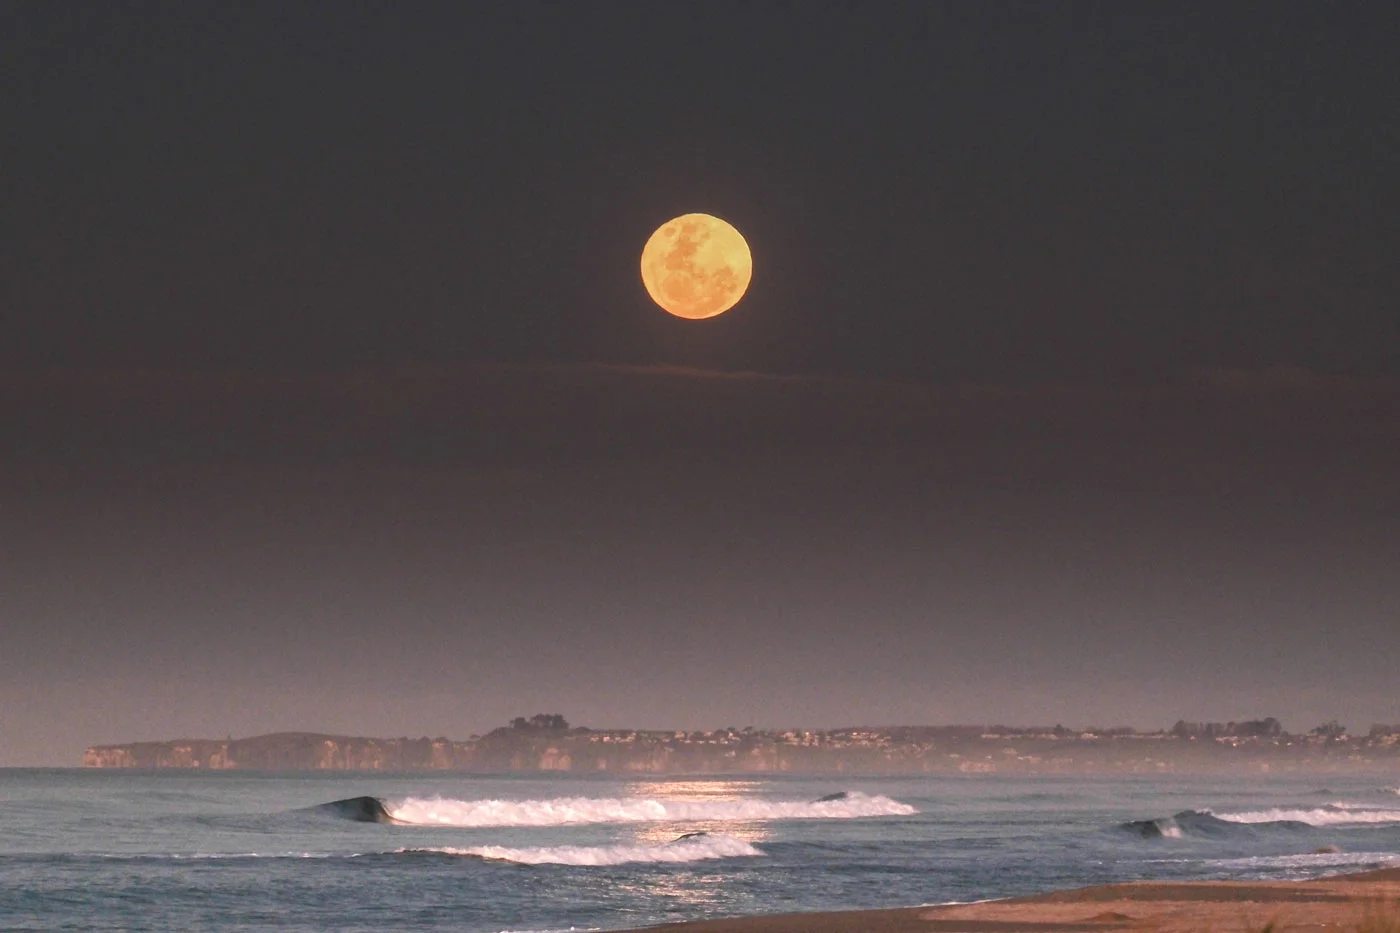
I was standing at my local surf break at sunrise, wetsuit half on, board waxed. As I turned around, behind me I caught the moon setting against a pink sky in the west, framed by a palm tree and a perfectly placed cloud.
It felt magical, less about the moon itself and more about the scene it created.
That moment showed me something: the real power of moon photography lies in context, timing and play. In this guide, I’ll share 10 creative moon photography tips that go beyond the obvious close-up, so your shots don’t just look impressive, they tell a story.
In this blog post:
Tip 1: Use clouds and colour to frame the moon formations
Tip 2: Embrace blue and golden hour
Tip 3: Capture the setting moon
Tip 4: Align a subject with the moon
Tip 6: Experiment with intentional camera movement
Tip 7: Create double exposures
Tip 8: Try long exposures of the moon
Tip 1: Use clouds and colour to frame the moon
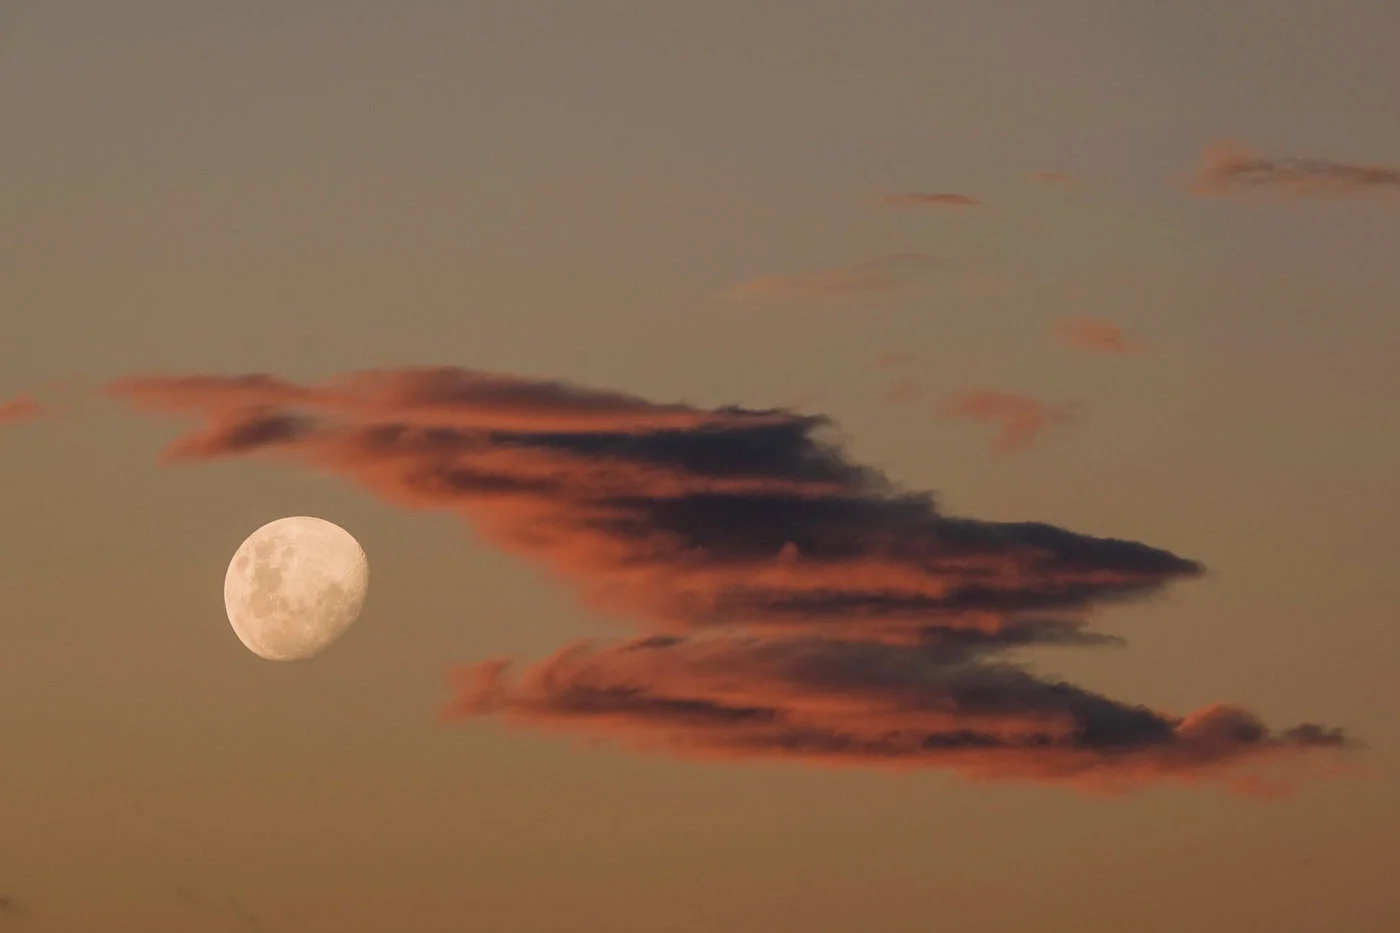
Adding atmosphere is one of the simplest yet most powerful moon photography composition ideas. Wisps of cloud crossing the moon create mystery, while candyfloss pink skies at dusk turn the moon into part of a dreamy pastel canvas.
One evening, the day before a full moon, I was driving home from a test shoot near Mount Maunganui. Suddenly, the sky transformed with glowing pink clouds. I made my partner pull over so I could set up my gear. Those clouds added depth, colour and framing around the moon, transforming what could have been an ordinary shot into something magical.
Tip: Always scan the whole sky. Some of the best creative moon photography ideas appear in fleeting, unexpected moments.
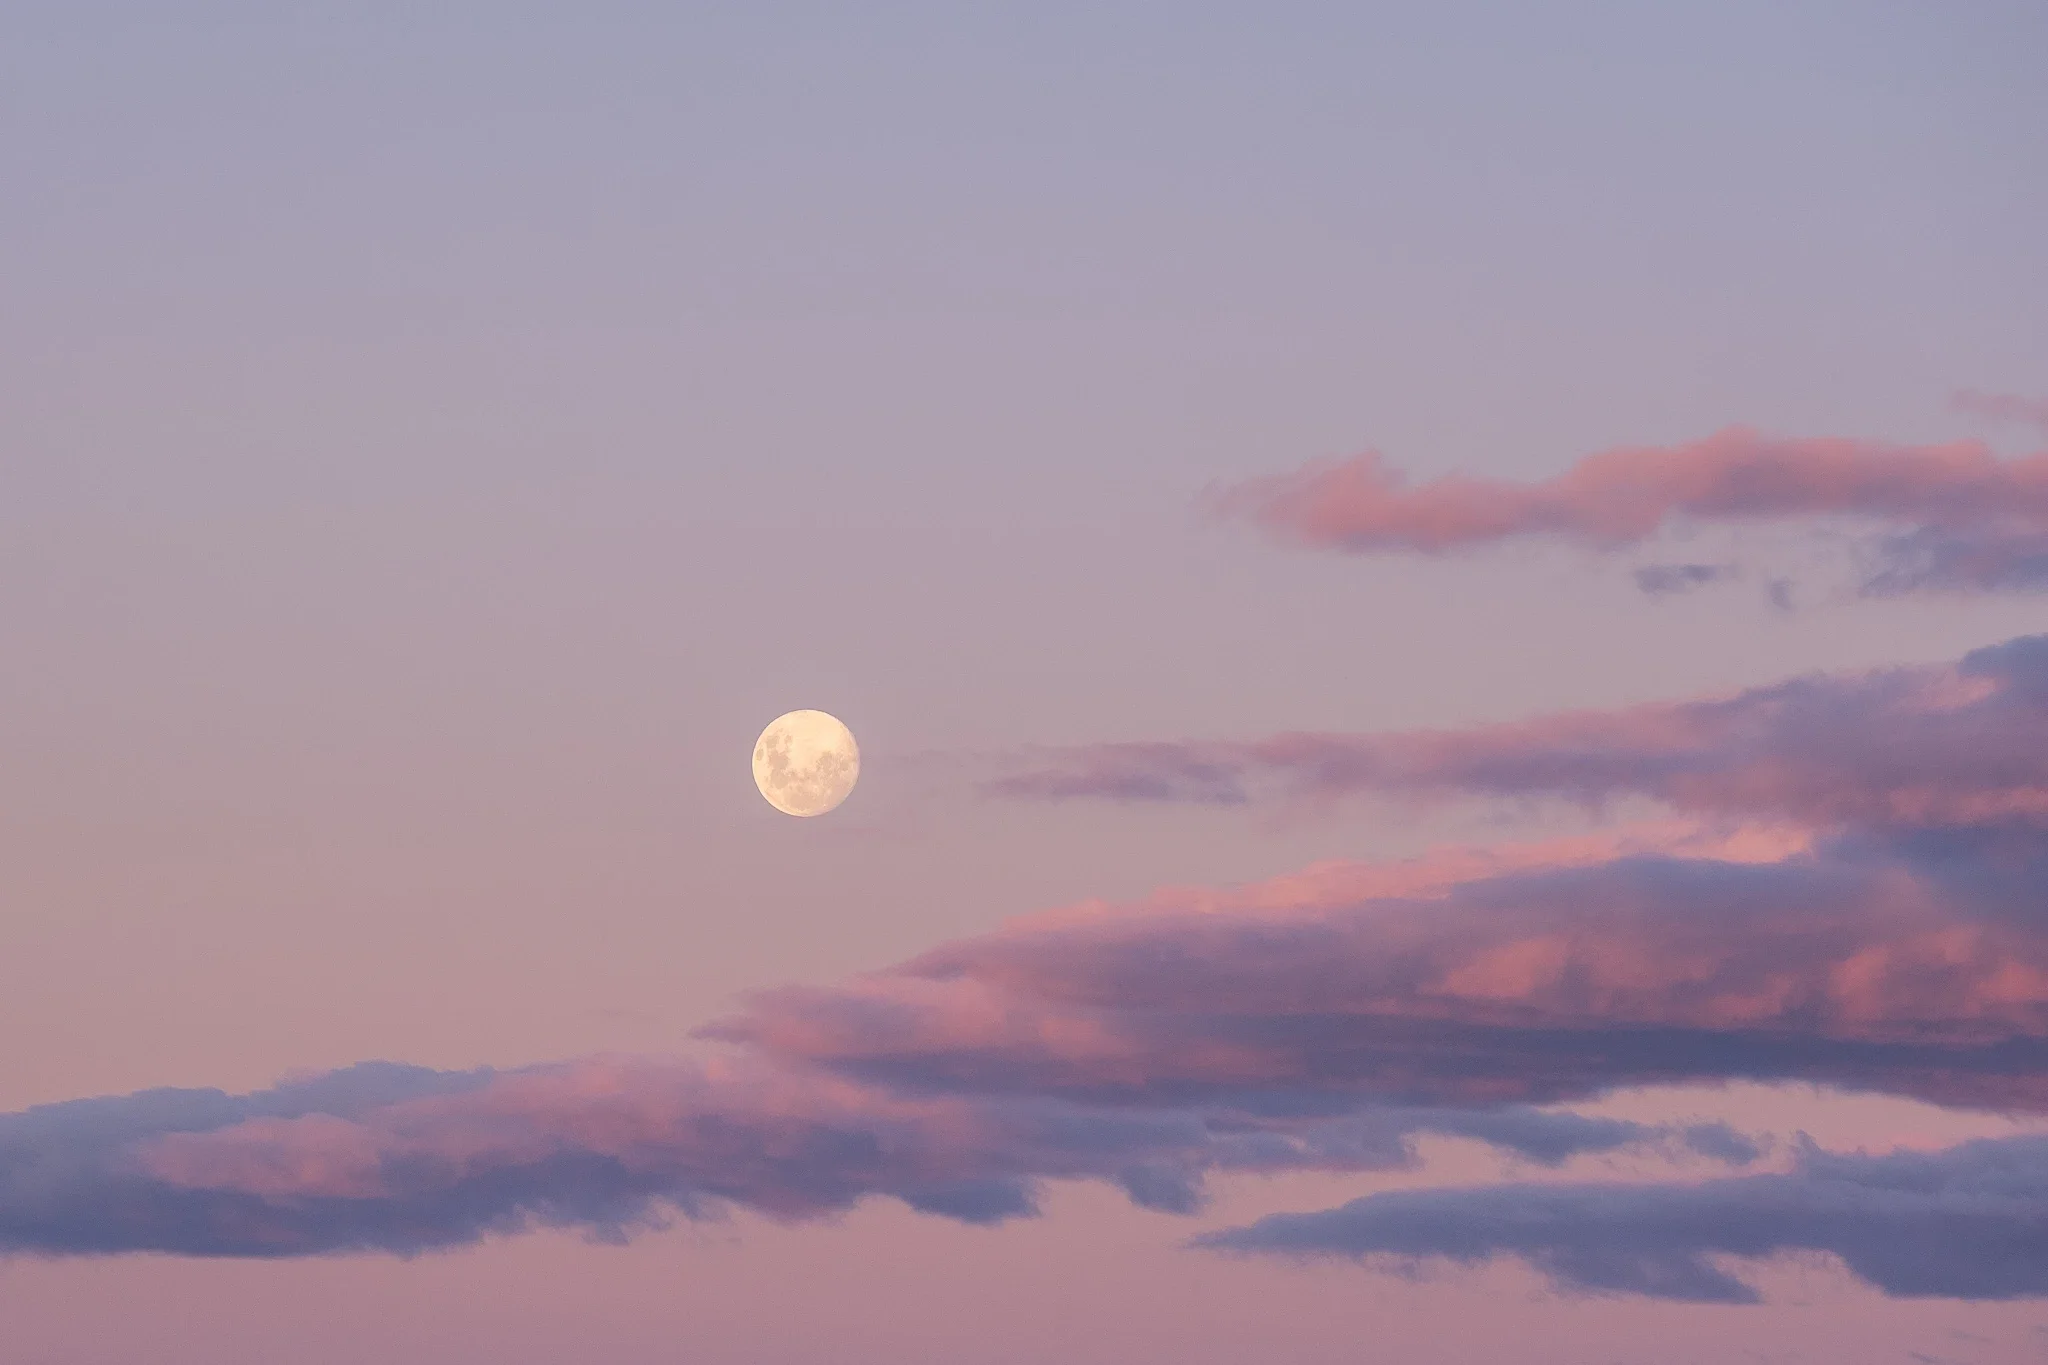
Fujifilm X-T3 | 100mm | 1/125 | f/5.6 | ISO 80
Tip 2: Embrace blue hour and golden hour
If you’re wondering how to photograph the moon in a way that feels atmospheric, twilight is the answer. During blue hour, the moon’s brightness isn’t as overpowering, and your camera can balance both sky and landscape. Golden hour adds warmth and contrast, perfect for dramatic moon photography composition ideas with ridgelines, silhouettes or reflections.
One of my favourites was at Aoraki/Mount Cook National Park. We had hiked to Sealy Tarns at sunset (I was 15 weeks pregnant, with cheeky keas circling us). Just as the last light hit the snow capped peaks, I noticed a crescent moon setting behind the ridge. The scene was striking: silhouetted mountains, whites catching the last glow, and dreamy blue skies.
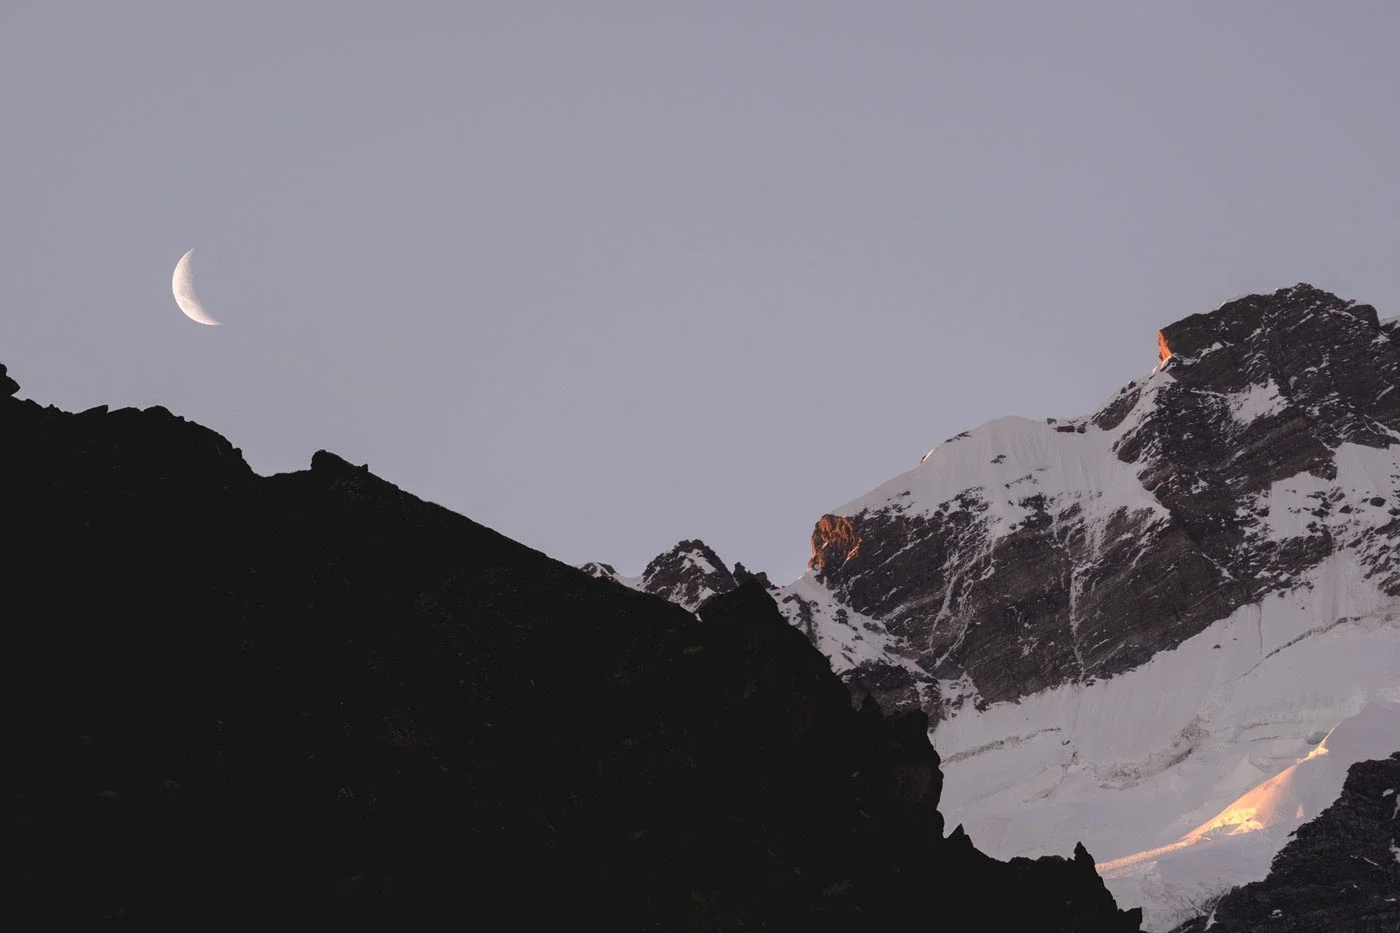
Fujifilm X-T3 | 100mm | 1/60 | f/8 | ISO 160
Tip 3: Capture the setting moon
Moonrise gets all the hype, but moonset has its own quiet magic. As the sun rises opposite, the moon often shifts from silver to warm gold, surrounded by deep twilight. For anyone exploring creative moon photography ideas, moonset is a must-try.
One autumn evening, I watched a crescent moon sink into the horizon. Against a deep blue sky, it glowed golden, suspended like a lantern. The dusk seemed to last forever, creating an image that felt calm, poetic and timeless.
Tip: Stay out for moonset. It’s one of the best-kept moon photography tips for capturing softer tones and slower moods.
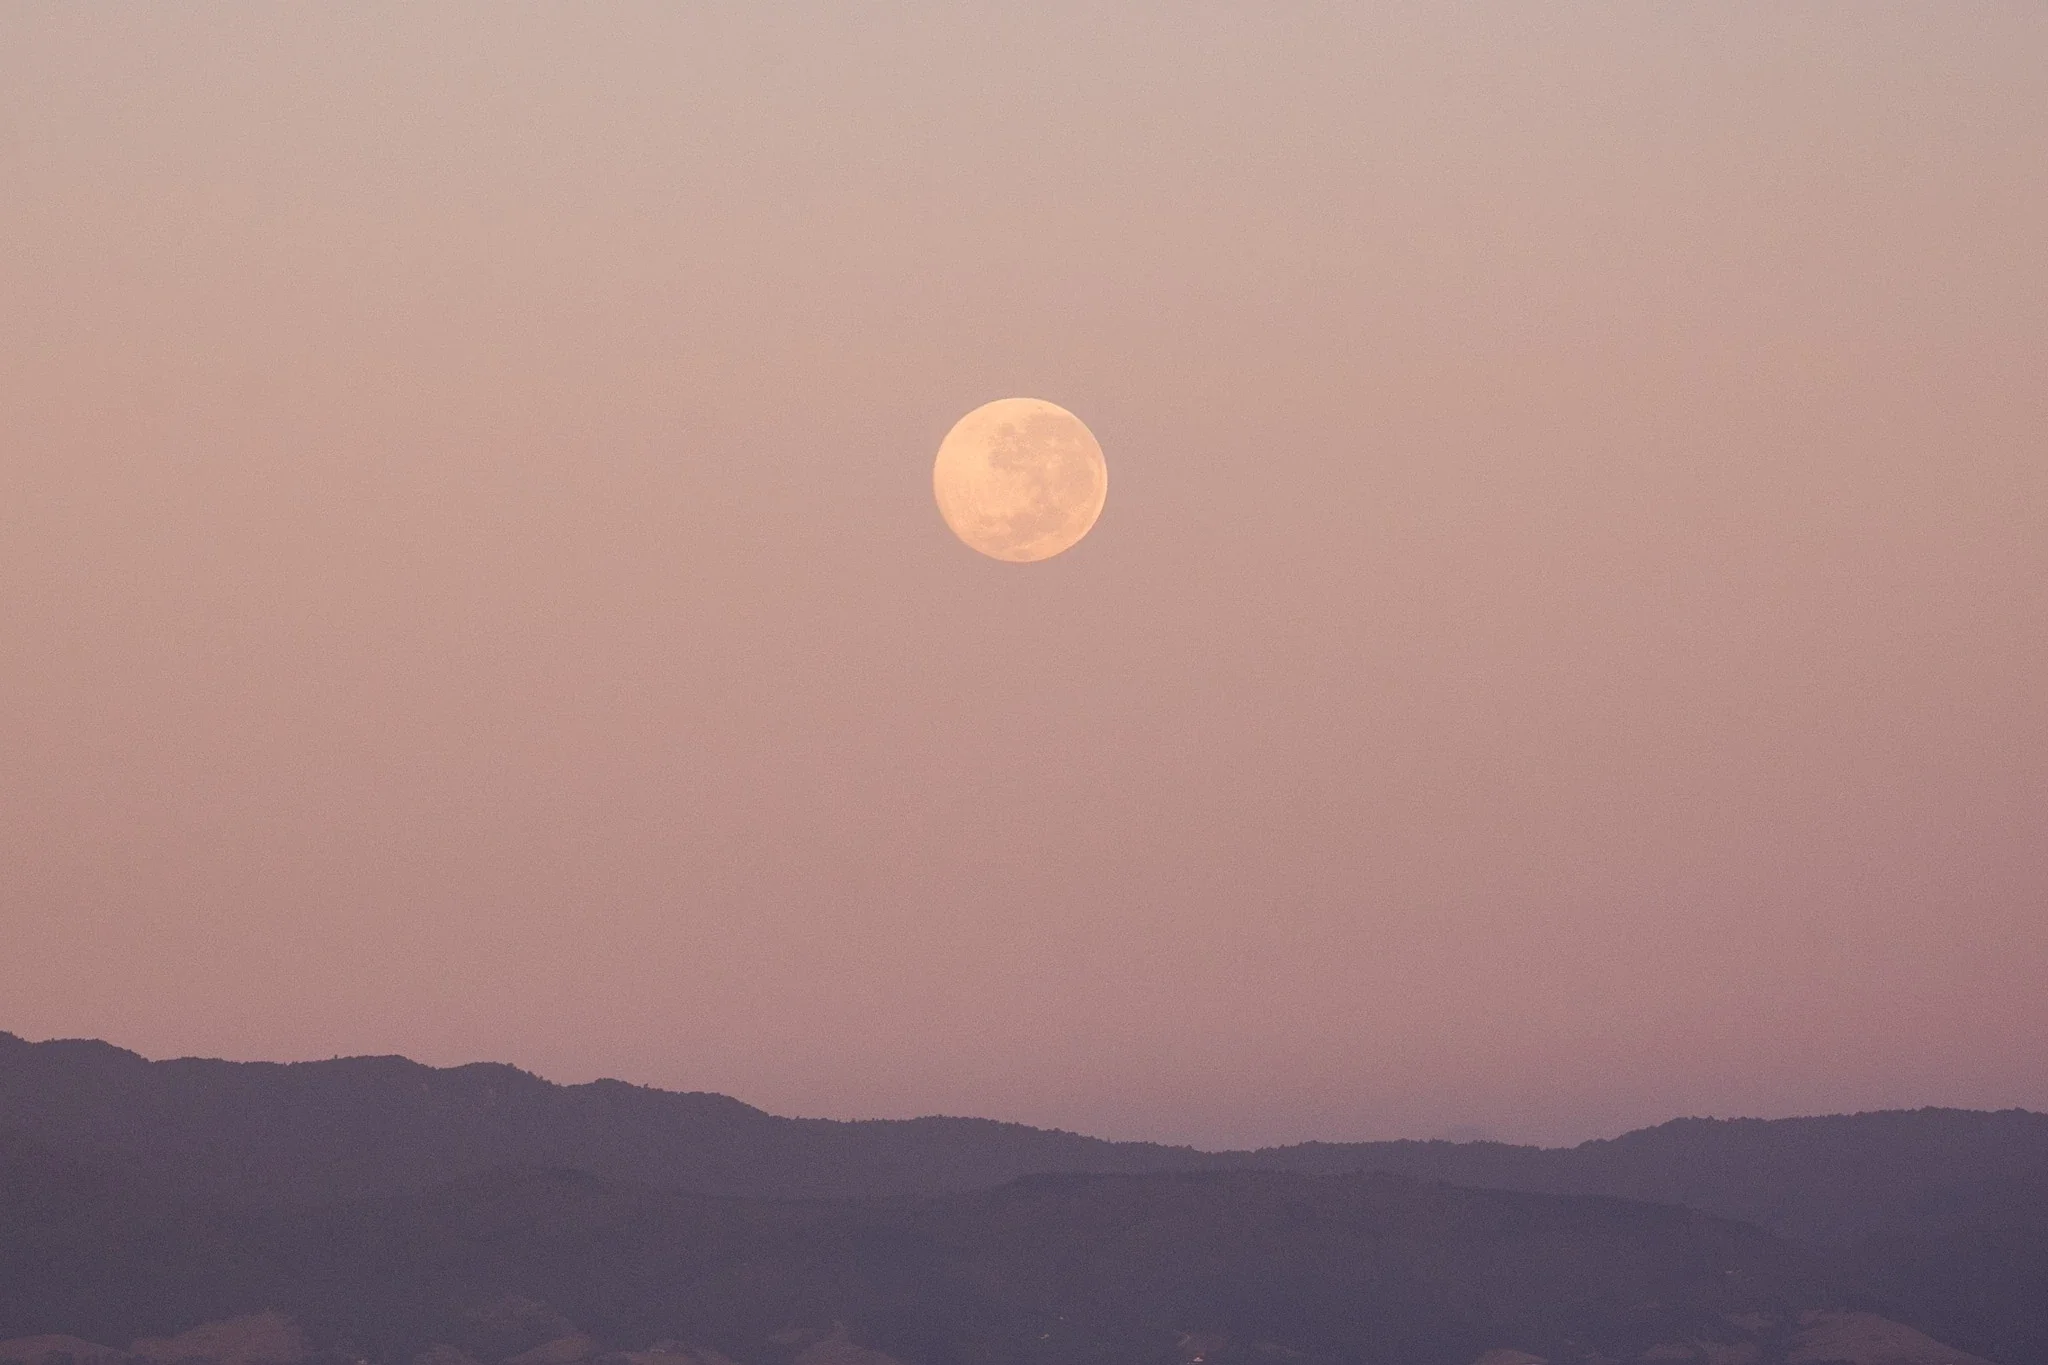
Fujifilm X-T3 | 386mm | 1/125 | f/11 | ISO 400
Tip 4: Align a subject with the moon
Including a subject is one of the boldest moon photography composition ideas. A surfer, a lighthouse or a tree in front of the moon creates drama and scale. It’s also one of the trickiest techniques, you often only have minutes to line it up and it can take days or weeks to plan.
One summer, I envisioned photographing a friend surfing against a supermoon. In reality, with me on land and her in the water, it was impossible to direct her into place. A few months later, I reworked the idea on land with another friend holding her surfboard. This time, I could guide her perfectly, and the result captured the surf vibe I wanted.
Tip: Use planning apps like the Photopills app to align your subject, but remember flexibility is just as important. Some of the best creative moon photography ideas come from adapting your vision. Try following the advice on this blog.
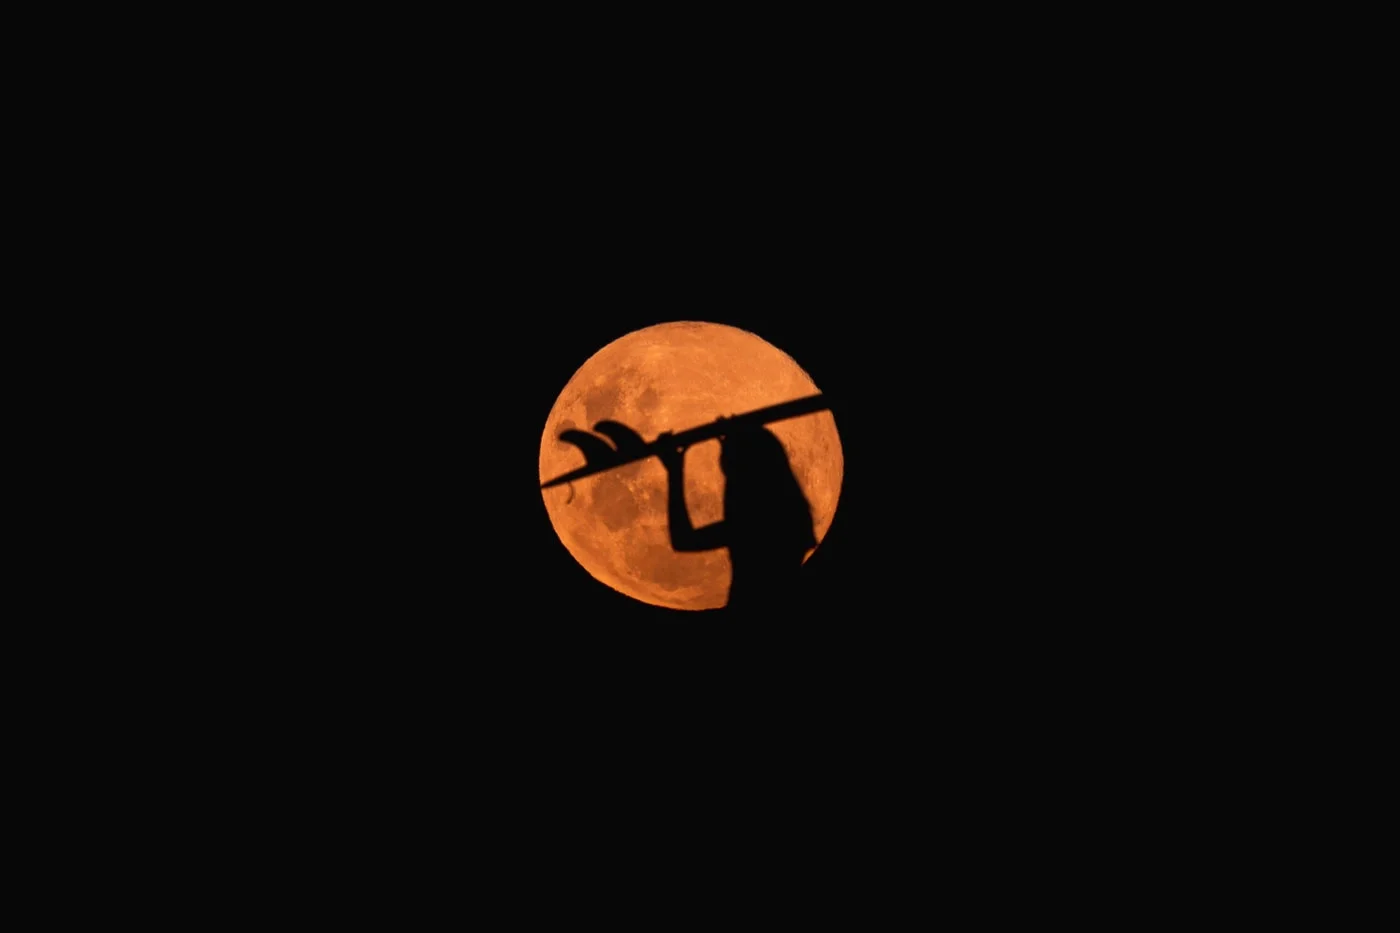
Fujifilm X-T3 | 400mm | 1/30 | f/16 | ISO 250
Tip 5: Play with foregrounds
Foregrounds are essential in moon photography composition ideas because they create depth and context. A branch can frame the moon delicately, while palm trees or rooftops give the photo a sense of place.
One evening, I discovered this in my own driveway. At the far end stood a group of palm trees. By zooming in and framing the moon through their leaves, the photo took on a mystical, tropical vibe. Suddenly the moon wasn’t just floating in the sky—it belonged to the scene.
Tip: Everyday settings, from driveways to backyards, can spark some of your most creative moon photography ideas.
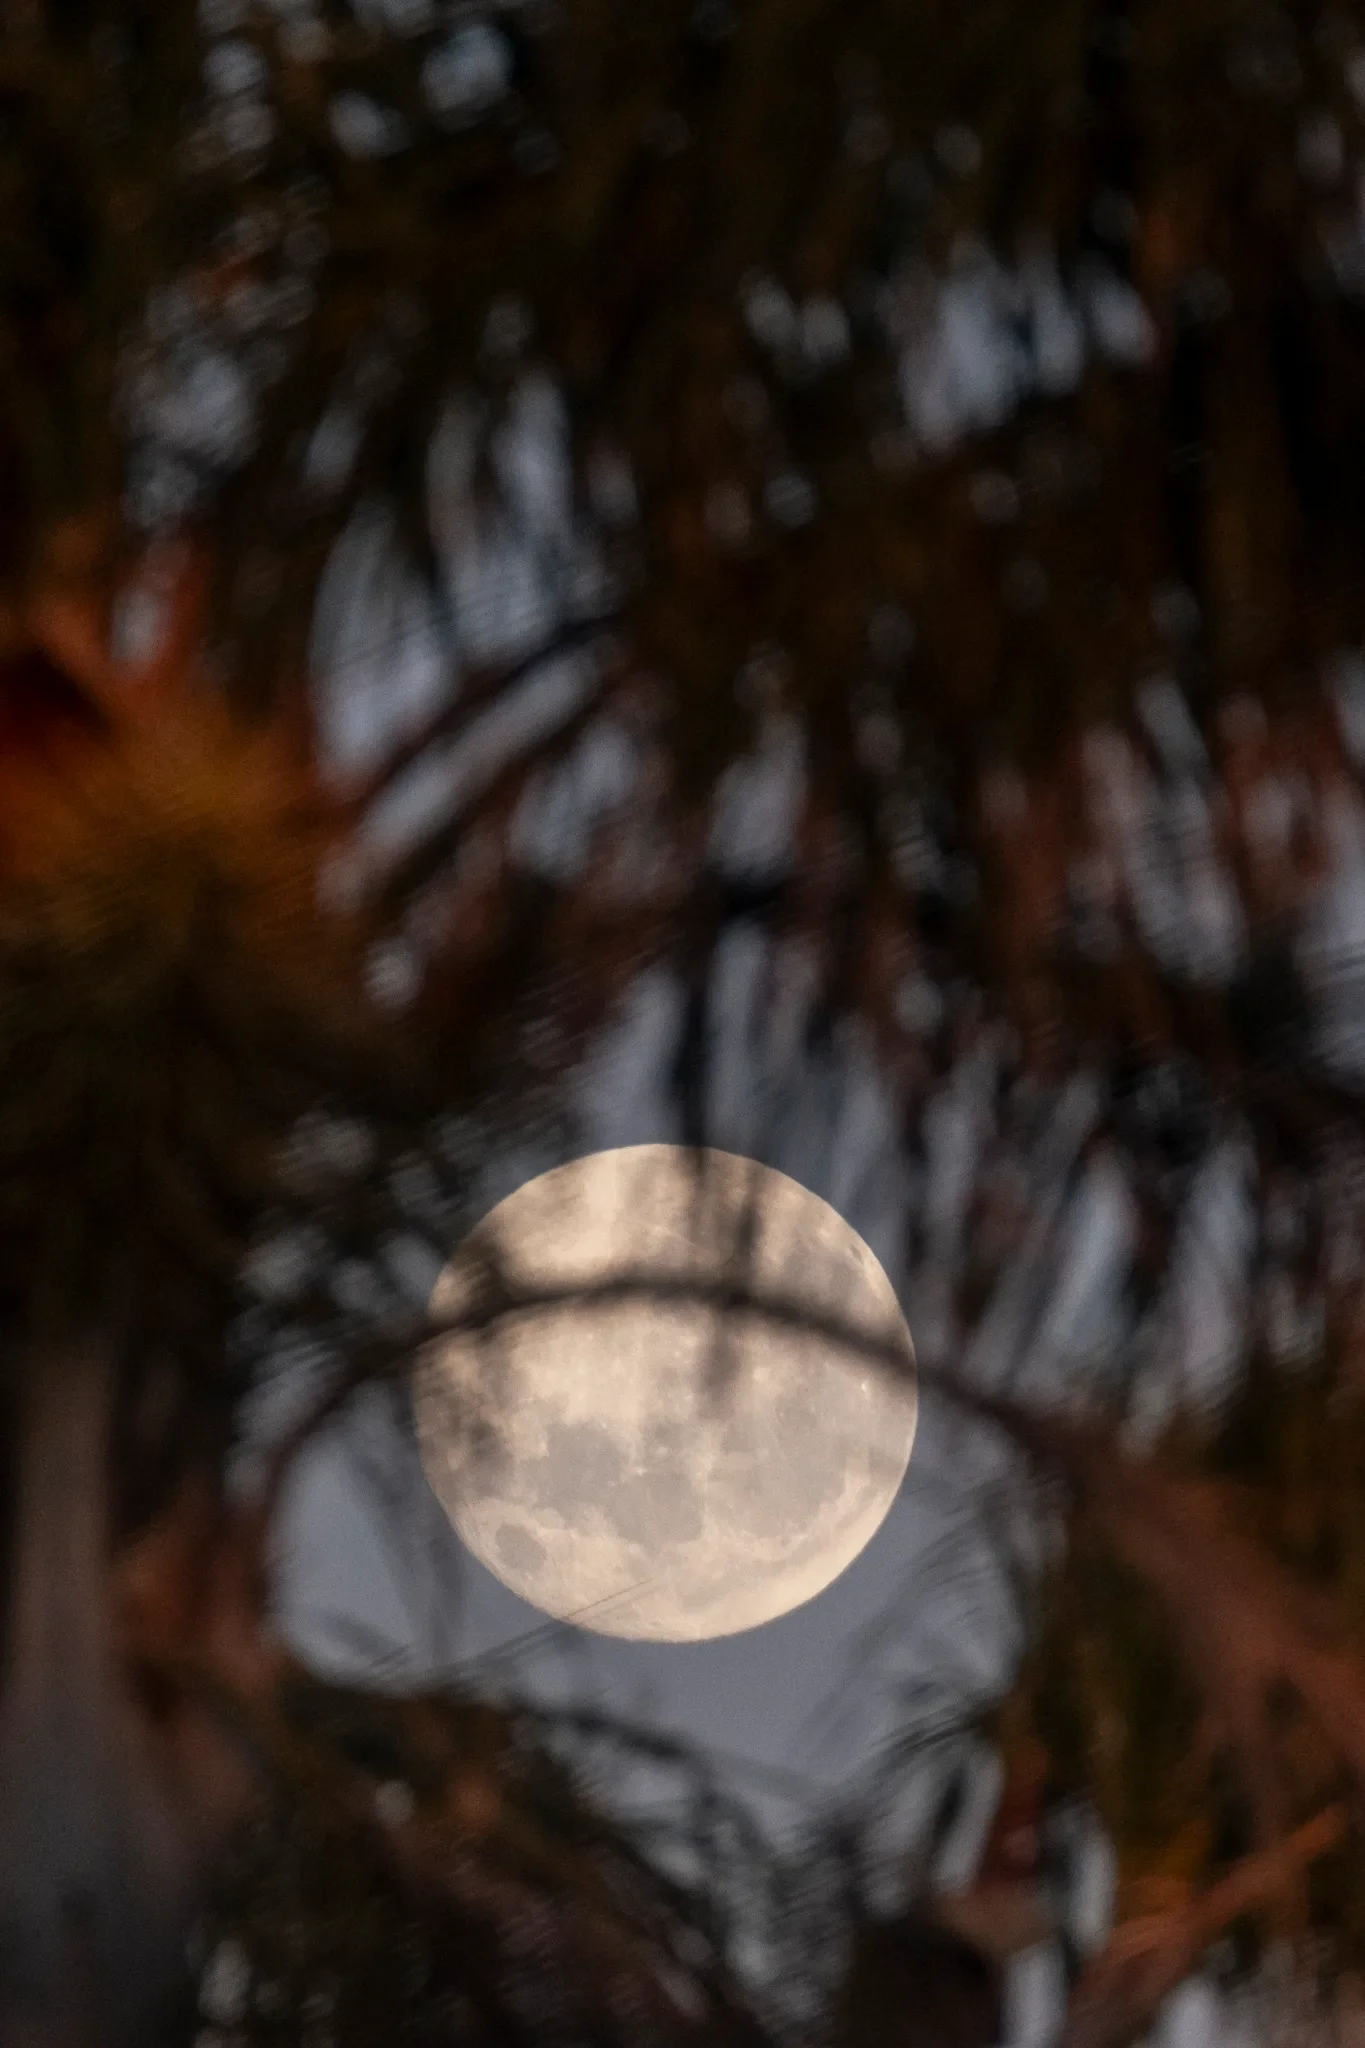
Fujifilm X-T3 | 400mm | 1/1000 | f/6.4 | ISO 1000
6. Experiment with intentional camera movement
Some of the most surprising creative moon photography ideas come from breaking the rules. By slowing your shutter speed and moving the camera, you can create abstract, painterly effects that feel alive.
At the top of Mount Maunganui, I experimented during golden hour fading into blue. With a slow shutter, I zoomed in and out mid exposure. The result was a shot I call Moon Vibrations, a crescent radiating ripples of light like echoes of the ocean.
This technique is what led to works like Oceanic Moonrise, now part of my Liminal Tides fine art print collection, where movement and light come together in a more abstract, atmospheric way.
Tip: Try shutter speeds of ½ to 4 seconds. This is one of the more playful moon photography tips. Embrace serendipity.
Oceanic Moonrise, a fine art print from the Liminal Tides collection
Tip 7: Create double exposures
Double exposures allow you to reimagine scale and placement, opening up endless moon photography composition ideas. Blend the moon with clouds, textures or landscapes for surreal results.
One spring night, the moon was low on the horizon while colourful clouds lingered elsewhere. I wanted them together, so I experimented with a double exposure. The result was surreal: the moon larger than life, glowing against the clouds like something from science fiction.
Tip: Double exposures are one of the most fun creative moon photography ideas—use them when you want to amplify mood, not accuracy.
Fujifilm X-T3 | 271mm | 1/125 | f/13 | ISO 160
Tip 8: Try long exposures of the moon
Long exposures with the moon are tricky, but with crescents they can create painterly results. This technique is a staple in advanced moon photography tips because it lets you capture both the glow of the moon and motion in the environment.
One of my favourites was a crescent moonrise over the ocean. It’s a rare alignment that happens only once or twice a year. My long exposure revealed the shadowed side of the moon, moonlight rippling across the water and colours that looked like a painting.
Tip: For crescents, try 1 to 3 seconds on a tripod. This is one of the most powerful moon photography composition ideas for creating cinematic depth.
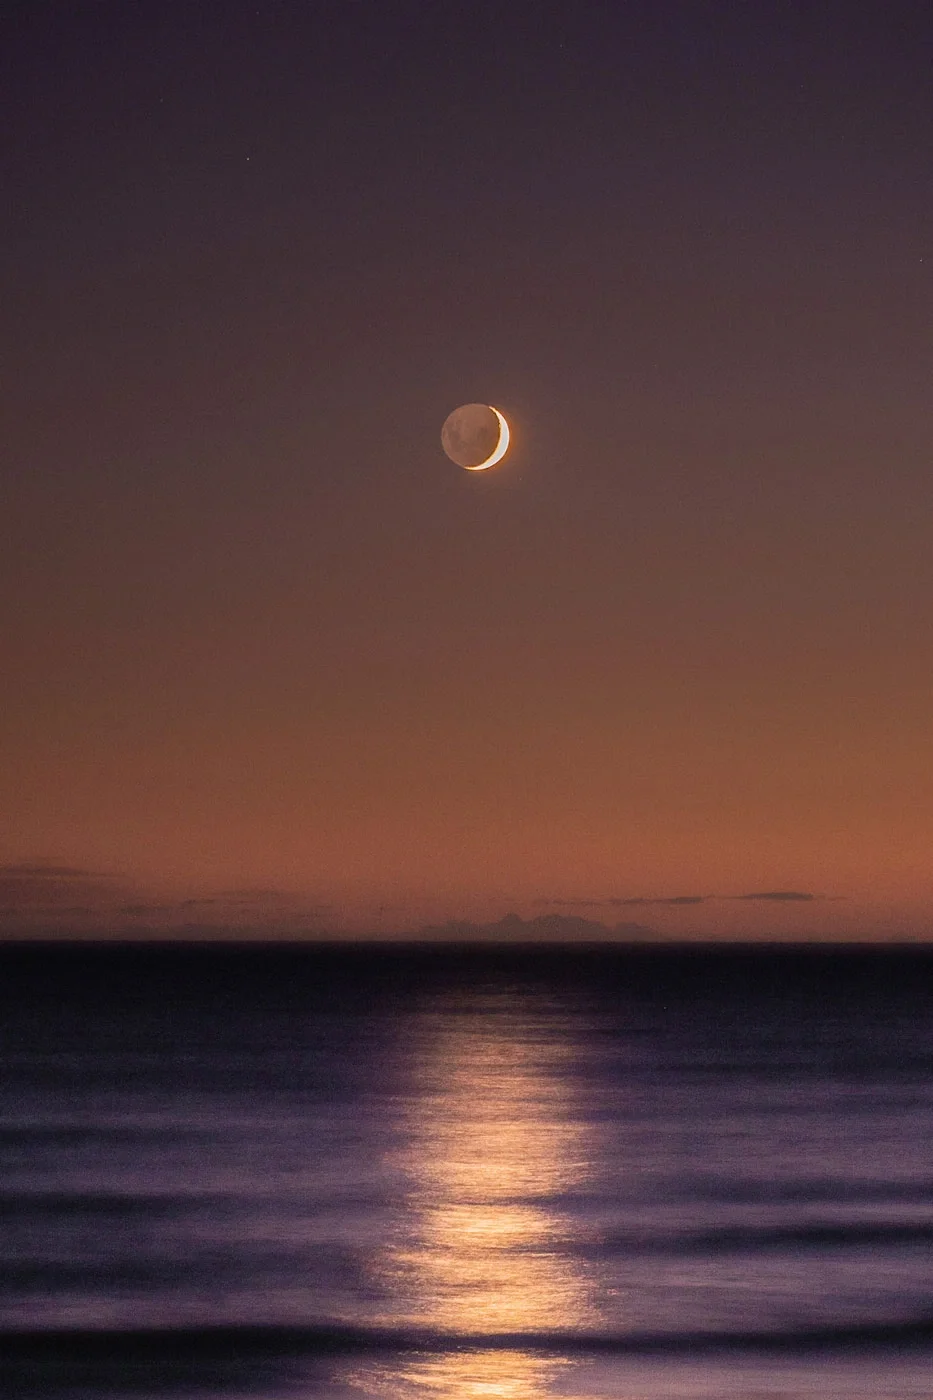
Fujifilm X-T3 | 100mm | 3 sec | f/4.5 | ISO 200
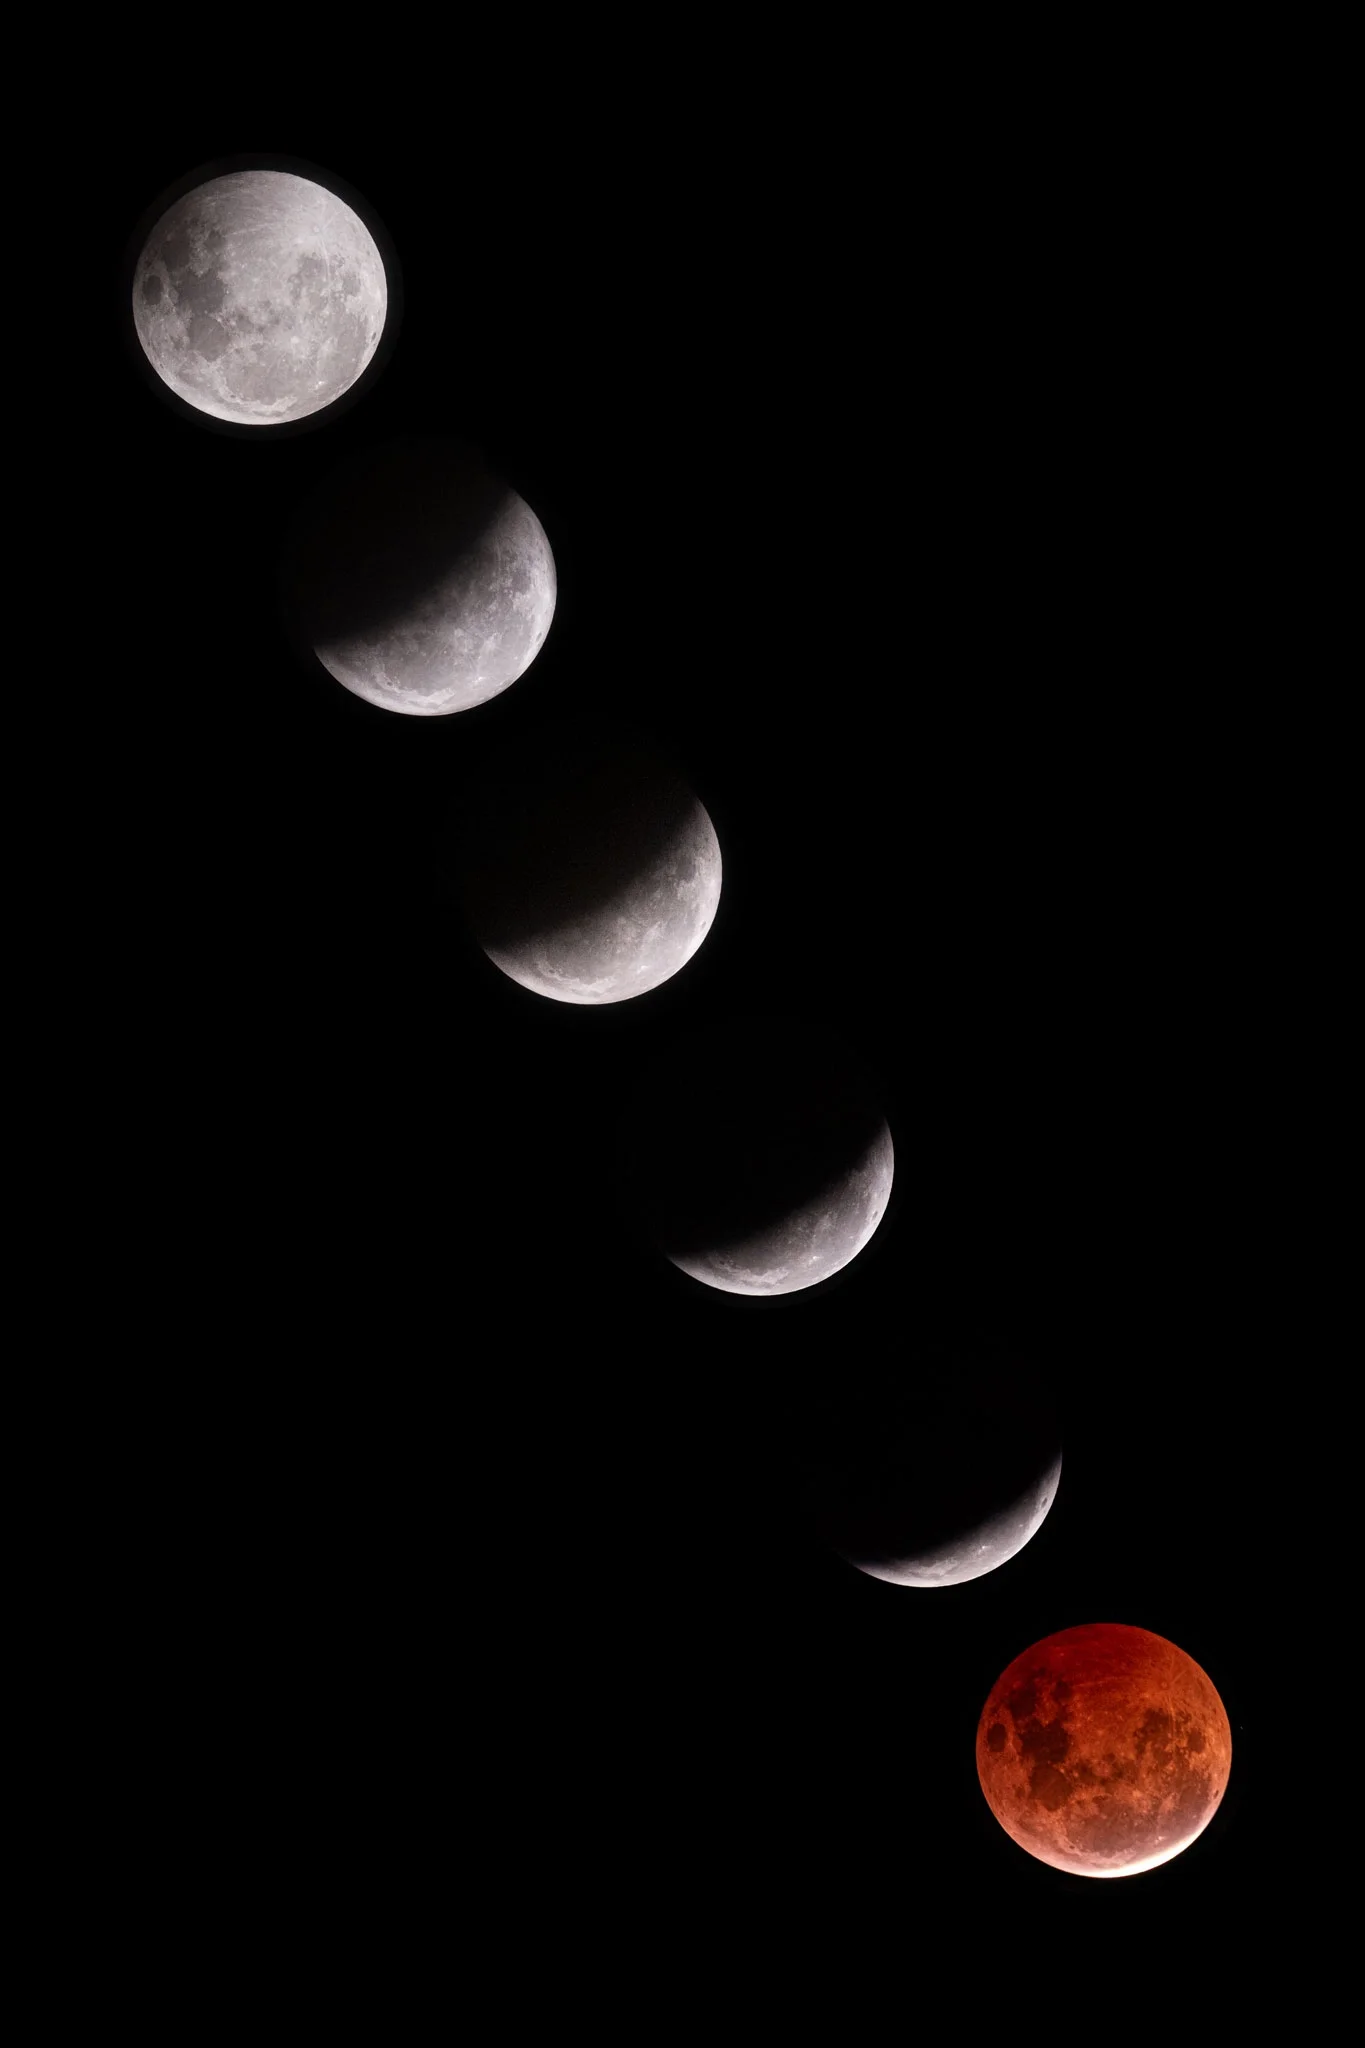
Tip 9: Use post processing for storytelling
Editing unlocks entirely new creative moon photography ideas. You can emphasise mood through colour, or tell a story through sequencing and collage.
One of my most rewarding edits was a lunar eclipse sequence. By arranging each stage of the eclipse into one composition, the final result told a story of transformation, not just a moment.
Tip: Think beyond single frames. Sequencing eclipses or moon phases is one of the strongest moon photography composition ideas for visual storytelling.
Tip 10: Watch for rare lunar events
If you’re learning how to photograph the moon, rare events like supermoons or eclipses will give you once-in-a-lifetime material. These fleeting alignments are also some of the most rewarding creative moon photography ideas to experiment with.
Some of my most memorable moon shots have been lunar eclipses captured right from my own back garden in New Zealand. Watching the moon shift from silver to deep red and back again reminded me how extraordinary the everyday sky can be.
Tip: Mark your calendar for lunar events. Even your backyard can be the perfect place to apply these moon photography tips.
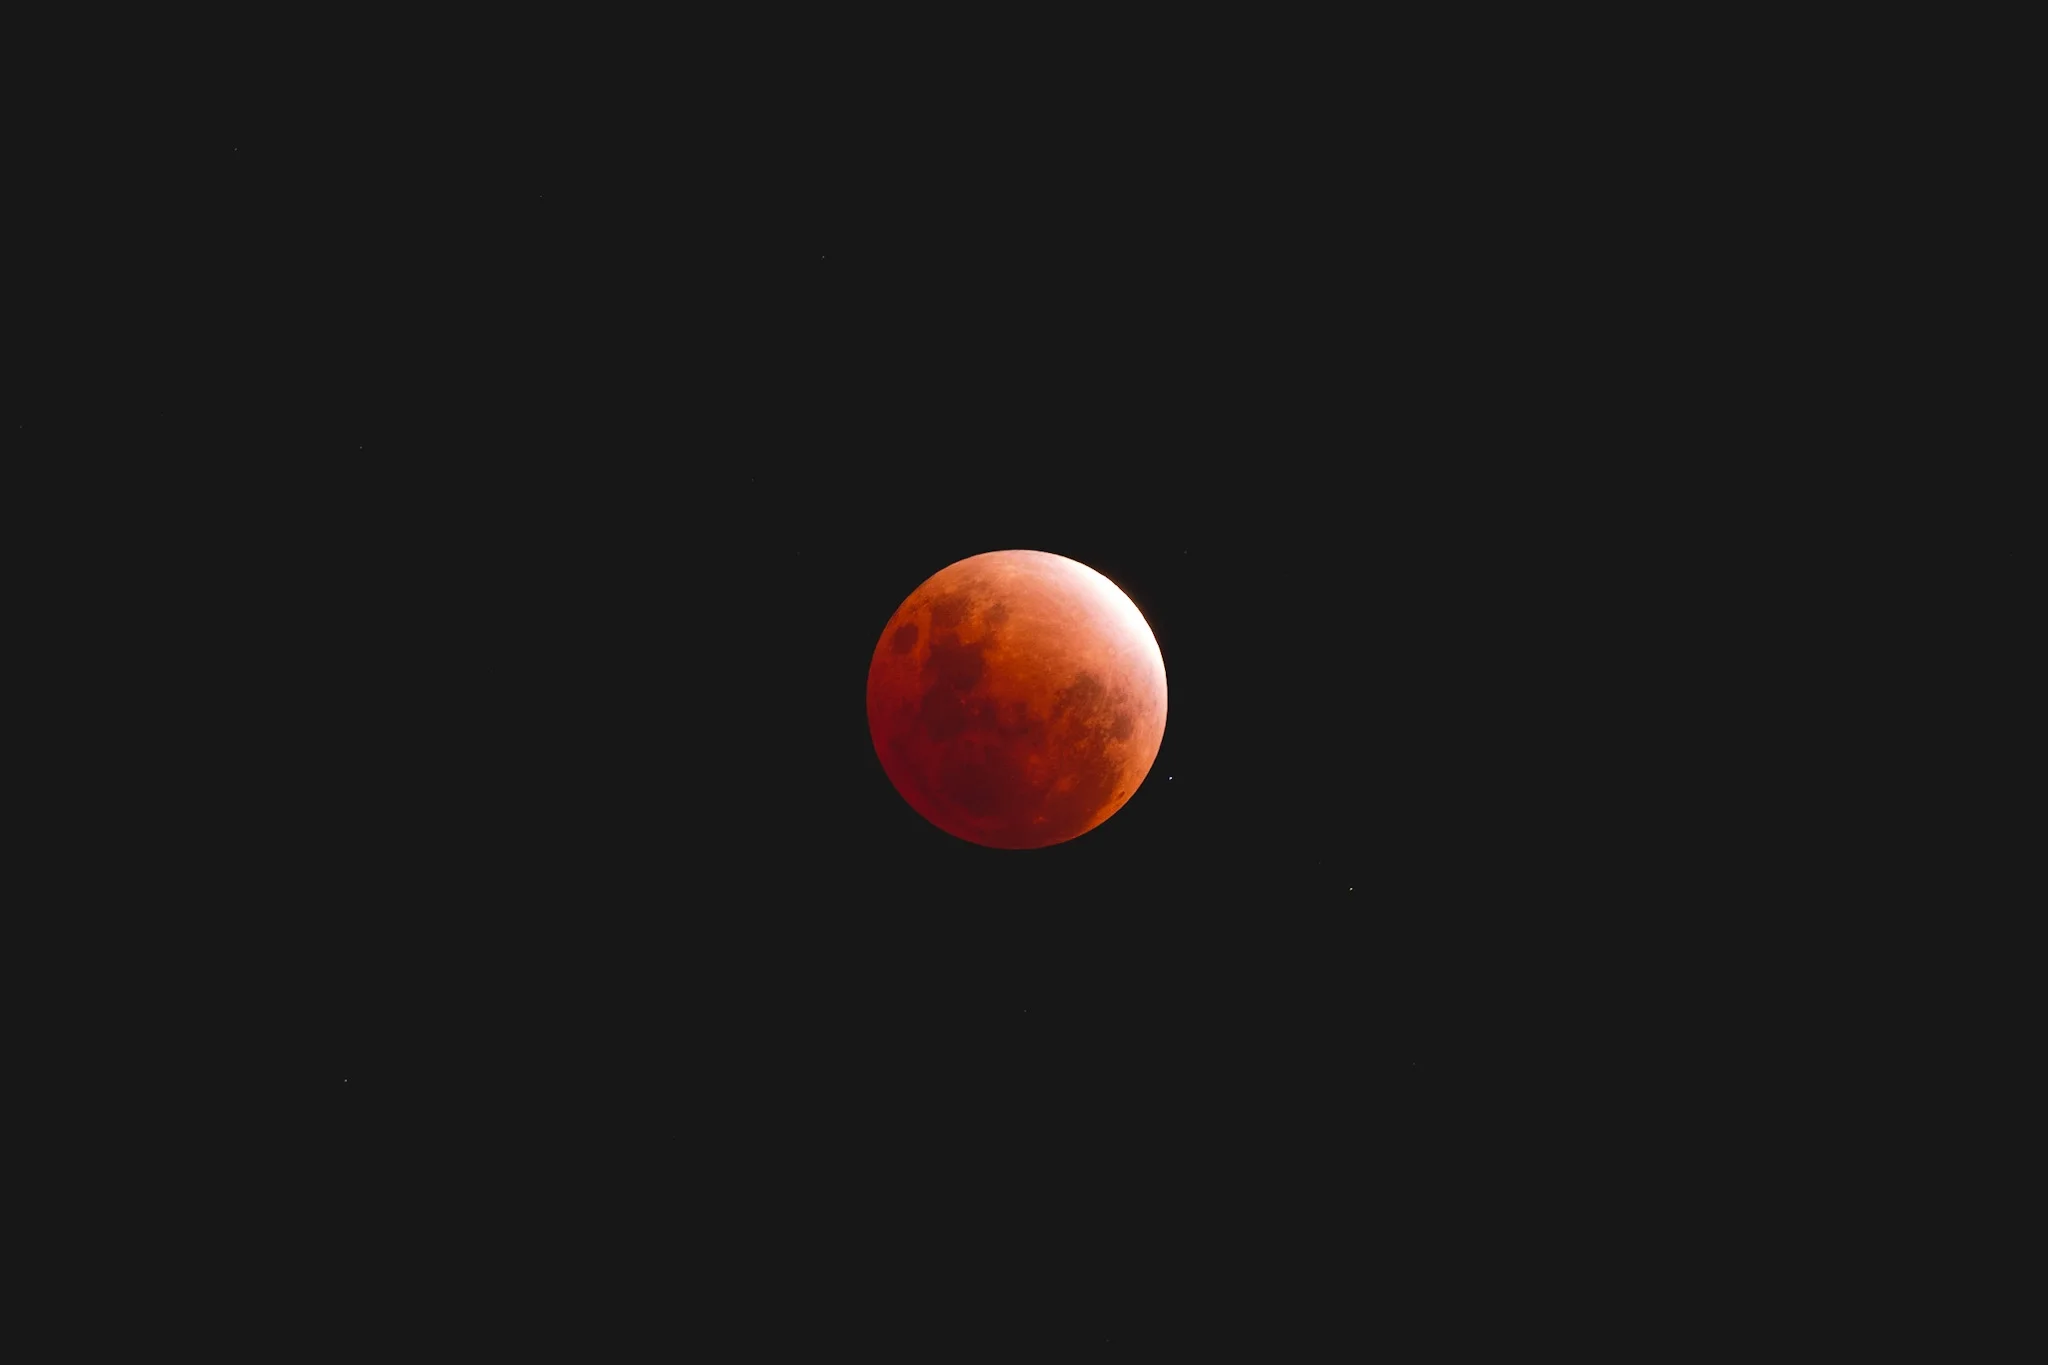
Fujifilm X-T3 | 400mm | ½ sec | f/5.6 | ISO 1250
Final thoughts
Photographing the moon has taught me more than settings. It’s about amplifying the beauty I see, making it larger than life and sharing it with others. Since I’ve shared my moon photos, people often tell me they notice the moon more. They’re inspired to stop, look up and sometimes even try photographing it themselves.
That’s the beauty of these moon photography tips. They help us notice rhythms and cycles we might otherwise miss.
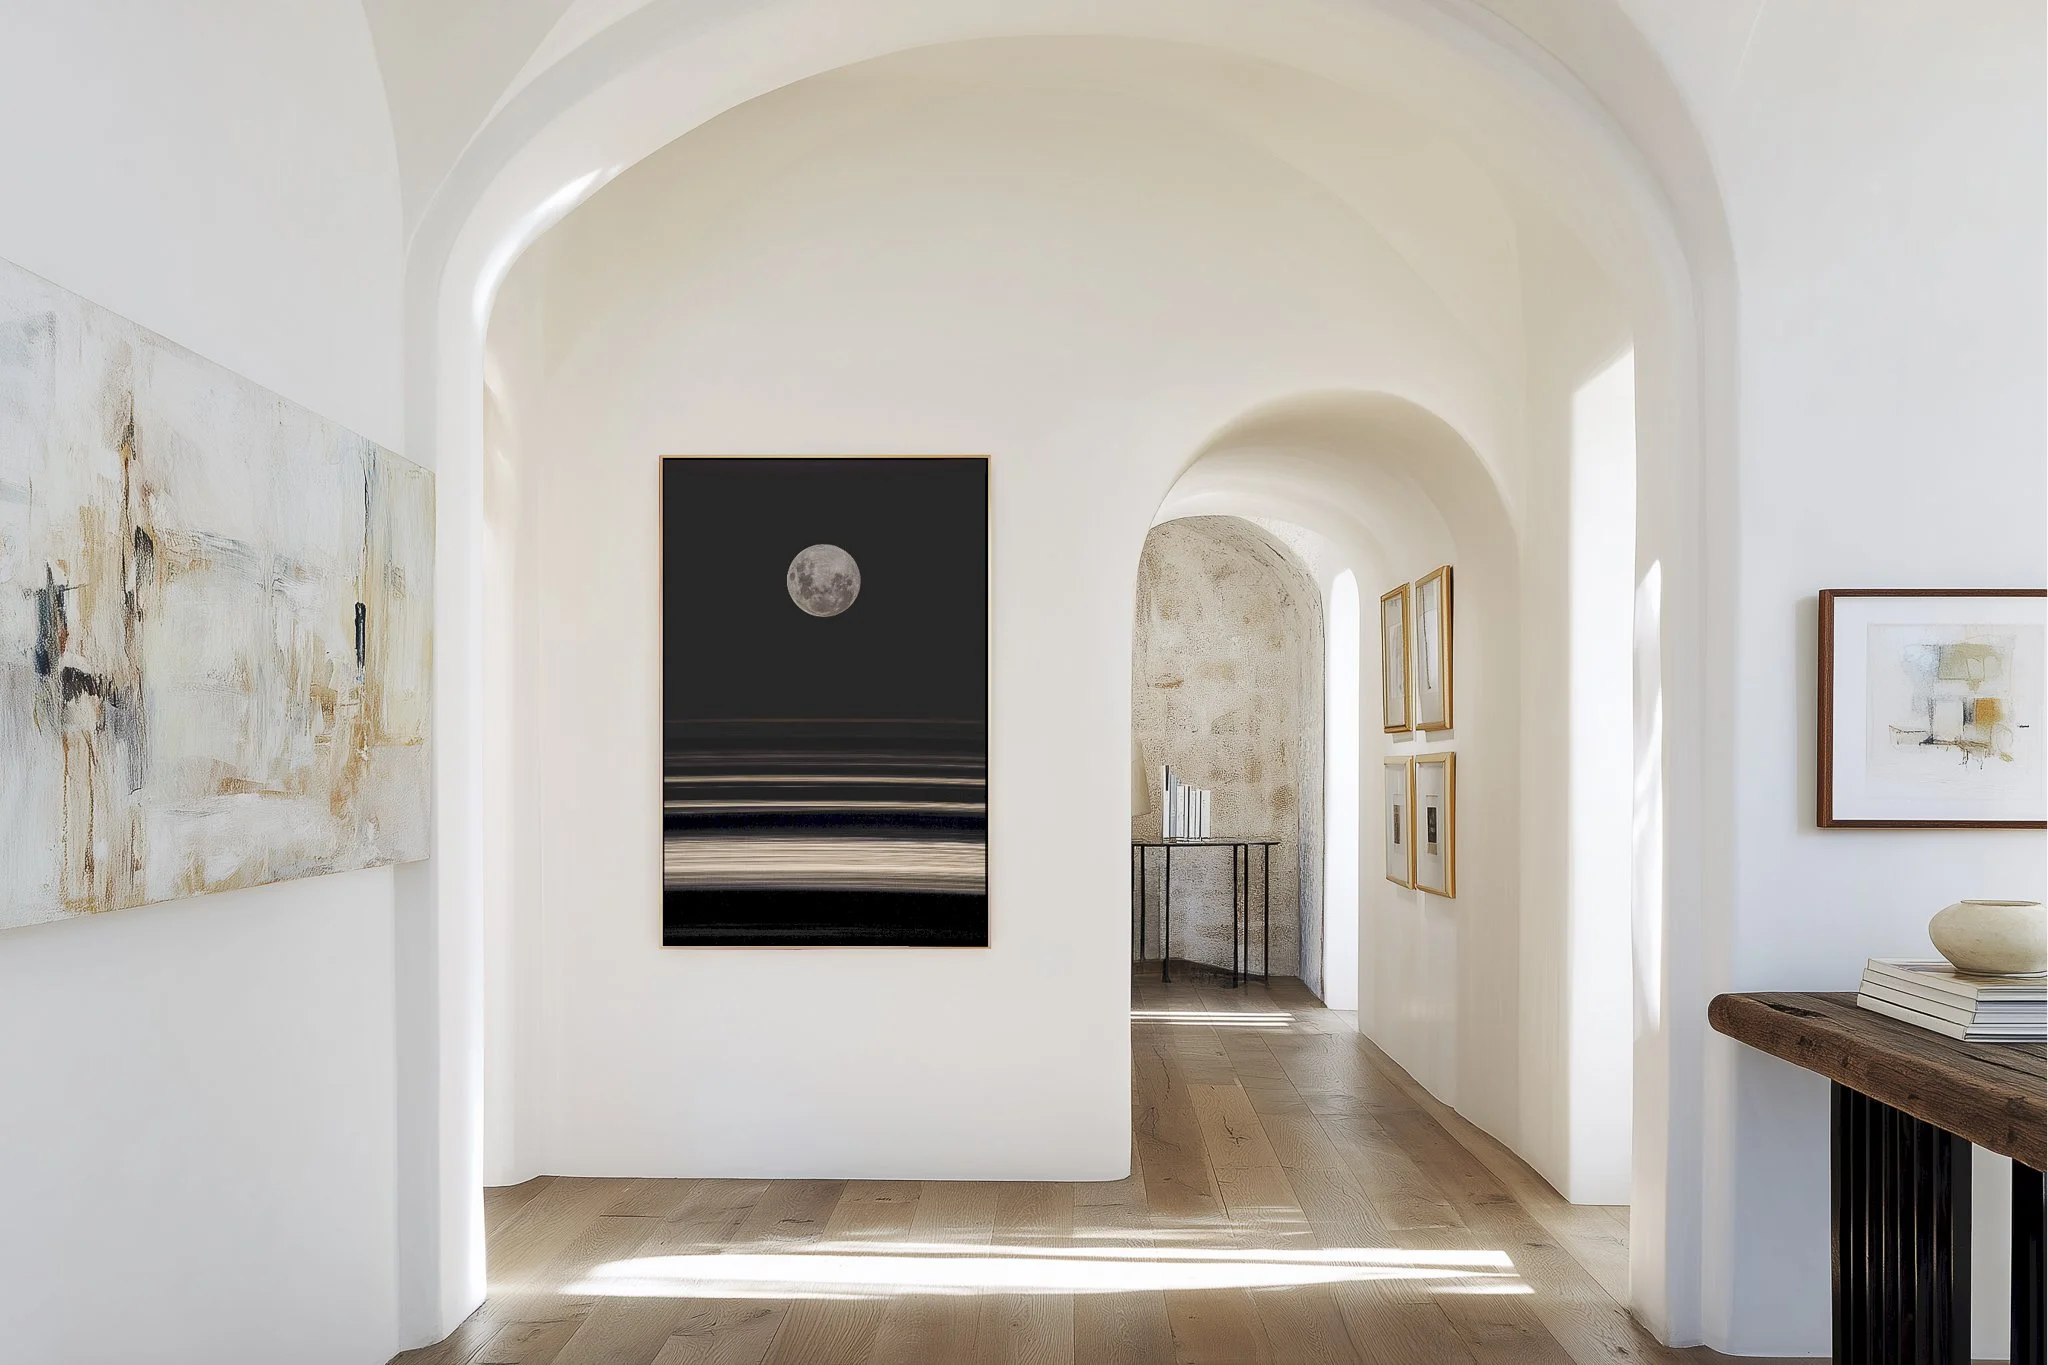
And sometimes, they even weave into client work. On a recent bed linen shoot, I added a moon photograph as a creative flourish. The client loved it. It was a reminder that the best creative moon photography ideas don’t just elevate personal projects, they can spark professional ones too.
Did this blog post help you? I’d love to know! Tag me in your creations on Instagram @louloubphoto
Until next,
L ✌️
FAQs: How to photograph the moon
What are the best moon photography tips for beginners?
Start with a tripod to keep shots steady, use manual settings, and try blue hour or golden hour so the moon is not too bright compared to the sky. Experiment with different focal lengths and pay attention to composition, not just zoom.
How do you photograph the moon with detail?
Use a telephoto lens (200mm or longer), a fast shutter speed around 1/125 or faster, and a low ISO to reduce noise. Switch to manual focus and focus on the edge of the moon’s surface for the crispest result.
What are some creative moon photography ideas?
Think beyond close ups. Use clouds, silhouettes, reflections, or double exposures for atmosphere. Long exposures with a crescent moon or aligning a subject with the moon are powerful ways to add story and scale.
What are the best moon photography composition ideas?
Add foregrounds for context and depth. Frame the moon through trees, architecture, or natural landscapes. Place the moon off centre and balance it with clouds, ridgelines, or water reflections.
Is it better to photograph the moon at moonrise or moonset?
Both work. Moonrise often creates drama against darker skies, while moonset can have softer, warmer tones. Many photographers prefer moonset for balanced exposures and painterly colours.
Do I need special gear for moon photography?
No. A DSLR or mirrorless camera with a zoom lens is ideal, but smartphones can also produce beautiful results with good timing, thoughtful composition, and careful post processing.