10 Essential surf and water photography tips for beginners
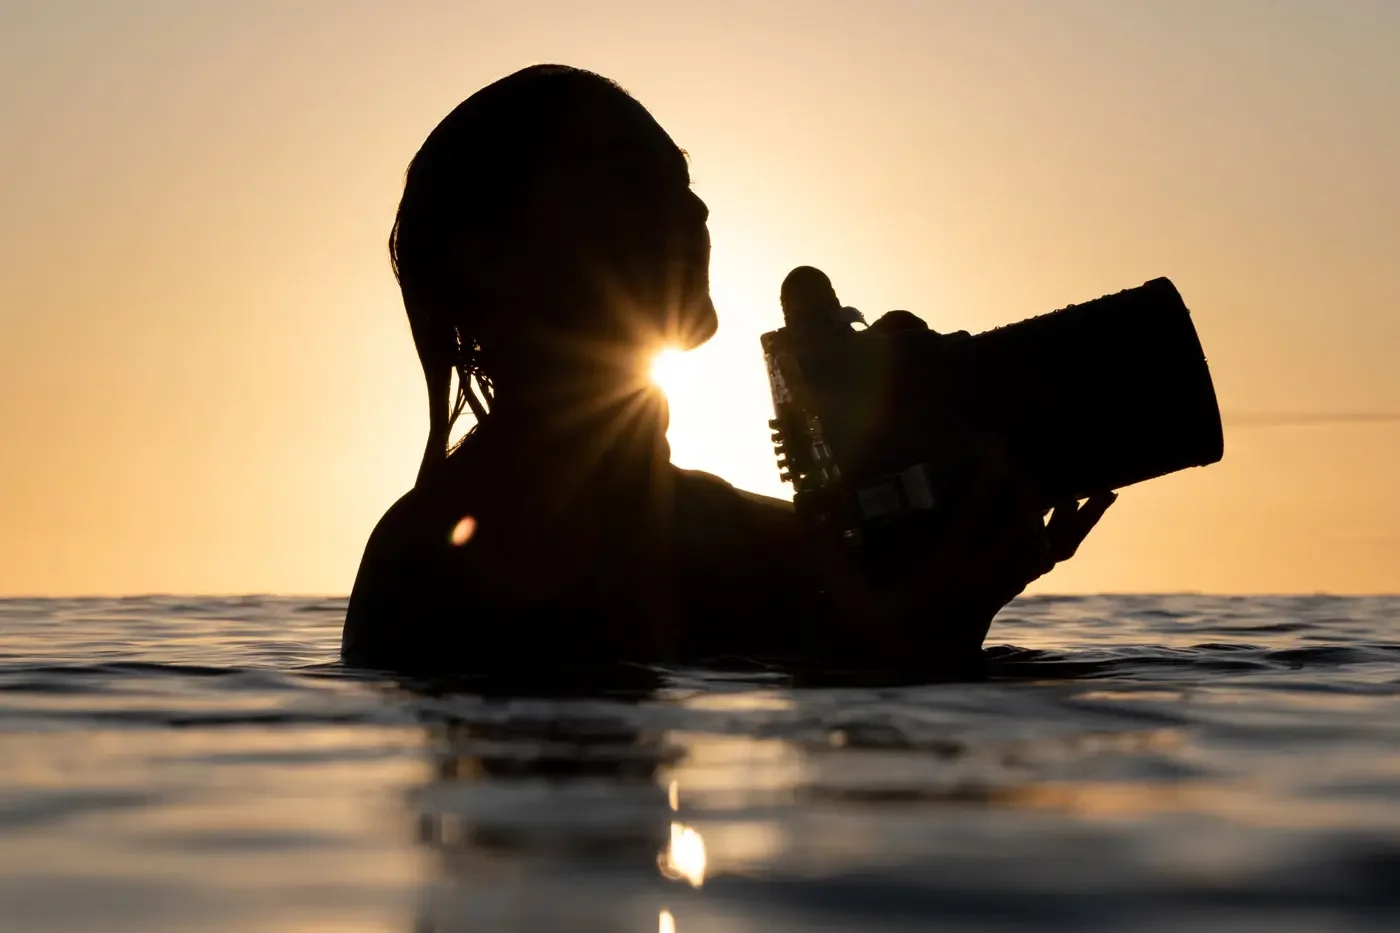
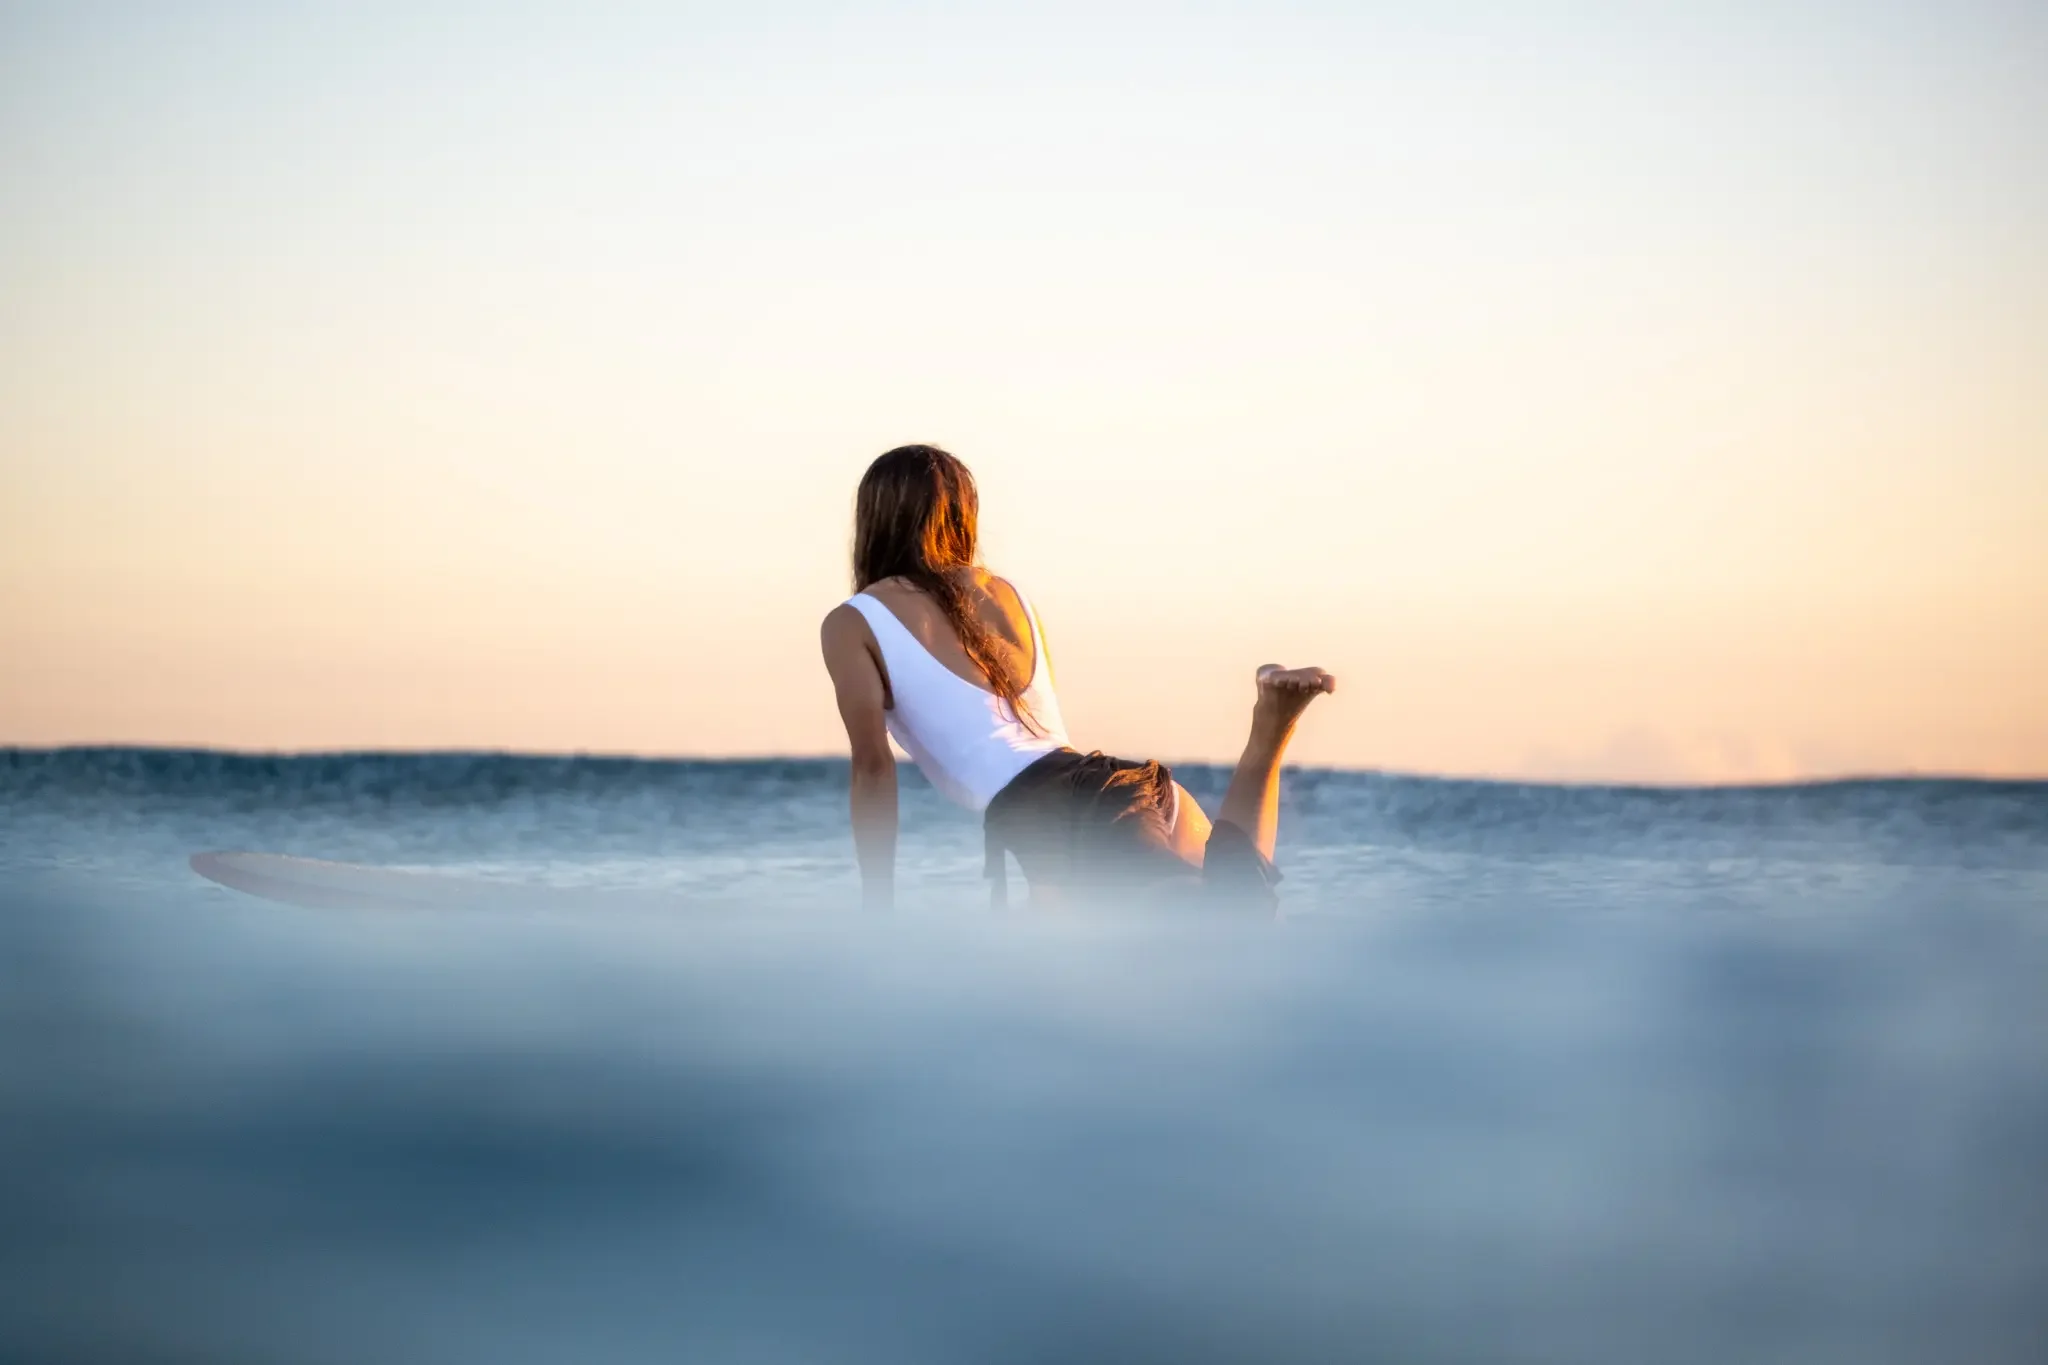
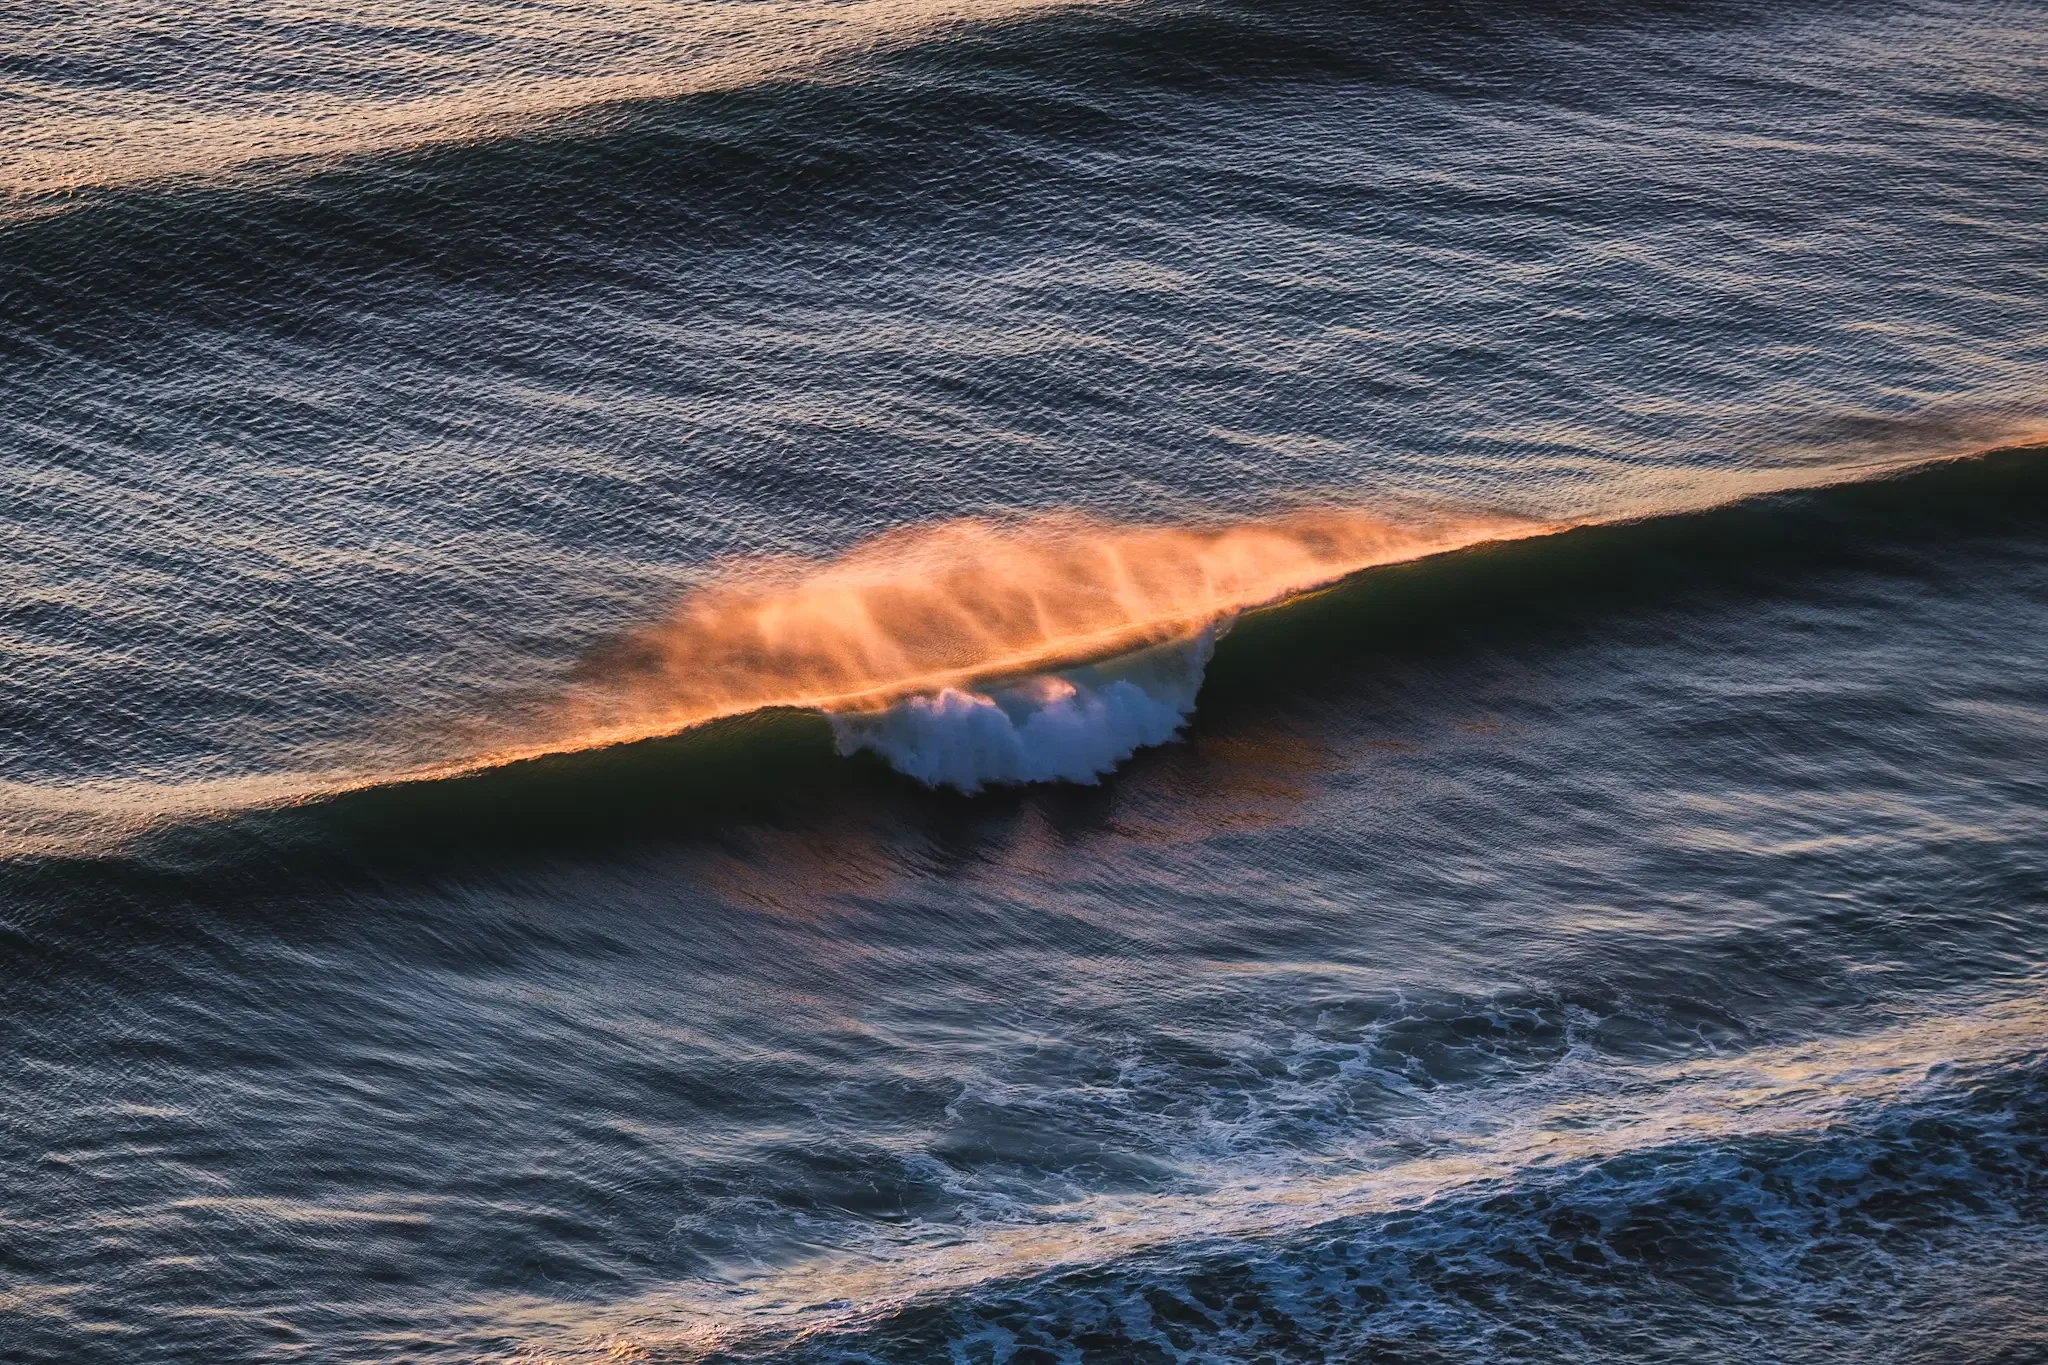
Fujifilm X-T3 | WR XF 80mm | 80mm | 1/500 sec | f/6.9 | ISO 160
The first time I ever tried surf photography, I destroyed my camera. Within minutes.
I thought I was being clever with a cheap waterproof case, but one wave was all it took for the ocean to drown my gear.
But here’s the thing: that disaster didn’t put me off. It made me want to get out there again.
I remember the silver shimmer of the sea against an overcast sky, Mauao (Mount Maunganui) glowing in the morning light in the distance, and a lone surfer paddling out who I befriended and who’s still a friend to this day. As I duck-dived with my leaky camera bag, I felt something unexpected. The familiar stoke from surfing as beautiful sets started rolling through, but with a lens instead of a board.
That was the moment I realised surf photography isn’t just about taking photos. It’s about learning to read the ocean, and noticing how this moving environment acts with light.
And it’s something anyone can begin, no matter your gear or experience.
If you’re standing where I once was feeling, curious but nervous and not sure where to begin, then this guide is for you. These are my 10 essential surf and water photography tips for beginners to help you get started safely, protect your gear, and begin capturing the ocean at its most magical.
Surf photography made simple
What is water photography?
Let’s start with the basics before we get to the ins and outs of surf and water photography.
Water photography is simply photographing life in and around water. That might look like shooting waves from the shoreline, swimming out with surfers, watching how light moves across the ocean surface at sunrise, or noticing the small details you’d otherwise walk straight past, like the way shallow water ripples over sand as it recedes back from the shoreline.
It can be as broad or as simple as you want it to be, and it doesn’t have to start in the surf.
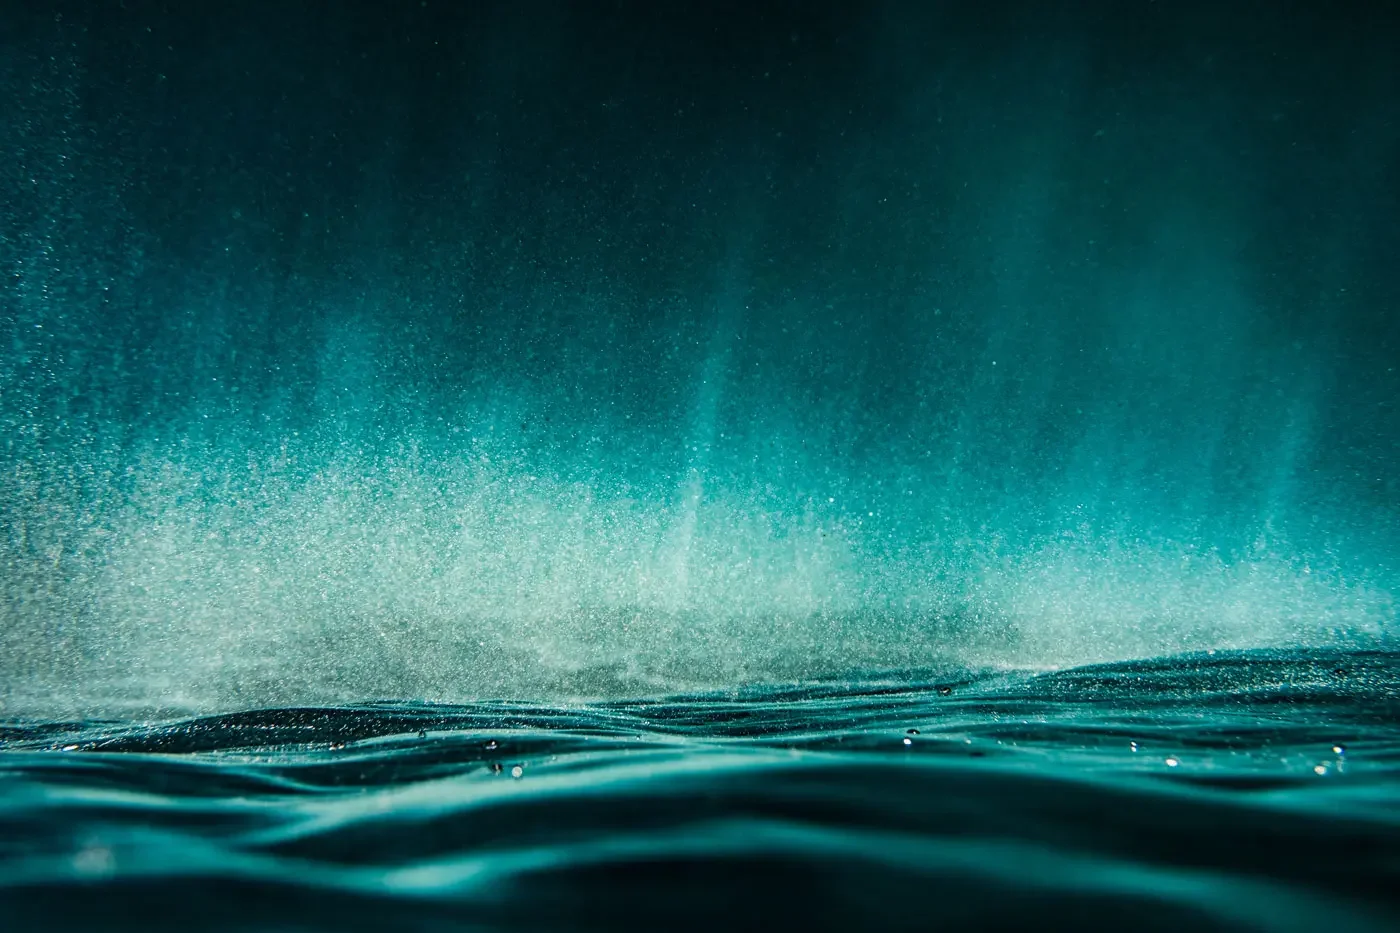
Surf and water photography is commonly associated with action photography, but I’m personally just as interested in the quieter moments spent floating around in nature documenting environmental scenes. Like sparkling reflections (I call this sea glitter), textures of the ocean surface, the changing colours between light and dark, the that freeing feeling of being in the ocean itself.
You also don’t need to start in the water to begin surf and water photography. I started from the land, learning how waves move and how light behaves on the surface before ever taking a camera into the sea. That simple curiosity was where it all started for me.
Types of water photography you can explore
When you think about water photography, you’re probably imagining something specific to your lifestyle; maybe it’s surfers cruising along waves, life beneath the surface of the ocean, or even dreamy photos in swimming pools. Yes, surf photography is often what draws people in first (and certainly was for me) there are many different ways to photograph life in and around the water.
Water photography can happen in all kinds of environments, depending on what draws you in:
Shoreline photography at sunrise or sunset
Photographing waves from land with a telephoto lens
Light reflections and surface textures on the ocean
Lifestyle ocean photography with swimmers or surfers
Calm harbour sessions in glassy morning light
Forest rivers and swimming holes with soft reflections
Lakes and still water landscapes
Pool photography with friends or creative concepts
In-water surf photography once you’re confident with your gear
Underwater photography if you want to take things further
For any photographers out there already working commercially, learning to shoot confidently in the water adds another environment you can work in. It opens up locations and ideas that simply aren’t available on land.
I actually started by experimenting from the shore before taking my camera into the ocean. It helped me study the ocean and how it responds to light and movement, without the added pressure of waves breaking around (and on!) me. There are so many ways into water photography, the secret is starting somewhere that feels safe and exciting to you.
1. Choose the right housing and gear
The first big step is figuring out how to get your camera safely into the ocean. And trust me, your choice of camera housing matters. My first attempt with the DiCAPac ended in heartbreak. It’s simply not built for surf conditions.
I started out with a GoPro. It was fun, but I quickly felt limited. One winter sunset session on the East Coast of New Zealand sealed the deal for me. I was out surfing with my partner, and the cloudy sky turned the most unreal shades of pink. I called it marshmallow skies. I dipped my face to the water level, framed up the scene, and thought, this is art. That is when I knew I needed a proper housing for my DSLR camera so I could create fine-art quality photography.
From there, I started experimenting with Seafrogs housings, which are affordable, functional, and they have served me well, and later Aquatech, the more expensive option but absolutely worth the investment once you are committed. If you are just testing the waters, you can even start with an AxisGo of JOBY SeaPal setup for your phone. But whatever you do, don’t skimp on protecting your gear. That surf photography mistake was tried and tested by yours truly.
If you want to explore options, check out Seafrogs for affordable surf housings, or Aquatech for professional-level builds trusted by surf photographers worldwide.
My golden rule: test your housing in shallow water first, and keep some silicone grease handy for those o-rings.
2. Master shutter speed for waves
One of the most powerful ways to bring the ocean to life is through shutter speed. A fast shutter, 1/1000 sec or more, will freeze water droplets mid-air and capture a surfer mid-turn in perfect clarity. A slower shutter, on the other hand, transforms moving water into soft streaks and motion blur, giving your photos a dreamy, almost painterly quality.
The first time I experimented with shutter speed wasn’t even in the water, it was on land, watching waves roll in at sunrise. I would pan my camera across the horizon as sets came through, playing with slower shutter speeds to capture that sense of motion. I quickly learned that the best time for these kinds of shots is early morning or late evening, when the light is softer.
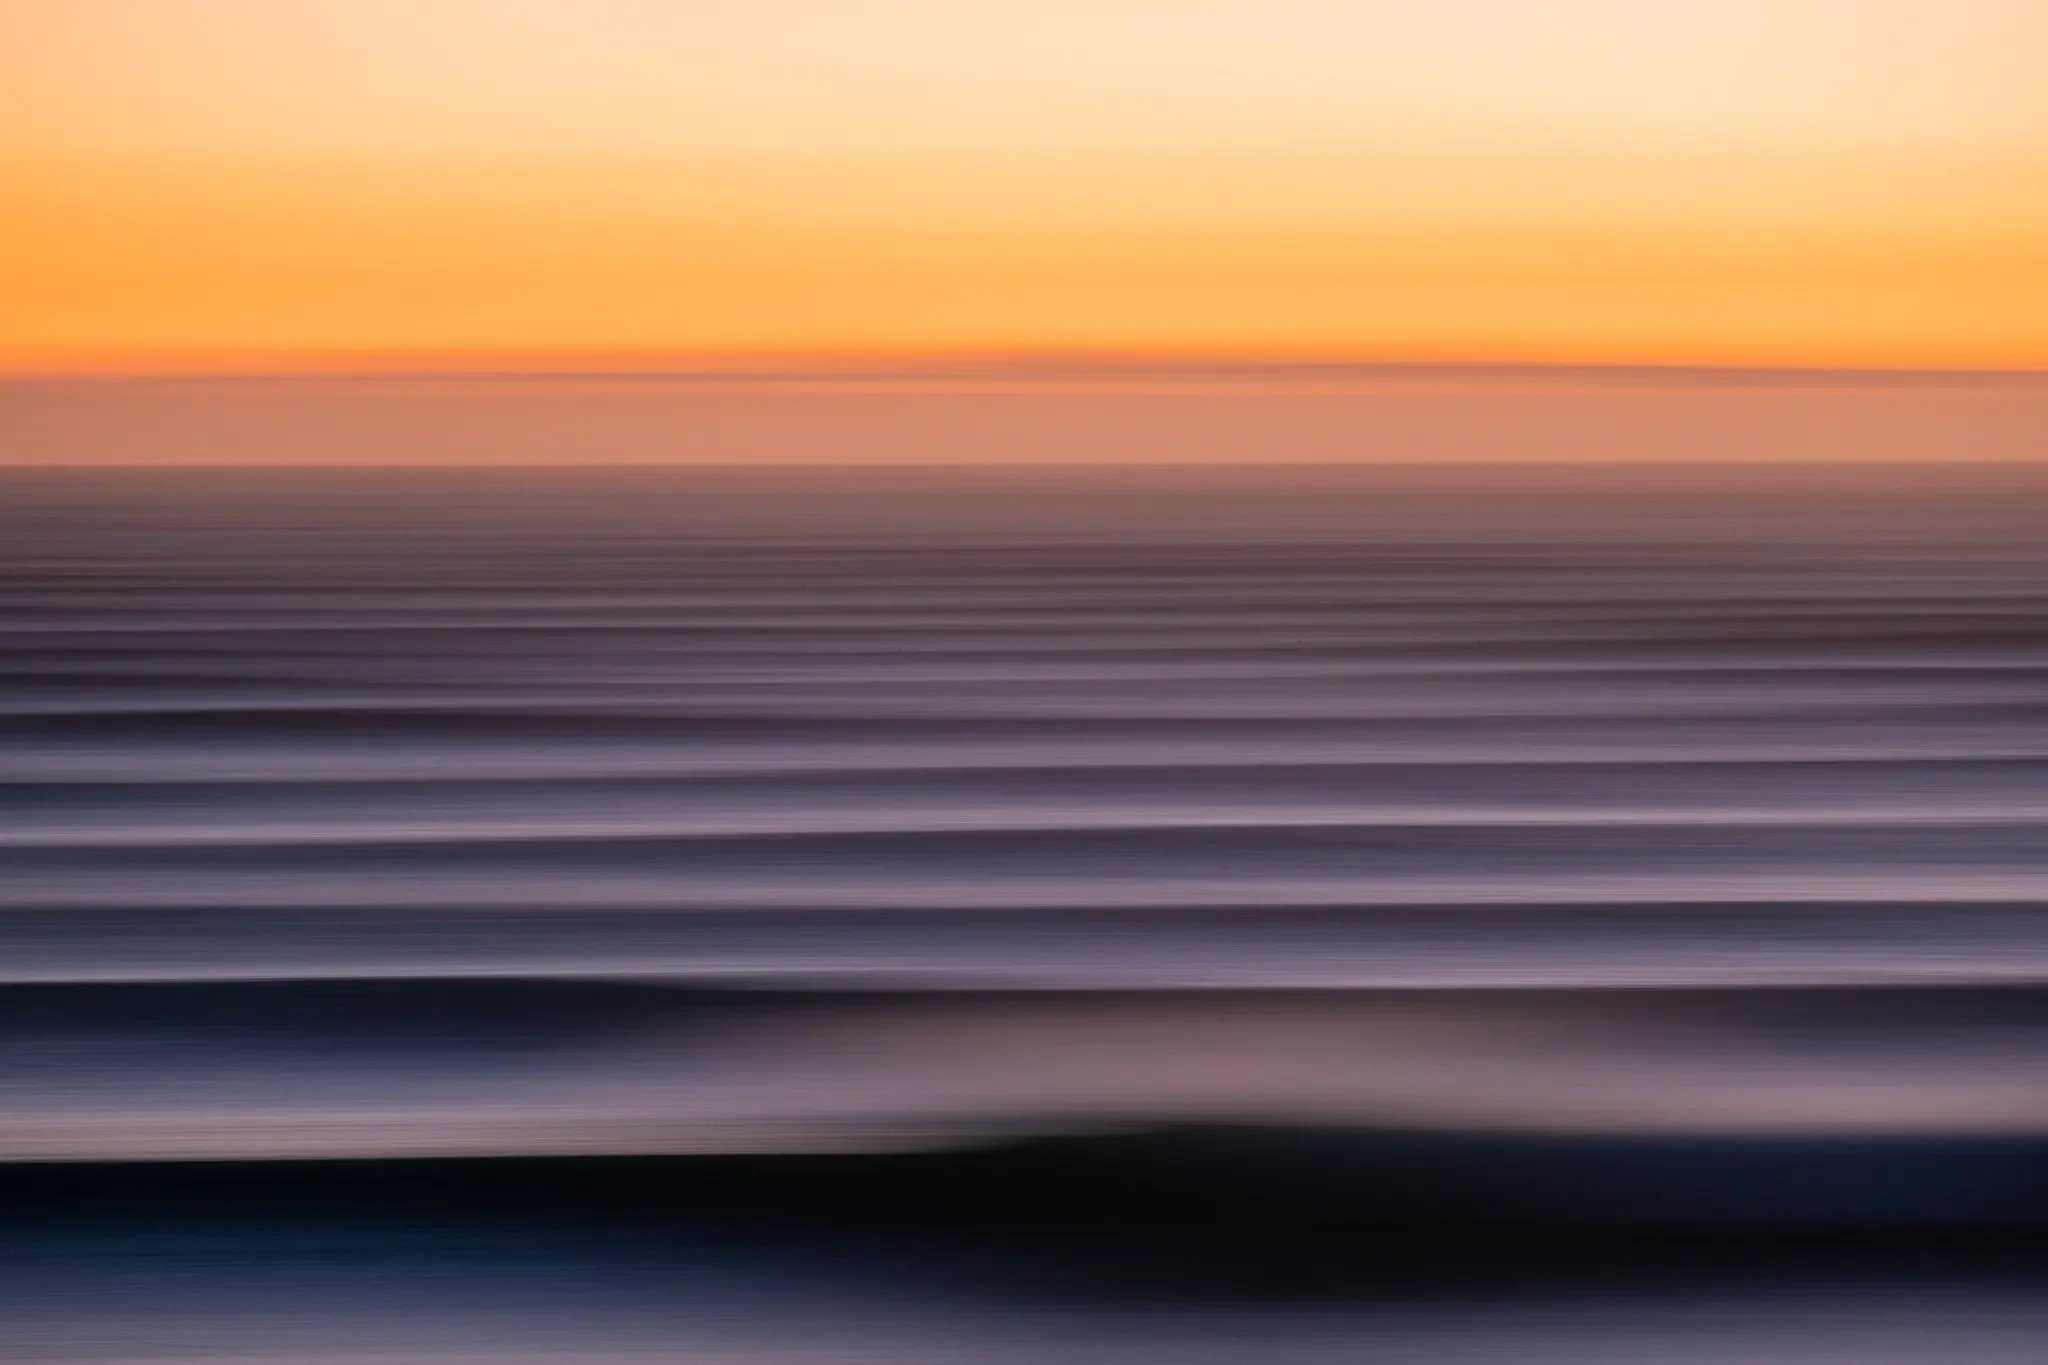
Fujifilm X-T3 | WR XF 100-400mm | 100mm | 1/15 sec | f/4.3 | ISO 160
That early experimenting on land taught me a valuable lesson: get to know your gear in a safe, controlled environment first. When you’re in the water, things happen fast; waves are breaking, surfers are moving, light is changing. If you’ve already built muscle memory for how your camera behaves at different shutter speeds, you’ll be ready to adapt in the moment.
Pro tip: start at 1/1000 sec for freezing action, and experiment with 1/15–1/30 sec for panning shots that capture speed and motion.
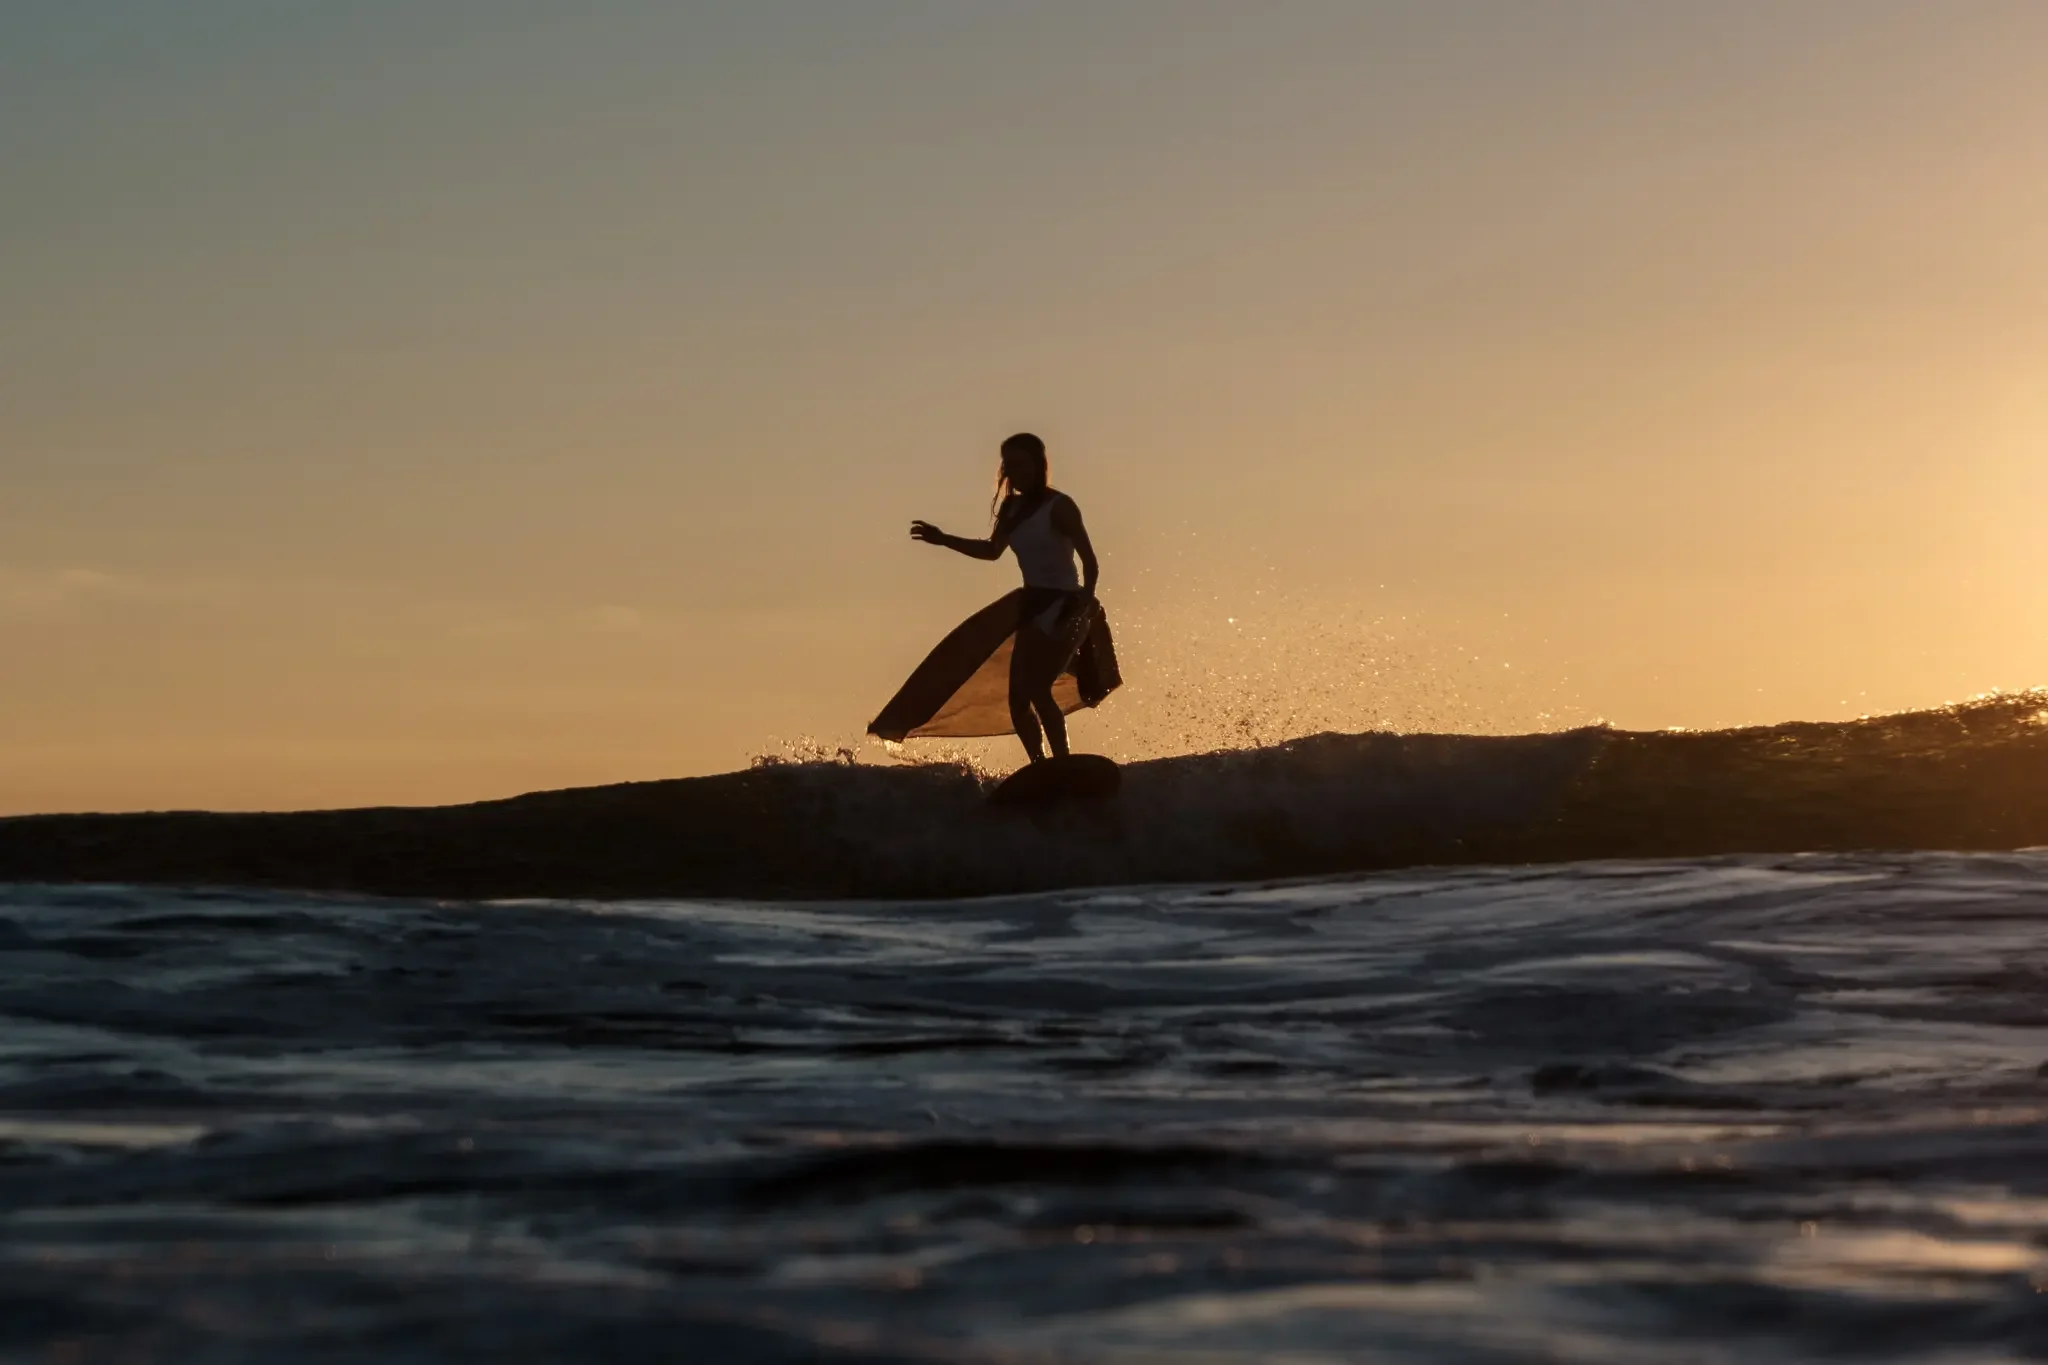
3. Shoot at golden hour
There’s a reason photographers chase dawn and dusk, the light is softer, colours richer, and everything feels more magical. I call these the in-between moments. In surf photography, golden hour isn’t just about light, it’s about mood.
One of my favourite examples of this is a photo I call Peach Peeler. Mark and I were on a romantic weekend away on the East Cape, staying at a little beachfront Airbnb. We walked barefoot across the grass, down the wooden steps, and straight into turquoise water. The waves there break differently to my local, perfectly shaped, hypnotic to watch and photograph. Just before dawn broke, the sky turned a soft peach, painting the sea in surreal tones. The contrast of rich turquoise waves against that peach sky has made this image one of my most popular prints to date.
If you only remember one thing: always, always check the light at sunrise or sunset. Those fleeting colours often deliver your most unforgettable images.
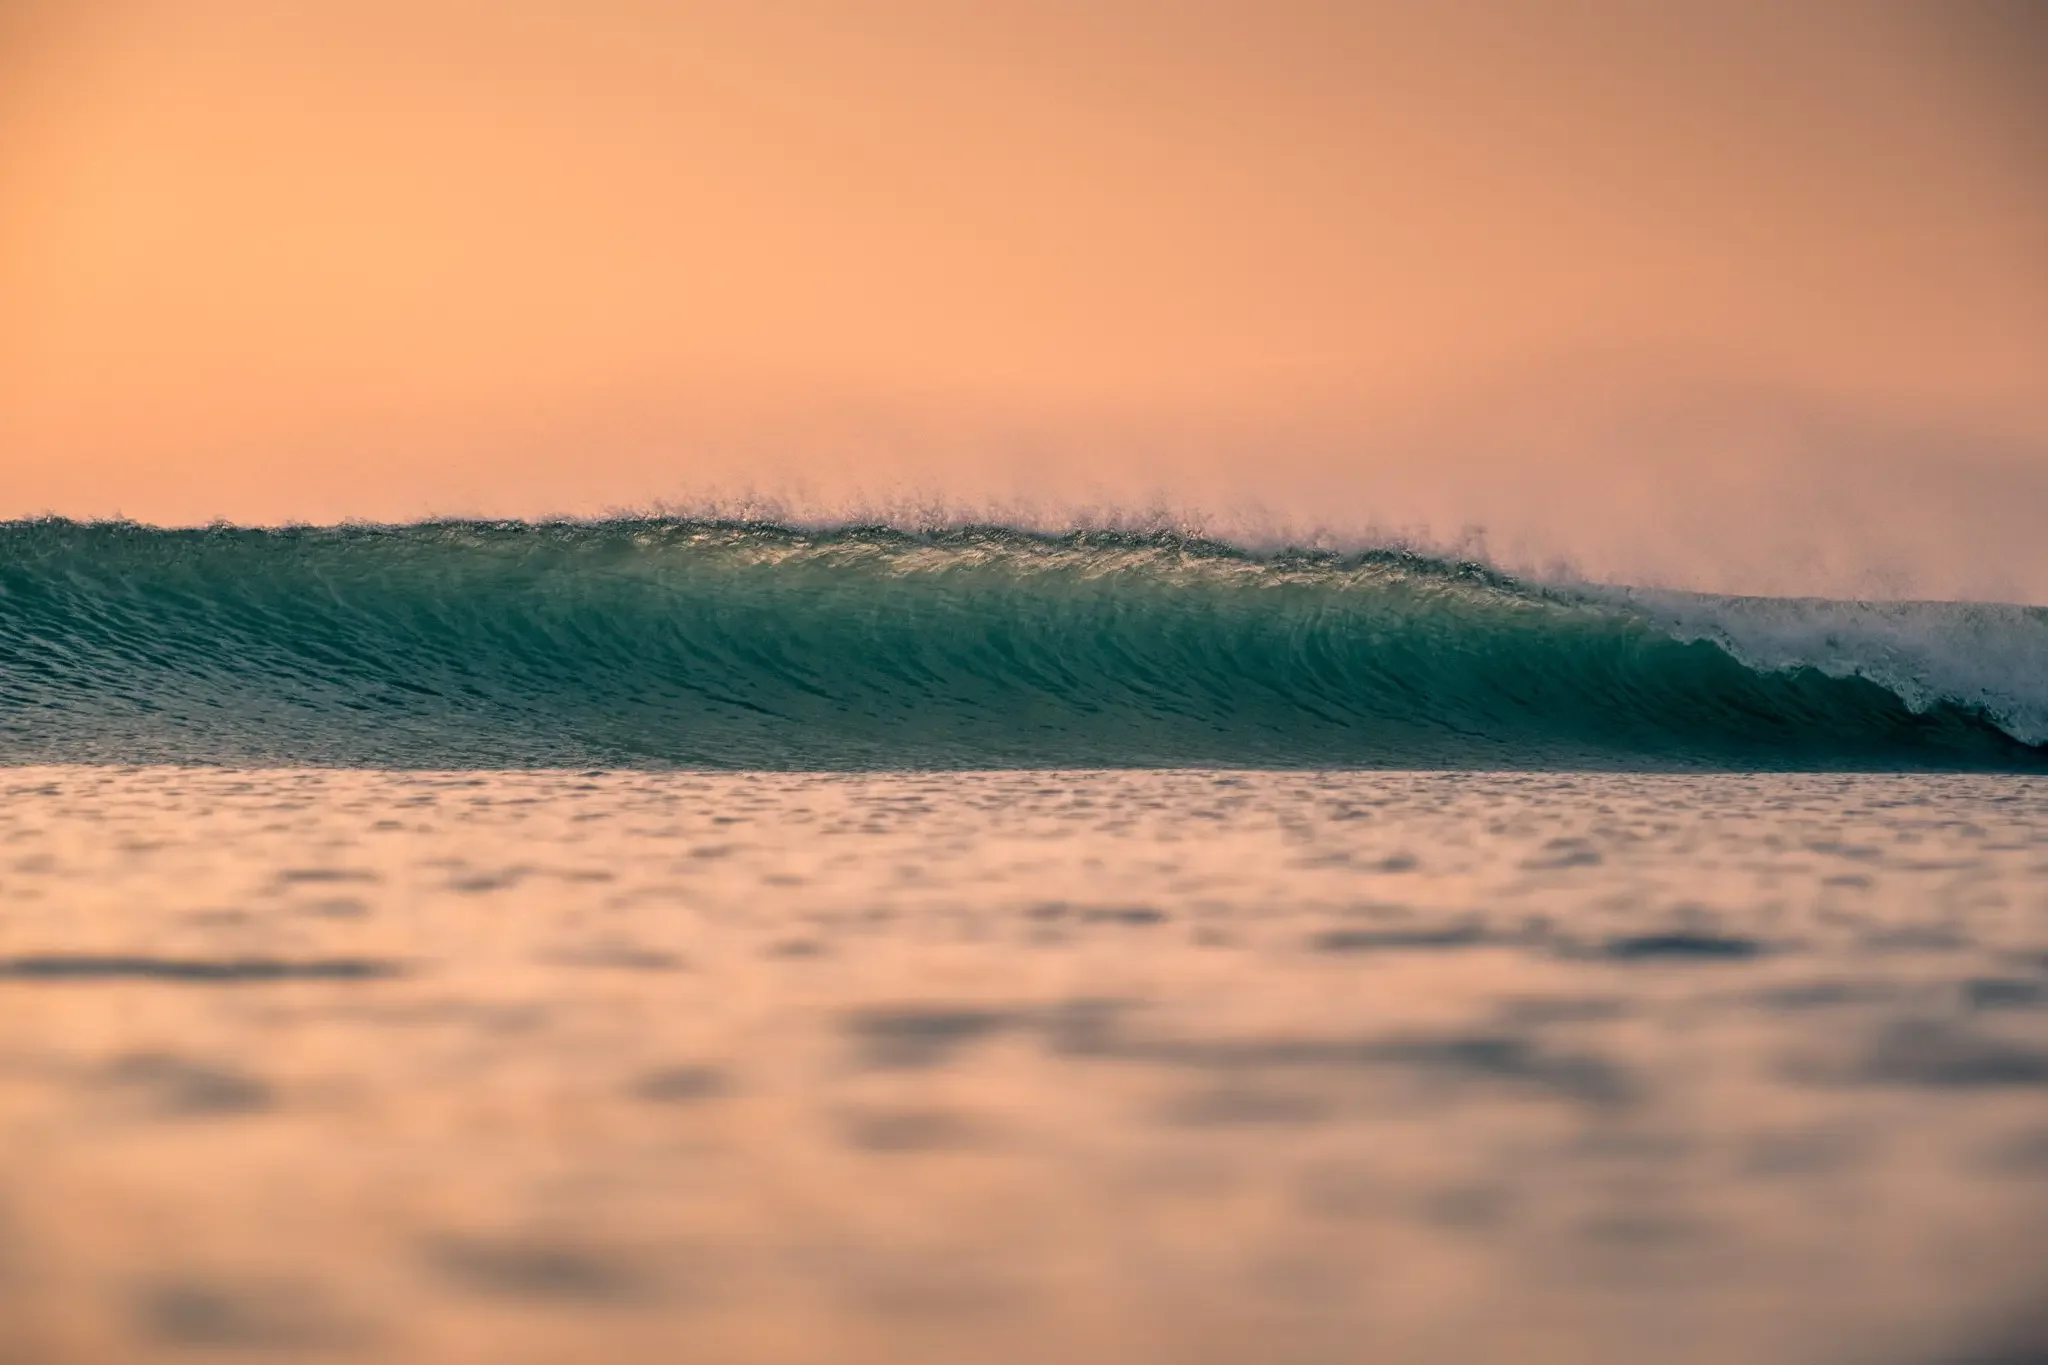
Fujifilm X-T3 | WR XF 16-55mm | 48.5mm | 1/500 sec | f/2.9 | ISO 200
Peach Peeler is a limited edition fine art print from the Liminal Tides collection.
4. Do you really need a wide angle lens?
A lot of surf photography guides will tell you to shoot wide in the water, think fisheye or 16–35mm. And yes, a wide angle lens can create big, dramatic scenes. But here’s my honest take: it’s not always the best choice, especially for beginners.
I started out with wider angles in the water, and here’s what I learned: it’s tricky. To fill the frame, you need to be extremely close to the action, which isn’t always safe for you or the surfer. Without a dome port, it’s also difficult to get a clean, balanced shot.
These days, my go-to is an 80–90mm lens in a flat port. It allows me to position myself in that sweet spot, close enough to capture detail and intimacy, but far enough to stay safe and give surfers their space. The compression from a longer lens also makes the waves feel more powerful and layered, which I personally love. I’ve written more about my fave lenses for surf and water photography in a dedicated guide here.
My advice on wide angle lenses for surf and water photography: do not feel pressured to start wide. Experiment. Find the lens that helps you tell the story you want to tell.
5. Put safety first in the ocean
This might be the least glamorous tip, but it’s the most important. Respect the ocean. Your safety and the surfers’ safety always comes before the shot.
On our coast, there’s a gutter that runs along the sand bank underwater. On high tide, it becomes deeper water and very rippy. One day, I was out swimming with my camera with two girlfriends who were surfing. They’d already surfed in, but I lingered, kicking on my back trying to get to shore. No matter how hard I kicked, the beach didn’t seem to get any closer. I remember seeing my friend walking up the sand and wishing I’d asked her for a tow. On that occasion I was fine, but I always make sure I’m well fuelled before swimming, and there’s someone to spot me either in the water or on land.
In conditions like that, I lie on my back, hold my camera by my side, angle myself toward the shore, and just kick steadily. Panic never helps in the ocean. Fins saved me that day, I don’t think I’d have made it back without them.
The golden rule: know your limits, use fins, and always respect currents. No photo is worth risking your safety.
6. Stay patient for the perfect wave
Surf photography is 50 percent swimming and waiting, 50 percent actually shooting. The ocean is unpredictable, especially at beach breaks, and the best shots often come in between long lulls.
One morning stands out as a perfect example. A girlfriend of mine wanted photos of her surfing in a skirt, such a fun concept. The waves that day were pretty average, a bit clunky, but we paddled out anyway. After she caught an average wave, she was paddling back out when suddenly, out of nowhere, this perfect wave rolled in. Totally unexpected. I was in position and captured it.
We both started screaming with excitement in the water. That photo remains one of my favourites to this day, not just because of the shot itself, but because of the stoke we shared in that moment.
Inside Light was the result of that unexpected moment, where everything came together for a brief moment.
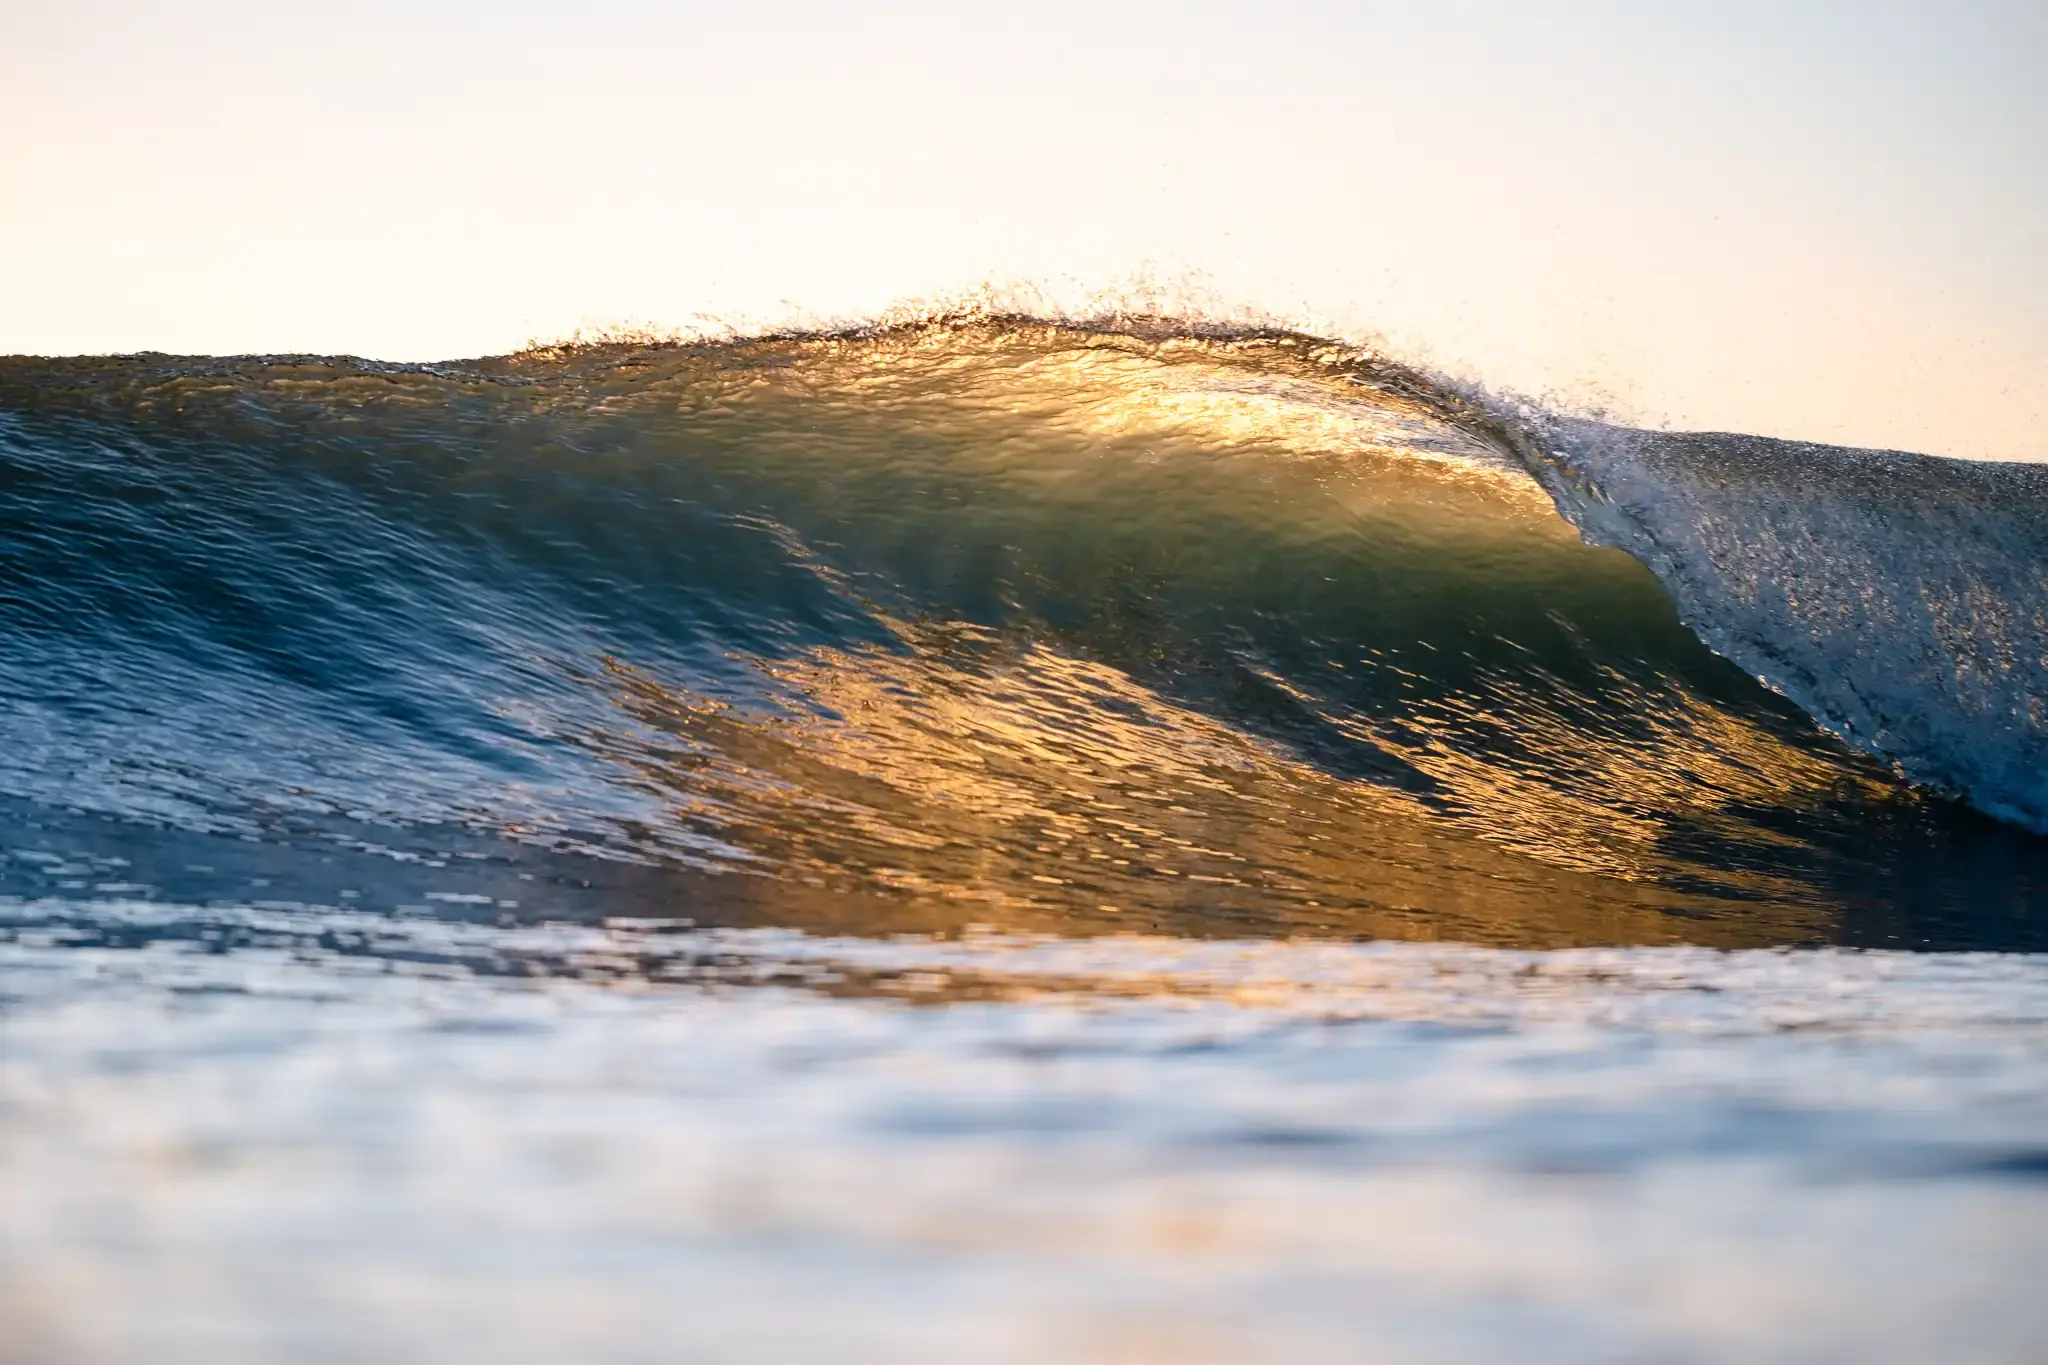
Fujifilm X-T3 | WR XF 80mm | 80mm | 1/1000 sec | f/2.9 | ISO 160
Lesson learned: patience pays off. Even on average days, magic can happen when the ocean decides to deliver.
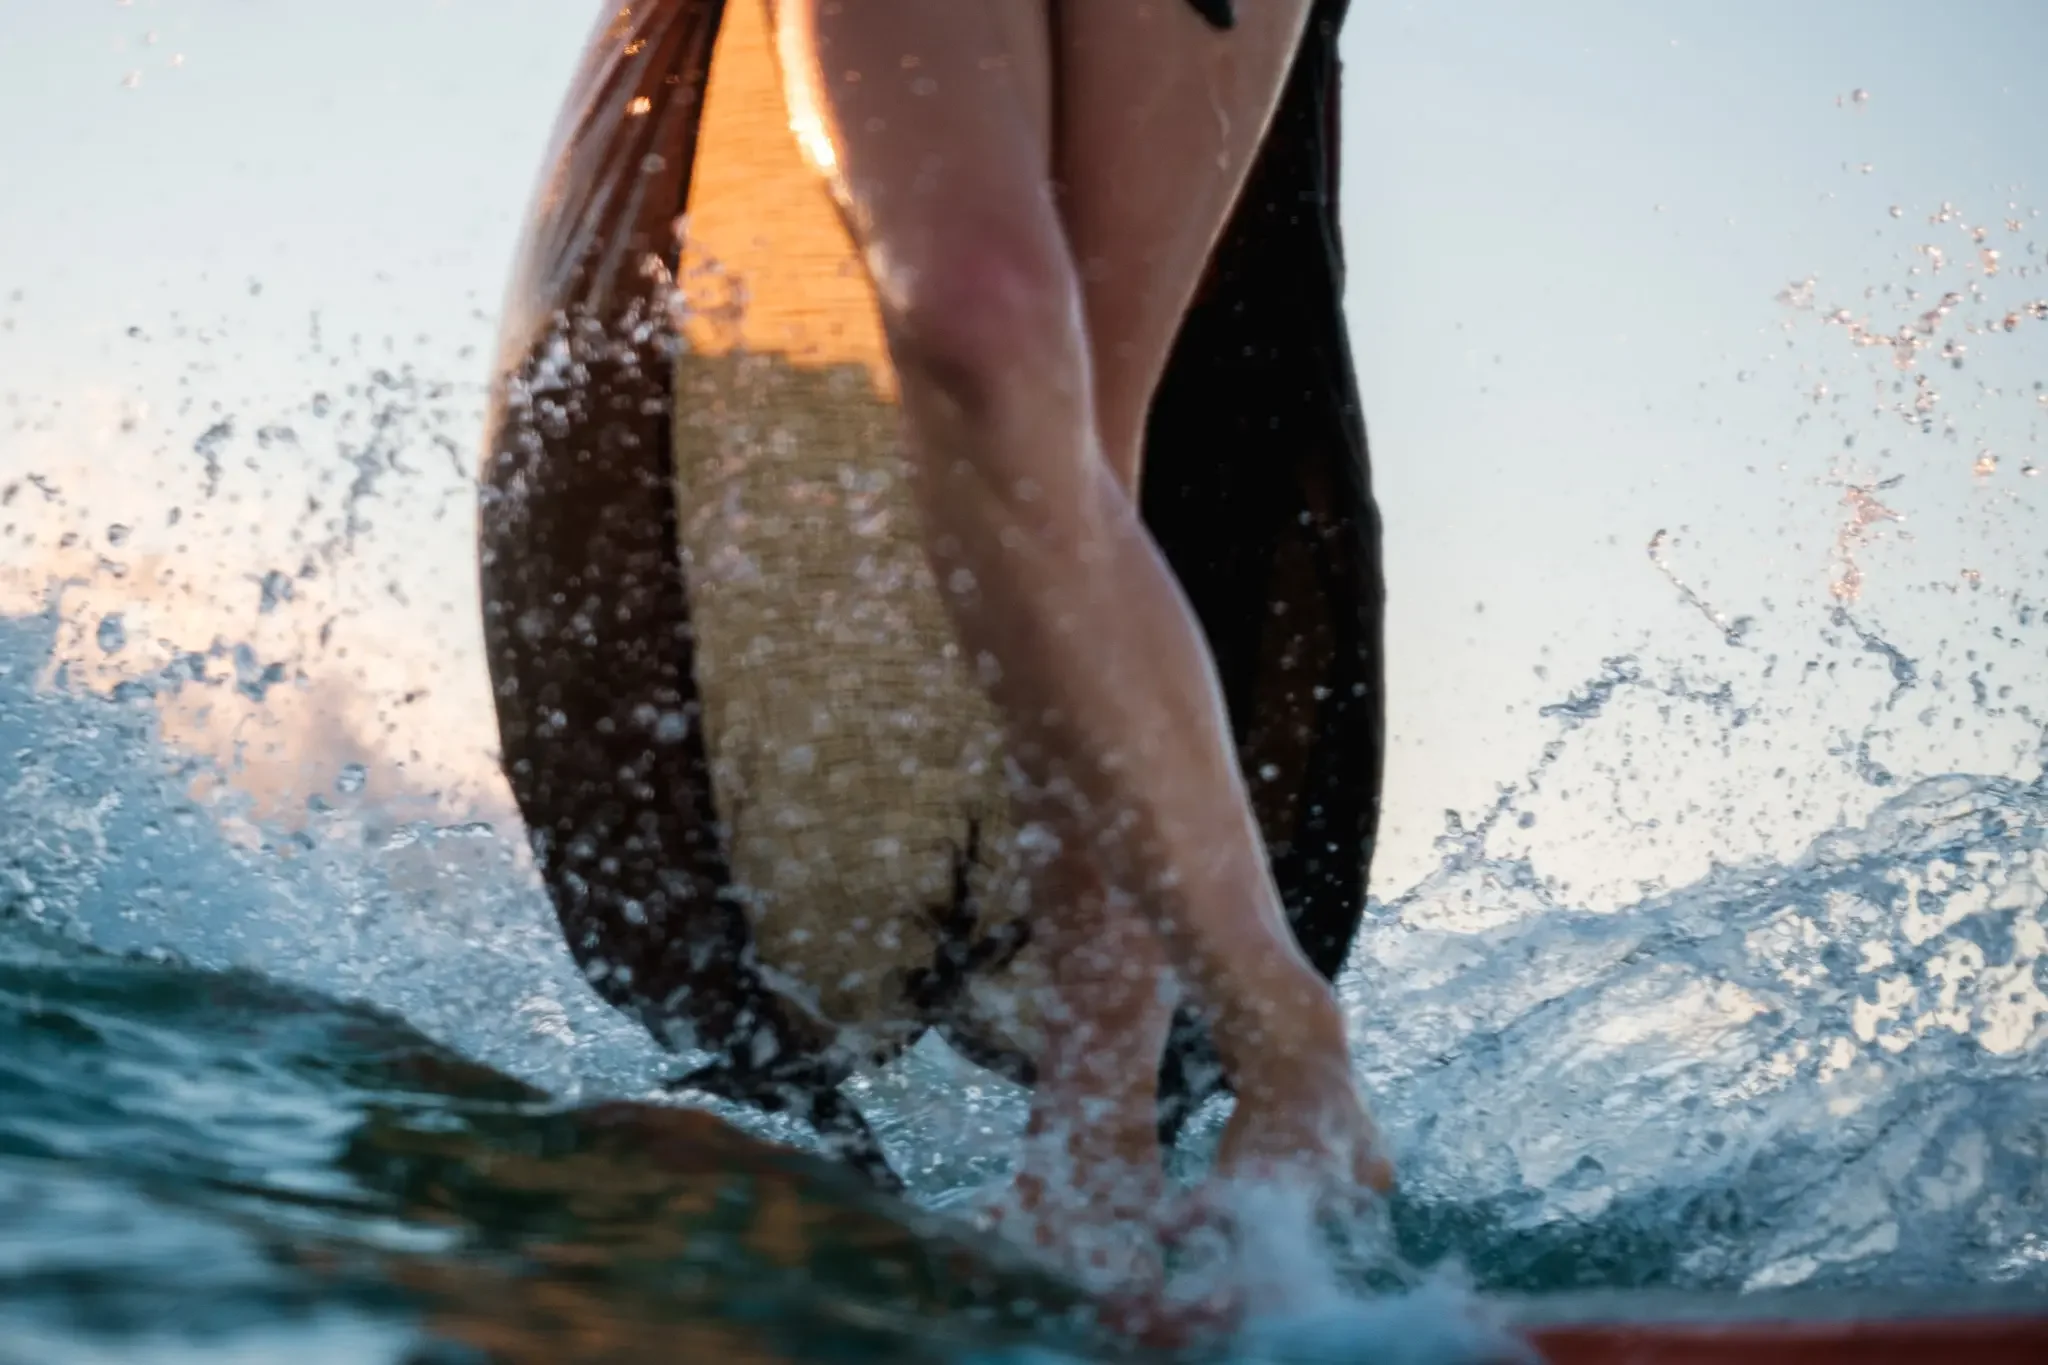
7. Composition tricks: shoot low and look for light
Composition is where surf photography shifts from documenting to creating art. The ocean is full of dynamic lines, reflections, and shifting perspectives, and small changes in angle can completely transform your image.
One of my favourite approaches is shooting just below the surface of the water during the day. I first discovered this while swimming off an island with crystal clear water. I’d dive slightly under, look for shards of light filtering through, and let nature do the rest. Those moments led to photos like Cosmic Underworld, abstract, otherworldly frames that I sometimes flip upside down in post to challenge perceptions of what’s above and what’s below.
Fujifilm X-T3 | WR XF 16-55mm | 24.2mm | 1/1000 sec | f/3.3 | ISO 160
Cosmic Underworld is available as a limited edition fine art print from the Liminal Tides collection.
When I’m photographing surfers, I think about positioning as much as composition. On beach breaks, it’s harder to predict, but at point breaks you can anticipate where a surfer will line up. Sometimes I’ll shoot from the front so they pass across the frame, other times from the side so they’re coming straight toward the lens. It’s all about imagining how you might frame the photo before it happens, then moving into position to make it real.
Pro tip: get low, experiment with underwater perspectives, and do not be afraid to play with orientation in post.
8. Editing tips for ocean photography
If you’re serious about surf photography, shoot in RAW. The ocean is ever-changing, and RAW gives you the detail and tonal range you need to bring that beauty to life in post.
When I open a RAW ocean photo, it often looks dull compared to what I saw in the moment. But with a few thoughtful adjustments, the scene transforms. I bring down highlights to recover spray detail, adjust the white balance to strike the perfect warmth-to-cool ratio, and balance the blues so they feel natural. Texture, clarity, and dehaze can be powerful tools too, but I use them sparingly, just enough to enhance the silky detail in water and light shards.
Sometimes, I’ll even flip an underwater shot upside down to challenge perceptions and create something otherworldly. For me, editing is not about fixing an image, it is about translating the wonder and amazement I felt into colour, depth, and story.
Tip: Don’t oversaturate. Let the ocean’s beauty speak for itself.
9. Use presets and workflows to save time
Editing every image from scratch is exhausting, and it can pull you out of the creative flow. That’s where presets come in. But for me, presets aren’t just about speed or consistency, but about storytelling too.
When I design and use my presets, my goal is to evoke the exact feeling of being immersed in the ocean, the wonder, the awe, the beauty as I see it with my own eyes. I want the depth of the turquoise, the warmth of dawn light, the mood of a fleeting moment to translate straight into the photo.
Presets give me a foundation to bring that mood to life quickly, so I can focus on the artistry instead of endlessly tweaking sliders. They’re also what I lean on when I want consistency across a series from one session or lighting moment.
10. Practice, experiment, and evolve
The best surf photographers aren’t the ones with the fanciest gear, they’re the ones willing to take risks, to experiment, and to evolve with every shoot. Sometimes that means trying a new setting. Other times, it’s about letting go of the plan and reacting to what nature gives you.
One of my favourite examples was a morning I climbed Mauao (Mount Maunganui) in the dark, guided only by the swell charts and a weather forecast that promised a big swell. I had no idea what I would actually see from the top when first light revealed the ocean scene. I set up my tripod with a wide lens, ready to capture the iconic Mount sunrise shot. While I waited for light, I played around with long exposures, planning to go home with that postcard-style photo.
But as soon as dawn broke, I saw the ocean below come alive. Massive sets were moving into Mount Main Beach, raw, wild, and breaking with so much beauty. As the first rays of sunlight hit the white caps, I scrapped my original plan, swapped to my 100–400mm lens, and started capturing the waves instead.
That decision paid off. Those wave shots went on to feature in my calendars, and I’ve sold prints of that very moment. It was a reminder that experimentation isn’t just technical, it’s about being open to the unknown and trusting your instincts when nature surprises you.
Fujifilm X-T3 | WR XF 100-400mm | 196mm | 1/125 sec | f/5.6 | ISO 160
Keep experimenting, stay curious, and don’t be afraid to throw out the iconic shot for the one that makes your heart race.
The TLDR: a note to beginners
The ocean is always changing, and so will your photography. Some days you’ll come home with memory cards full of shots, other days just one frame that makes it all worth it. You’ll fumble, learn, adapt, and then one day look back and realise just how far you have come.
What matters most is that you keep showing up, with patience, curiosity, and respect for the sea. Every session teaches you something new. Every wave is an opportunity to create art. And every time you step into the water, you’ll probably feel that mix of excitement and intimidation that makes surf photography so addictive.
So start small, stay safe, and let your work evolve. Trust me: those fleeting moments of magic are worth every early wake-up, every swim through whitewash, and every frame that didn’t quite work.
If you want to learn more, check out the 14 most common questions I’m asked.
Until then, stay patient, stay curious, and most importantly, stay safe in the water.
L x
FAQs: Surf and Water Photography for Beginners
Where can I start surf photography as a beginner?
Start on the beach with a zoom lens to practice composition and camera settings before swimming out. When you feel comfortable, move into shallow water with a safe setup.
What gear do I need for surf photography?
At minimum: a waterproof housing, fins, and a camera with good burst speed. Beginners often start with GoPros or AxisGo phone housings, then upgrade to Seafrogs or Aquatech.
What is the best lens for surf photography beginners?
Wide angle lenses create dramatic close-up shots, but longer lenses (80–90mm) are easier for beginners and safer when photographing surfers.
When is the best time to take surf photos?
Golden hour (just after sunrise and before sunset) offers the most flattering light and magical tones for surf photography.
Is surf photography dangerous?
It can be. Always put safety first, know your limits, wear fins, and never shoot alone in heavy surf.
Can I edit surf photos on my phone?
Yes. Apps like Lightroom Mobile paired with ocean-inspired presets can help you achieve professional results on the go.