How to set up your camera for in-water surf photography
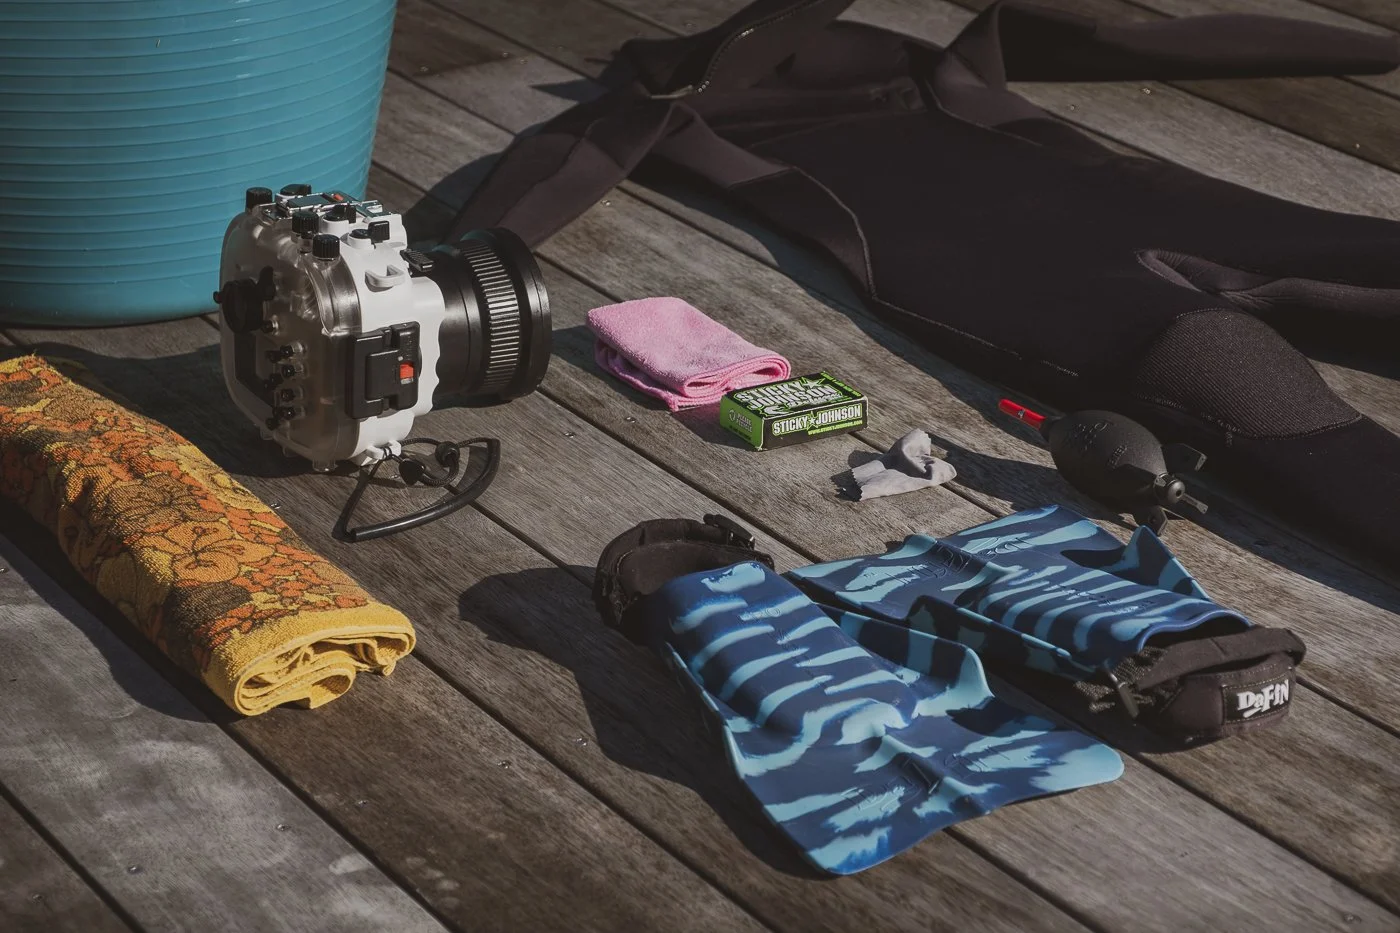
My basic in-water surf photography setup before heading into the ocean.
Taking your camera into the ocean for the first time can feel equal parts exciting and slightly terrifying.
Salt water, sand, moving waves, expensive gear, swimming with flippers on… there’s suddenly a lot more to think about than just taking photos.
Over time, setting up my camera for in-water surf photography has become less of a workflow and more of a ritual before I paddle out. I like knowing everything is prepared before I even touch the sand, from checking my housing seals to choosing settings I can trust once I’m in the water.
If you’re still figuring out what equipment you actually need before getting started, you can read my full guide to the best surf photography gear for beginners here.
The ocean moves quickly. And once you’re swimming with a waterproof camera housing in your hand, there’s very little time to adjust settings between waves or fix something you forgot on the beach. That’s why I try to keep my setup as simple and reliable as possible before getting in the water.
A good setup should feel reliable enough that you stop thinking about your camera once you’re out there. Your attention shifts back to the waves and the surfers instead.
This guide is based on the setup process I use before most ocean sessions. If you’re just starting out with surf photography, hopefully it helps you avoid a few beginner mistakes and feel more confident taking your camera into the water for the first time.
Once you’re confidently out there, you’ll probably develop your own ritual too!
Your pre-surf camera ritual before getting in the water
Why setting up your camera properly matters before getting in the water
The first time you take a camera into the ocean feels exciting right up until the moment you start thinking about salt water, sand, waves, and expensive gear all existing in the same place.
What shook me most when I started shooting surf photography was how quickly everything happens once you’re in the water.
There’s no clean bench to change settings. No dry towel. No safe place to open your housing. And usually no extra time between sets.
Small mistakes that feel harmless on land become much bigger once you’re swimming.
A grain of sand near the housing seal. A memory card that’s already full. A shutter speed that’s too slow. A port covered in water droplets. Even just one of those can cause your session to end earlier than expected.
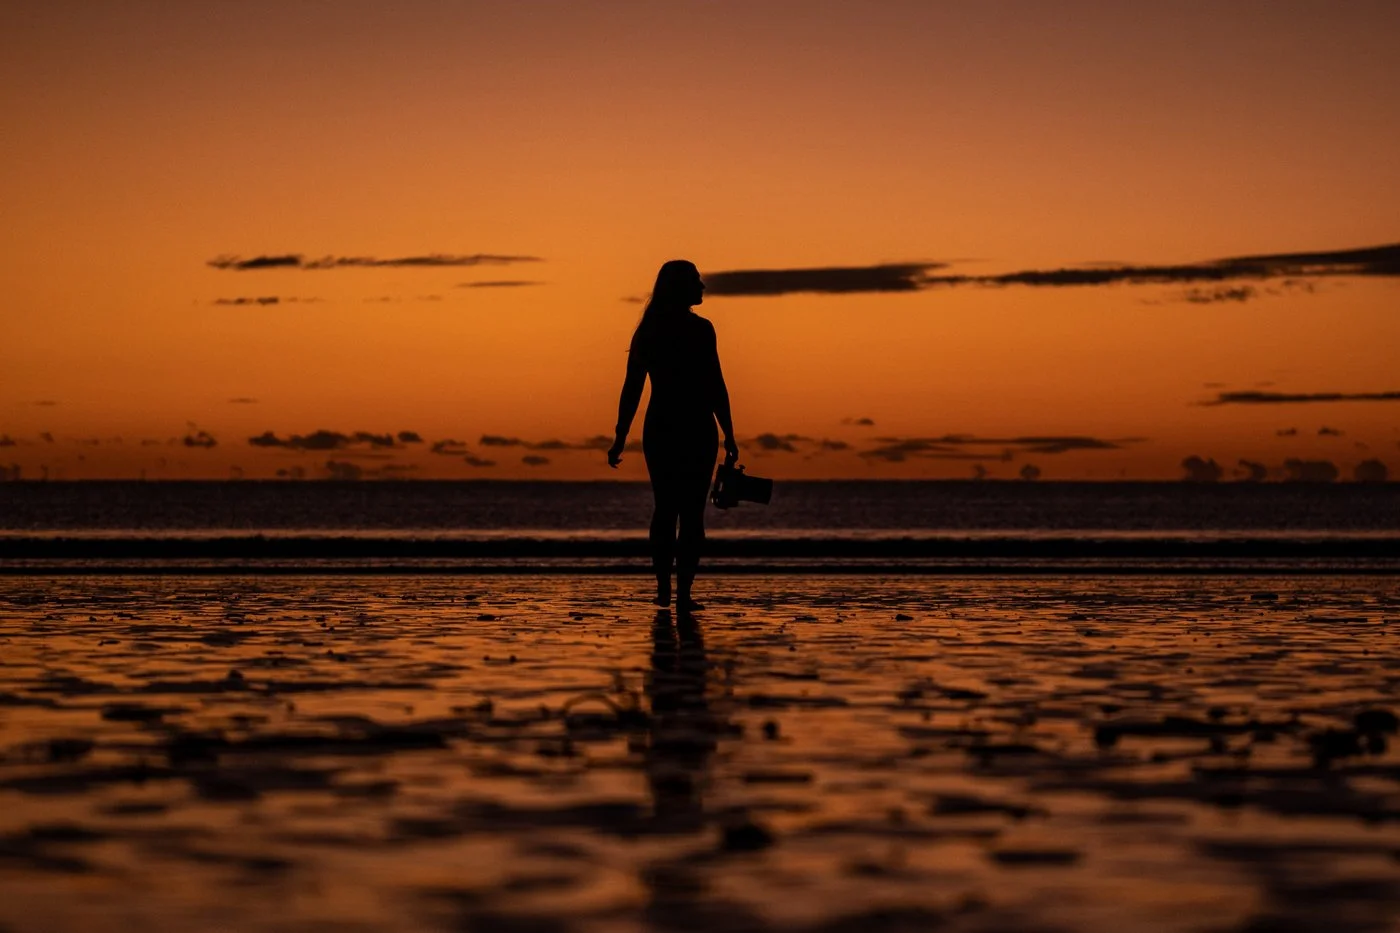
Most of the stress disappears when your camera is already prepared before you even touch the shoreline. That preparation gives you confidence in the water because you’re no longer thinking about your gear every few seconds. You’re watching what the waves are doing instead.
Hot tip: for a dawnie, I always set up my camera the night before so I’m ready to get out there in the morning instead of fumbling around in the dark.
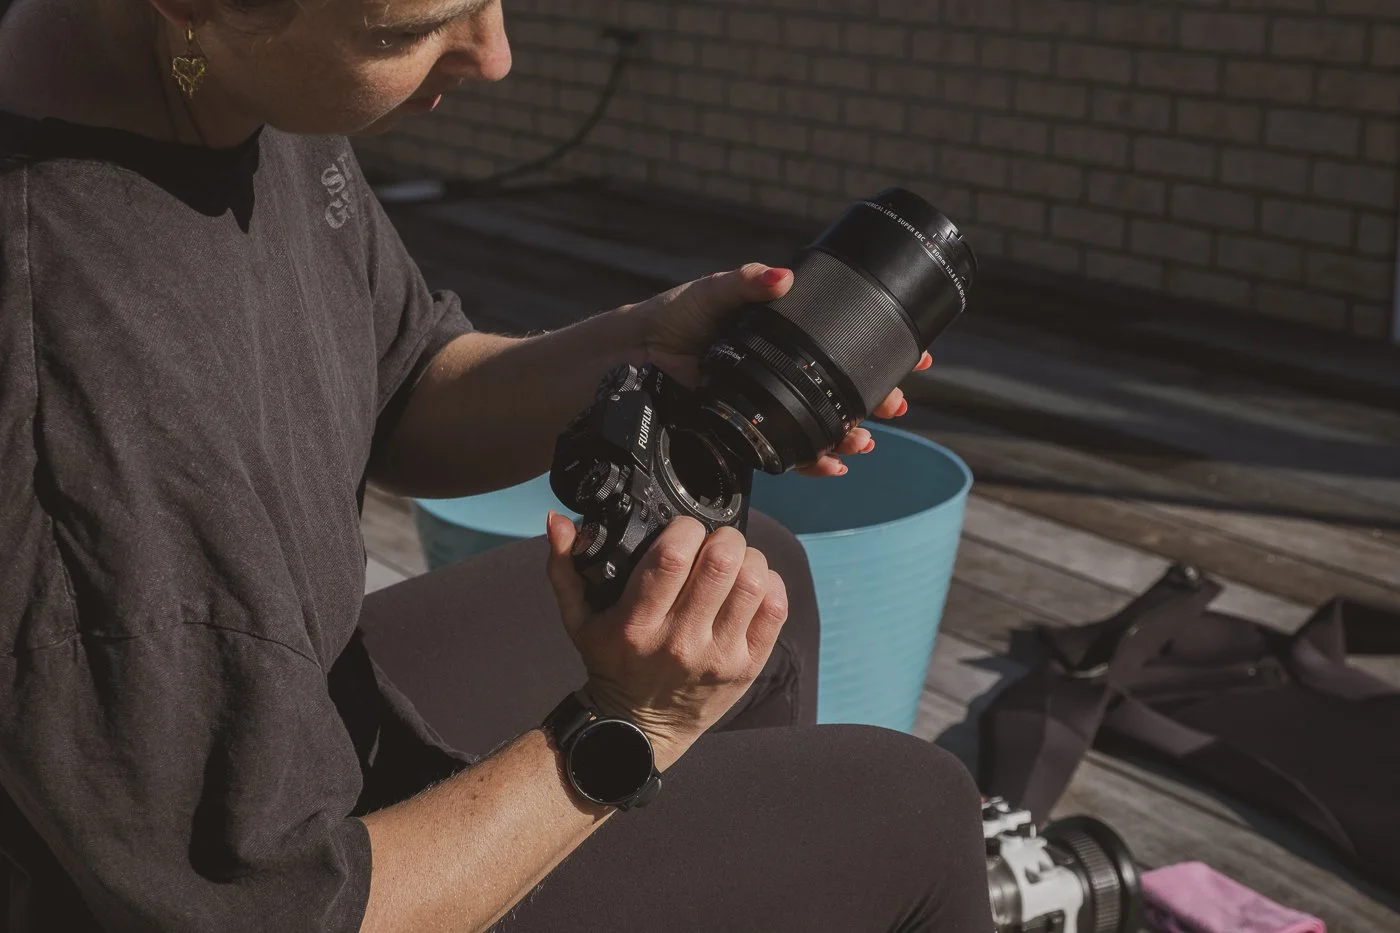
Step 1: Choose your lens before you leave for the beach
Your lens choice shapes everything that follows.
From the shoreline, longer lenses help you stay back and learn how waves are breaking before you start moving closer. They give you time to watch how the sets are rolling in and understand where surfers are positioning themselves.
Once I’m planning to shoot in the water, I’ll aim to use something in the 80mm to 90mm range. Those focal lengths feel natural for working close to the surface without losing the sense of space around the surfer, while giving me a little more positioning options.
I do have a macro version of this lens which can be fun to experiment with, but it can also be frustrating in moving water. It’s one of those tools that works best when you already know what you’re trying to create.
Most of the time, simplicity wins.
I’ve written more about the best lenses for surf photography in this blog here.
Step 2: Set your aperture to auto before entering the water
Before I swim out, I’ll always flick my aperture to auto, therefore shooting on shutter priority.
Light shifts constantly on the surface of the ocean. Waves move between you and the sun. Reflections appear and disappear without warning. Keeping aperture automatic lets the camera respond quickly while I focus on positioning.
It means I’m not adjusting aperture settings between sets. I’m watching what the water is doing instead.
Step 3: Keep shutter speed flexible while in the water
When I’m actually swimming with a housing, I always leave my shutter speed flexible so I can respond to the conditions.
If I want to capture a wave frozen in time, I usually start around 1/1000. It keeps the shape of the wave crisp while still holding detail in the spray.
Once that’s set, the rest of the exposure becomes much easier to manage as conditions change.
If I feel like experimenting, I sometimes slow things down. One of my favourite shutter speeds for panning photography is 1/15. It introduces movement into the frame in a way that can completely change the feeling of the image.
That kind of experimentation usually happens once I’m already comfortable in the water.
Read more about the surf photography camera settings I’d recommend for beginners here. (link to guide to best camera settings - live tomorrow)
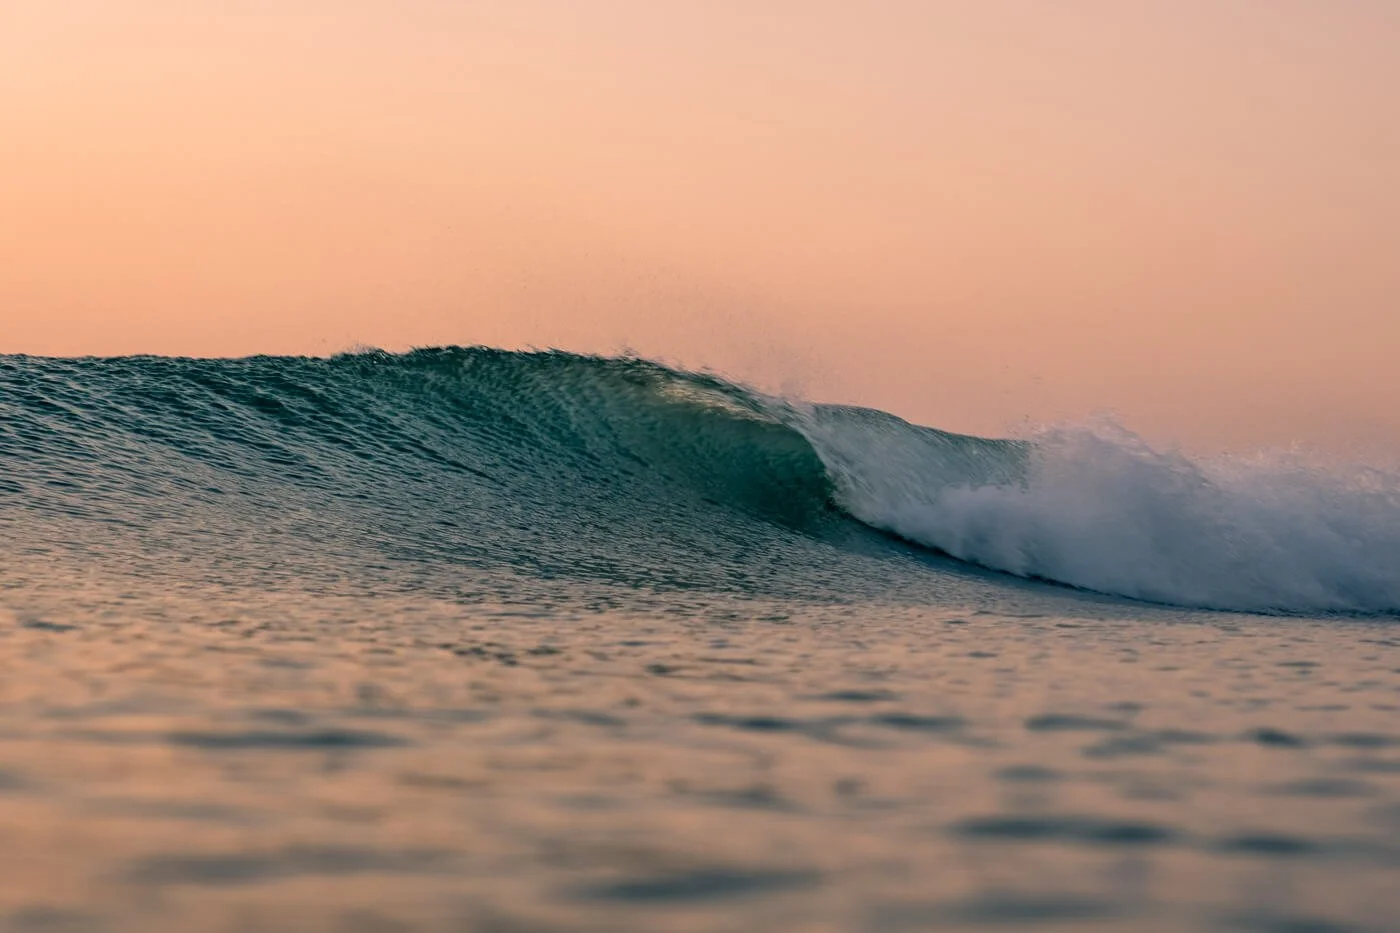

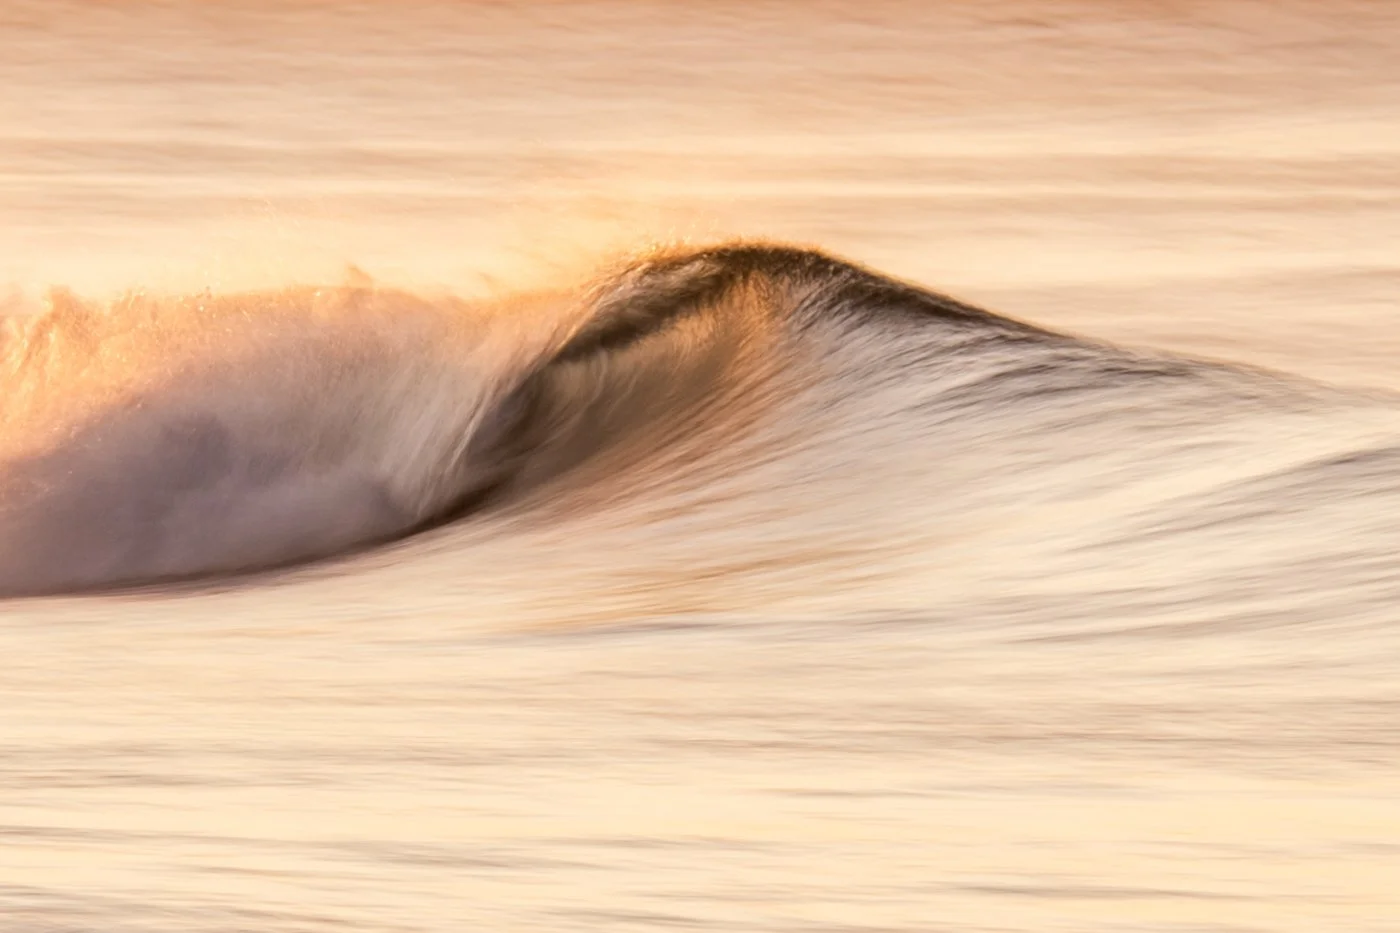
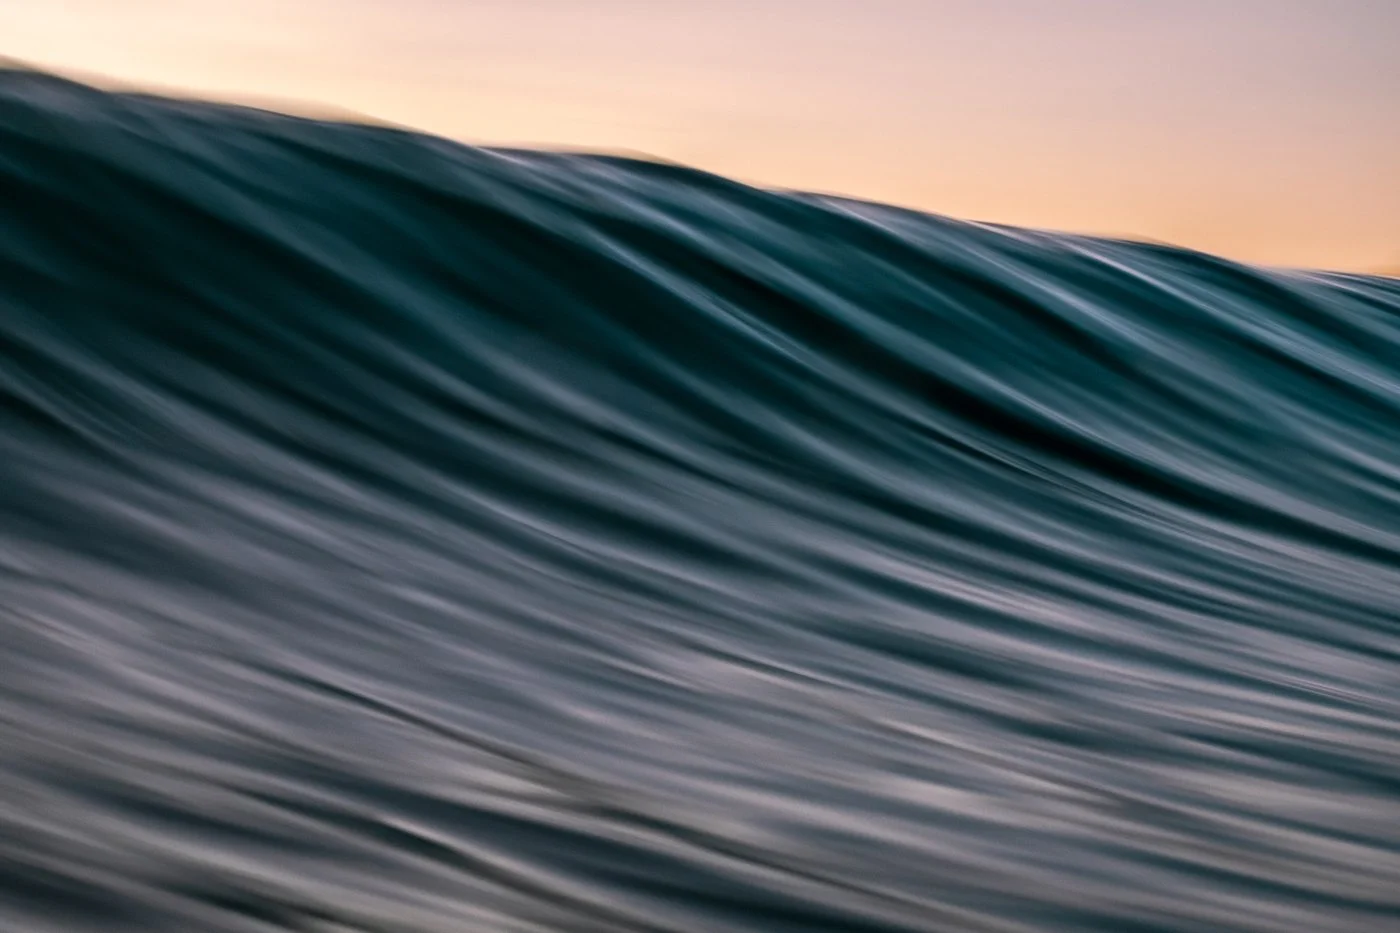
Different shutter speeds change the feeling of water. You have the option of freezing movement or documenting movement (which is so fun!) The top images are taken at 1/1000sec, and bottom two images are 1/15sec
Step 4: Turn on continuous autofocus and burst mode
Surf photography happens quickly.
A wave stands up. A surfer changes direction. Spray catches the light for a split second and disappears again.
Continuous autofocus helps track that movement as it unfolds, and burst mode increases your chances of catching the exact moment everything lines up.
It’s one of the simplest adjustments you can make before entering the water, and one of the most useful.
Hot tip: Make sure you have an empty memory card for every session, since shooting in burst mode will result in filling up your memory card a lot faster.
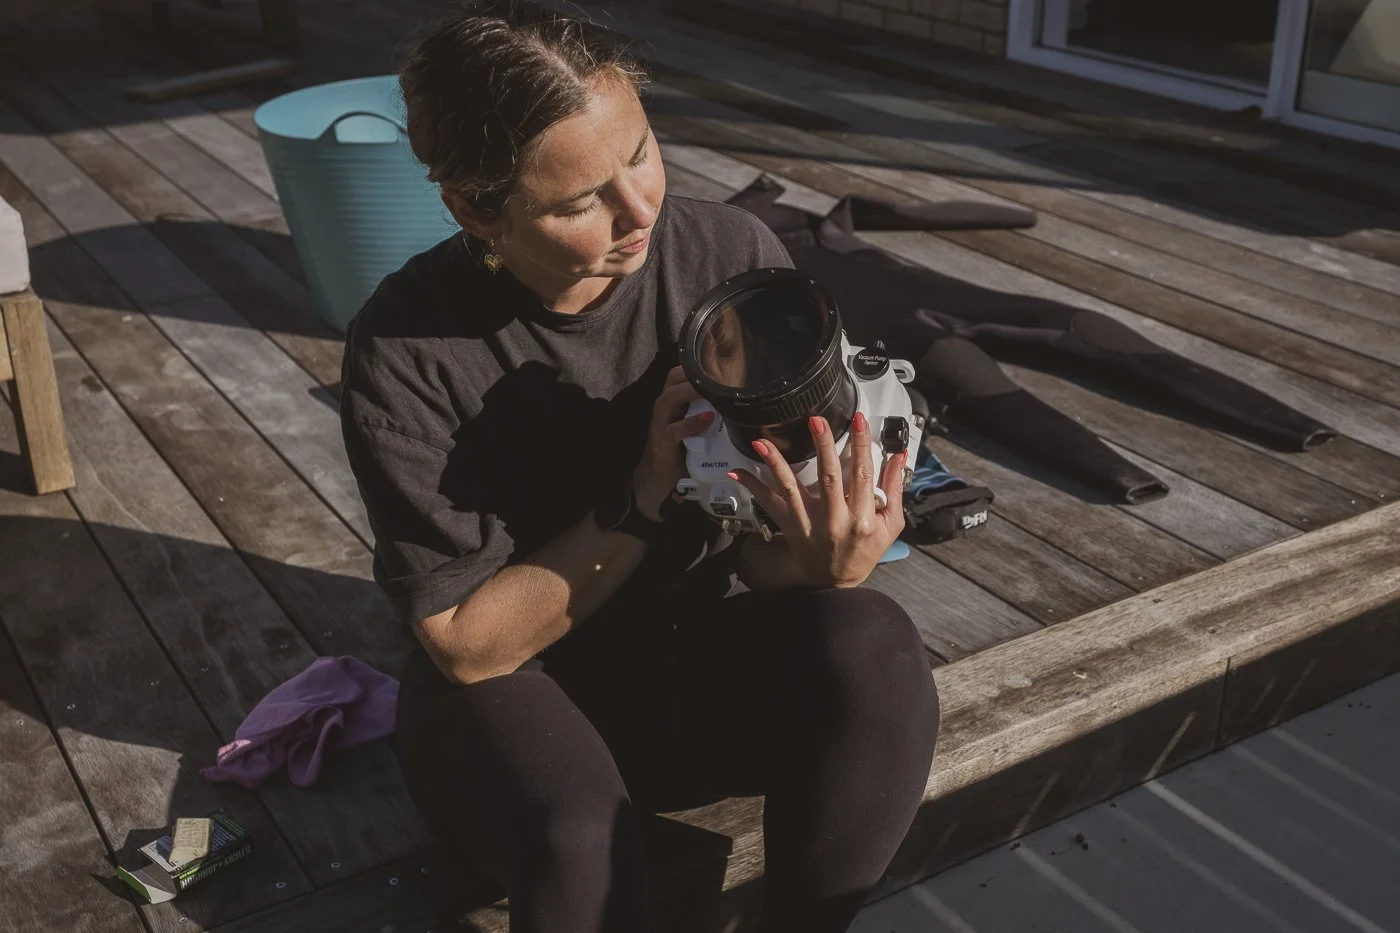
Step 5: Prepare your camera housing before you swim out
Once your camera is inside a waterproof camera housing, small preparation steps make a big difference.
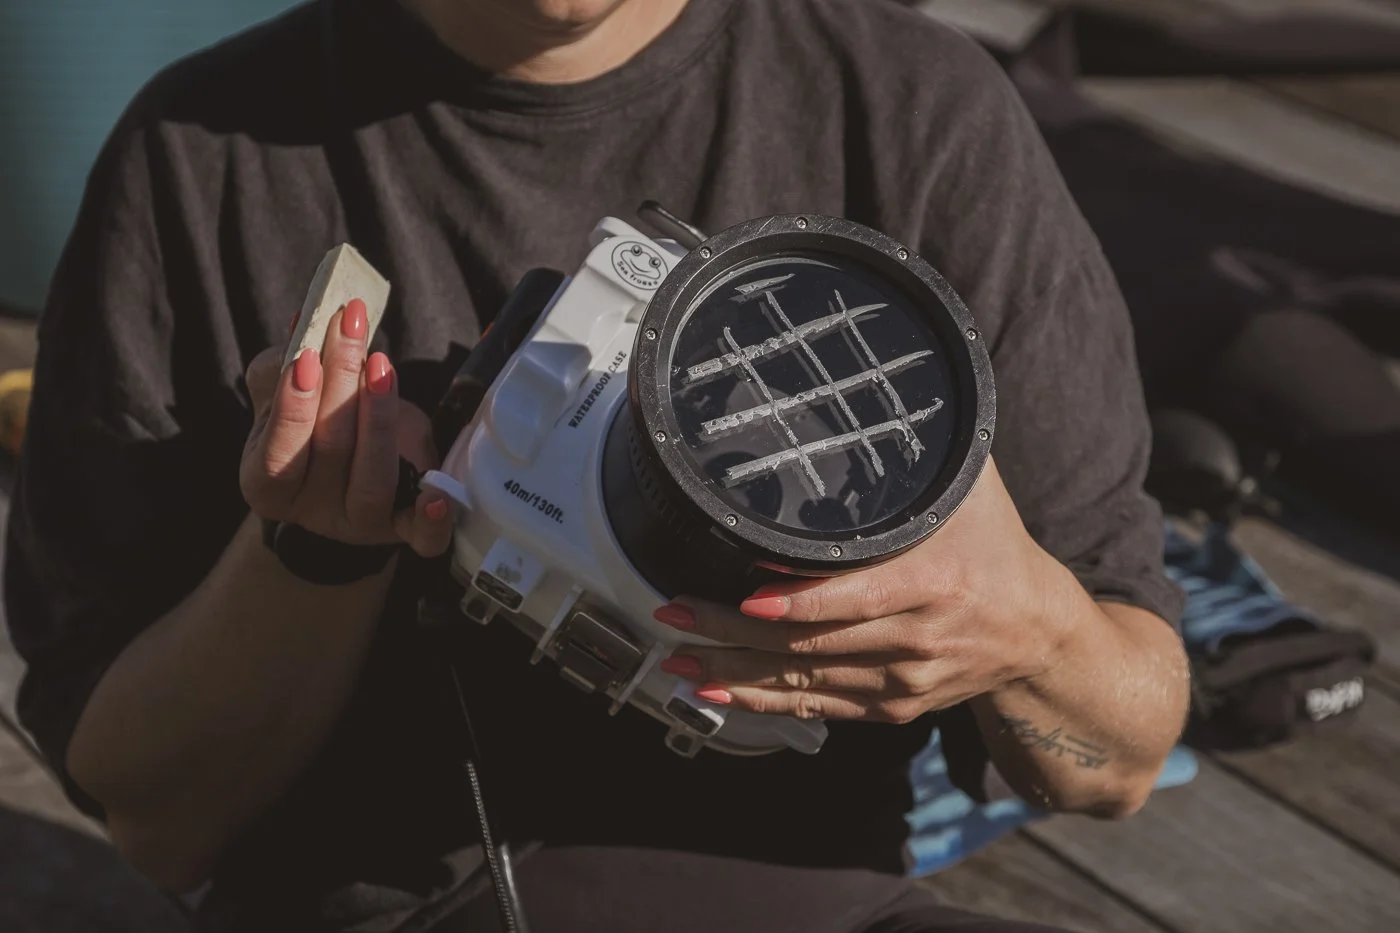
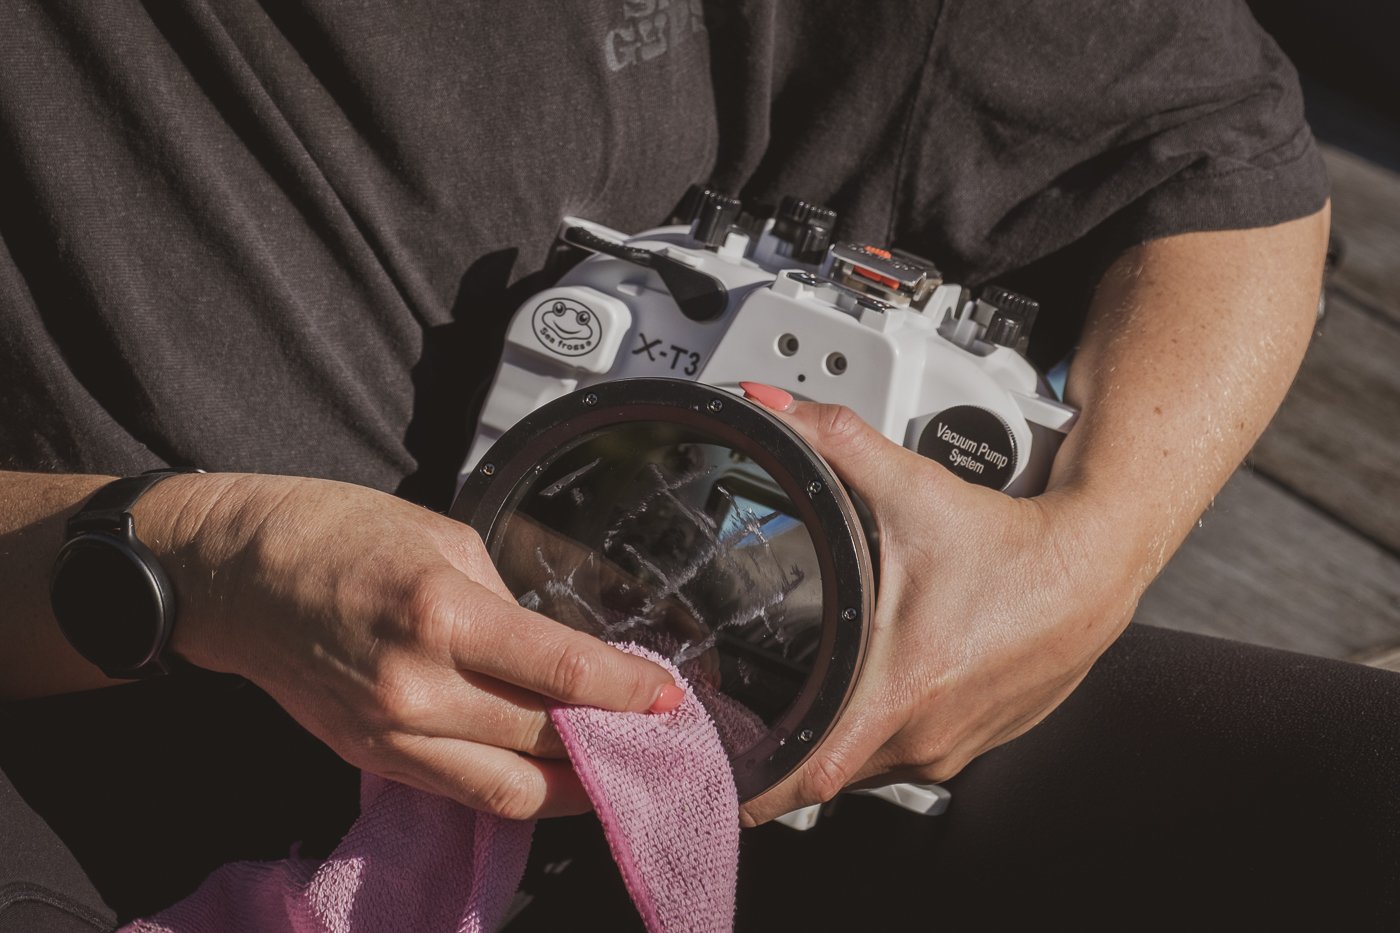
Before entering the surf, I usually prepare the port as well using either the spit and lick technique or a light surf wax cross-hatch polished back with a microfibre cloth. Both help reduce droplets sitting on the surface of the port once you’re in the water.
Clean your sensor, lenses, and housing before sealing everything
Before I even put my camera inside the housing, I’ll always use a rocket blower to clean my sensor, lenses, and housing carefully.
I hold both the camera and lens upside down while blowing upward so any dust or sand falls out rather than deeper into the gear. I’ll clean both the front and back of the lens, then repeat the same process inside the housing and around the lens port before sealing everything up.
This step is so important.
Just one grain of sand or smudge can ruin an entire session once you’re in the water. And because you can’t safely open your housing once you’re out there, it’s worth slowing down and checking everything carefully before you even reach the beach.
Once everything is clean, that’s when I’ll prepare the port using either the spit-and-lick technique or the dry port method (see below).
The “spit and lick” technique for keeping droplets off your port
Apply a thin layer of saliva across the front of the port. It sounds basic, but it helps water sheet across the surface instead of forming droplets.
That makes a noticeable difference when you’re shooting toward the sun or working with reflections.
The dry port technique using surf wax
If I want a cleaner frame for longer sessions, I sometimes use what’s called a dry-port technique.
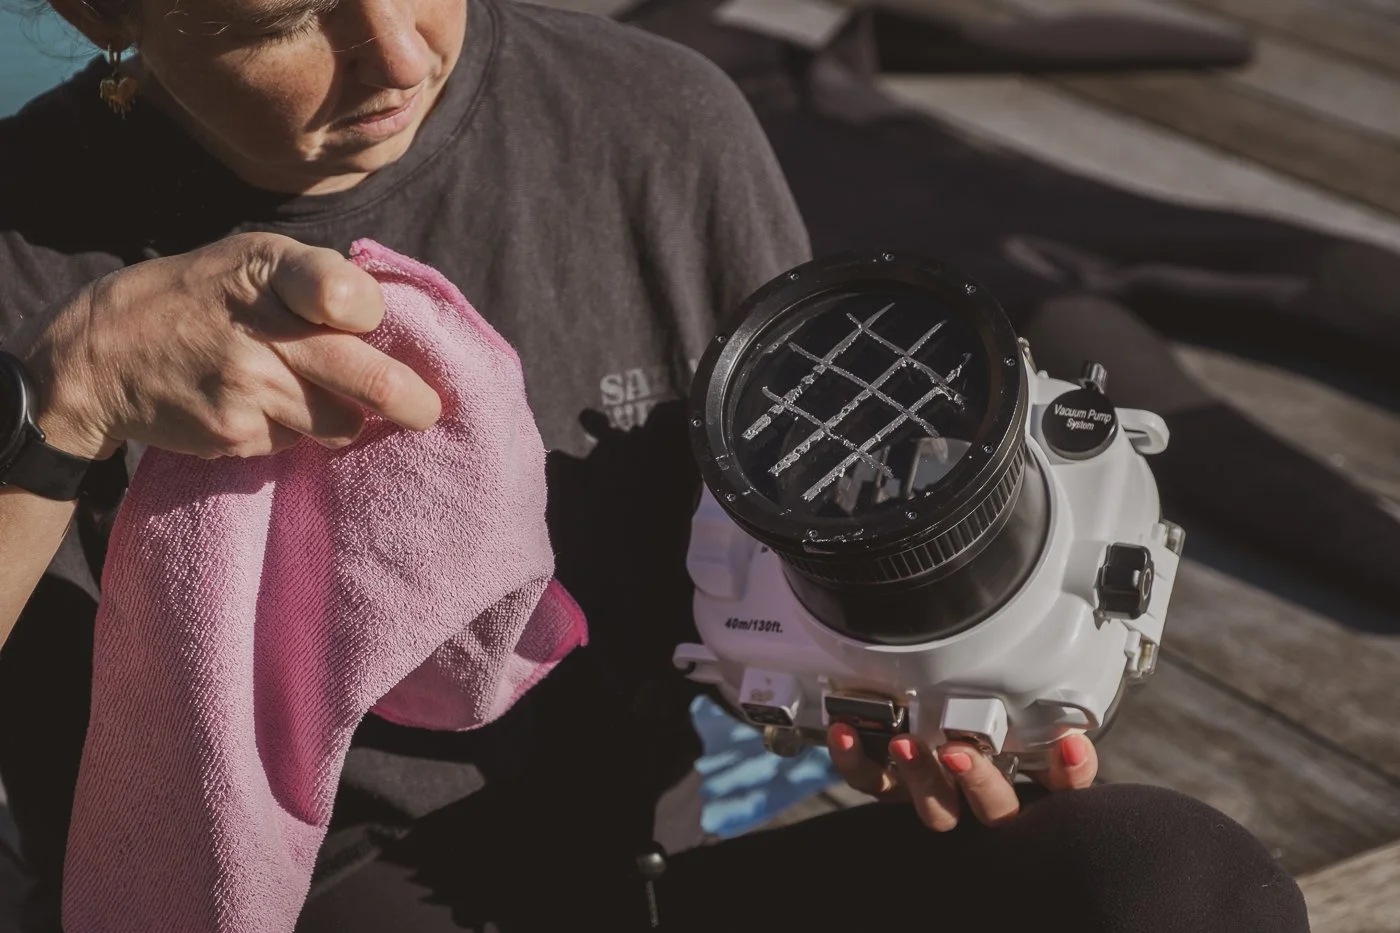
For this I use normal surfboard wax. I rub a very light cross-hatch pattern across the front of the port, then polish it back with a microfibre cloth until you can’t see the wax anymore.
It sounds counterintuitive at first, but what you’re doing is creating a surface that encourages water to slide off instead of forming droplets.
Every time I do this I think of that Karate Kid line. Wax on, wax off.
This works especially well when you’re shooting toward the sun or trying to keep reflections clean between sets.
These small habits make sessions feel much calmer once you’re out there.
Step 6: Keep your setup simple once you’re swimming
When I’m actually swimming, I always attach the leash loosely around my wrist, but I still hold the housing in my hand. It gives me more control when moving through whitewater and keeps the setup close if a wave catches me unexpectedly.
I also keep the housing down by my hip when swimming out. It’s the same principle as surfing. You don’t want anything between your head and an incoming wall of water.
The biggest change that happens when you start shooting in the water is how little time there is to adjust your camera.
That’s why I like to make most decisions before entering the surf.
A shutter speed I trust
I usually try to keep my ISO around 200 or lower in bright conditions
Continuous autofocus
Burst mode
Aperture set to auto
Once those are set, I can focus on reading the waves instead of thinking about settings.
Step 7: Adjust as the ocean changes
No two sessions feel the same.
Sometimes the light sits low behind the surfers and everything turns into silhouettes. Other days the reflections across the surface become more interesting than the action itself. Occasionally I’ll slow my shutter speed right down and experiment with movement instead of freezing it.
I often come back to a simple question when this happens.
What happens if I try something different here?
Those small adjustments are usually where the most interesting images come from.
Common mistakes beginner in-water surf photographers make
Most of the common surf photography mistakes happen before you even enter the water.
A few things I’ve learned to double-check every session:
- Make sure your memory card has enough space
- Charge batteries fully before leaving home
- Check the housing O-ring carefully for sand, hair, or dust
- Never open your housing on a windy beach
- Test every housing button before entering the water
- Attach your leash properly before swimming out
- Keep a microfibre cloth nearby while setting up
- Don’t overcomplicate your settings for your first sessions
Simple setups are usually the most reliable in the ocean.

That’s a wrap: set your camera up before stepping foot (or fin) on the sand
Surf photography starts to feel easier when you have confidence in your setup.
Setting up your camera before you swim out gives you space to respond to what’s happening around you instead of reacting too late.
Choose a lens that suits where you’re working. Set a shutter speed you trust. Keep your setup simple enough that it disappears once you’re in the surf.
From there, the ocean usually shows you what to try next.
Until next time,
L ✌️
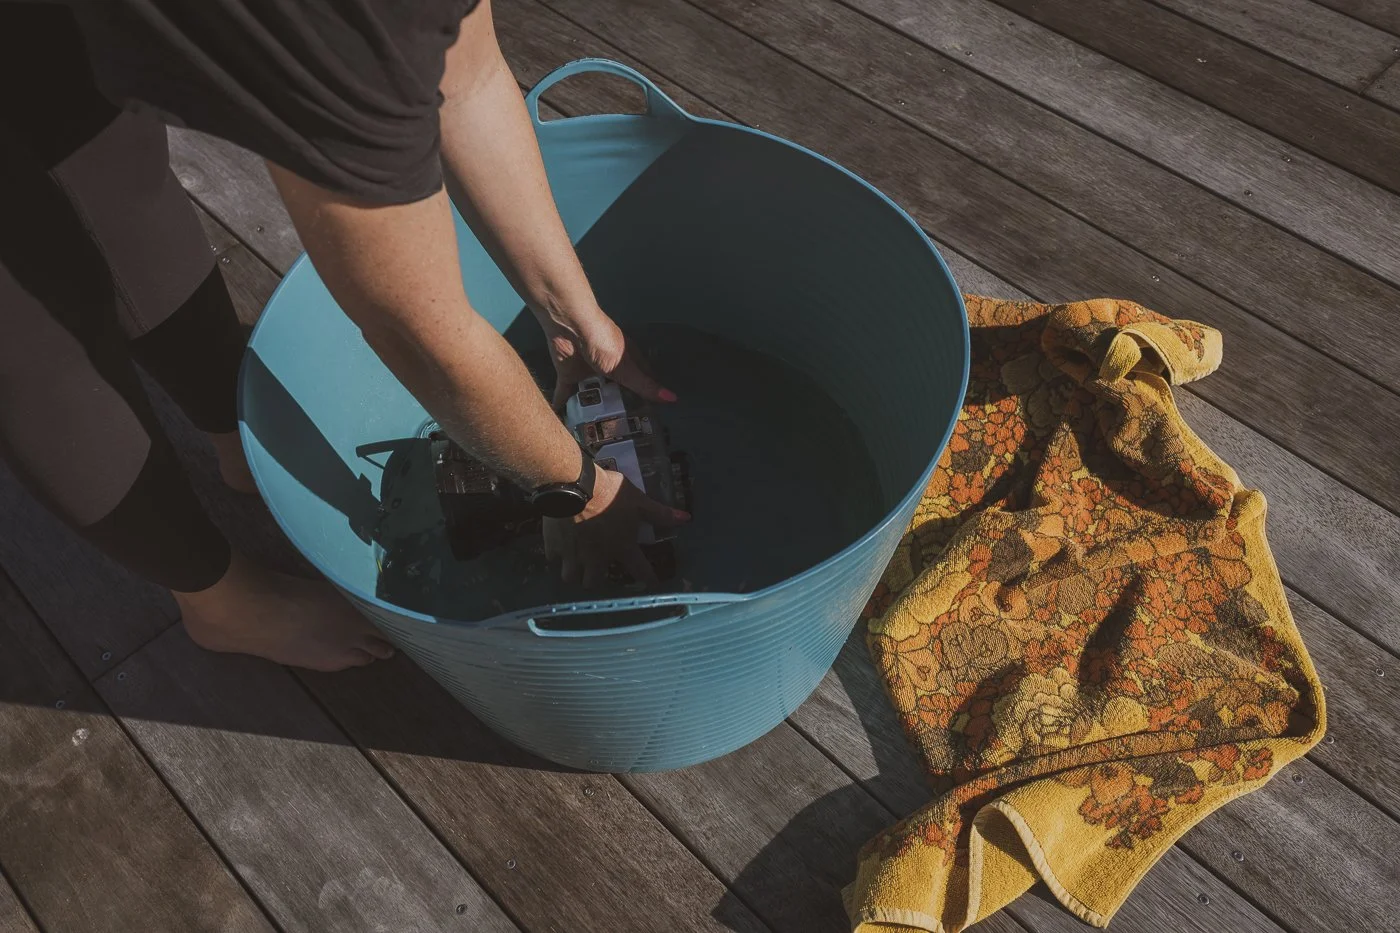
A quick freshwater rinse after every session helps protect your housing from salt build-up.
FAQs About Setting Up Your Camera for Surf Photography
What camera mode is best for surf photography?
Shutter priority works especially well in the water because it lets you control motion while the camera adjusts exposure as light shifts across the surface.
What shutter speed should I start with for surf photography?
Around 1/1000 is a reliable starting point for freezing wave movement and capturing spray clearly.
What is shutter priority mode?
Shutter priority mode lets you choose your shutter speed while the camera automatically adjusts the aperture to balance exposure.
For surf photography, this is especially useful because the ocean changes constantly. Light reflects differently off the water, waves move between you and the sun, and conditions can shift quickly while you’re swimming.
I usually use shutter priority mode for in-water surf photography because it lets me lock in a shutter speed I trust while the camera handles the rest. That means I can focus more on positioning and timing instead of adjusting settings between waves.
Do I need burst mode for surf photography?
Yes. Burst mode increases your chances of capturing the exact moment a wave breaks or a surfer moves through the frame.
Should autofocus be continuous when photographing surfers?
Continuous autofocus helps track moving subjects and works well in changing surf conditions.
Do I need to change settings once I’m in the water?
I prefer to simplify my setup before entering the surf - or even stepping foot on the sand. This way I can focus on positioning instead of adjusting exposure between sets.
How do I stop my surf housing from leaking?
Before sealing your housing, carefully inspect the O-ring for sand, hair, dust, or anything that could break the seal. Even tiny particles can let water in. I also avoid opening housings on windy beaches whenever possible.
Can salt water damage my camera housing?
Yes. Salt water and sand are hard on gear over time, which is why rinsing your housing with fresh water after every session is important.
What ISO should I use for surf photography?
Auto ISO works well for in-water surf photography because light changes constantly once you’re swimming in the ocean.
Should I use auto or manual focus for surf photography?
Continuous autofocus is usually the easiest and most reliable option for beginners because surfers and waves move quickly.
What lens is best for in-water surf photography?
Lenses definitely become a personal preference but I’d recommend the best lenses for in-water surf photography around 35mm to 90mm depending on how close they are to the surfer and how much of the wave they want to include.
How do I stop water droplets on my housing port?
Either the spit-and-lick method (as I call it!) or a light surf wax technique called the ‘dry port technique’ to help water slide off the port more evenly.